Update, Update

I just got around to updating Capture 1 and DaVinci. C1 mainly to use the G9II in RAW and DV because, well why not?

I have this odd dynamic at the moment. I updated one laptop to Sonoma and now it refuses to play nice with Dropbox (keeps loosing internet with three bars showing). My other is still to be updated to Sonoma, but has the new C1 and DaVinci. Until I am sure they are settled, I will not update laptop 2 with these, nor laptop 1 to Sonoma.

DaVinci has not been used yet, but I have been trying out C1 and it is interesting.

First up, it is a bit twitchy, but that will settle.

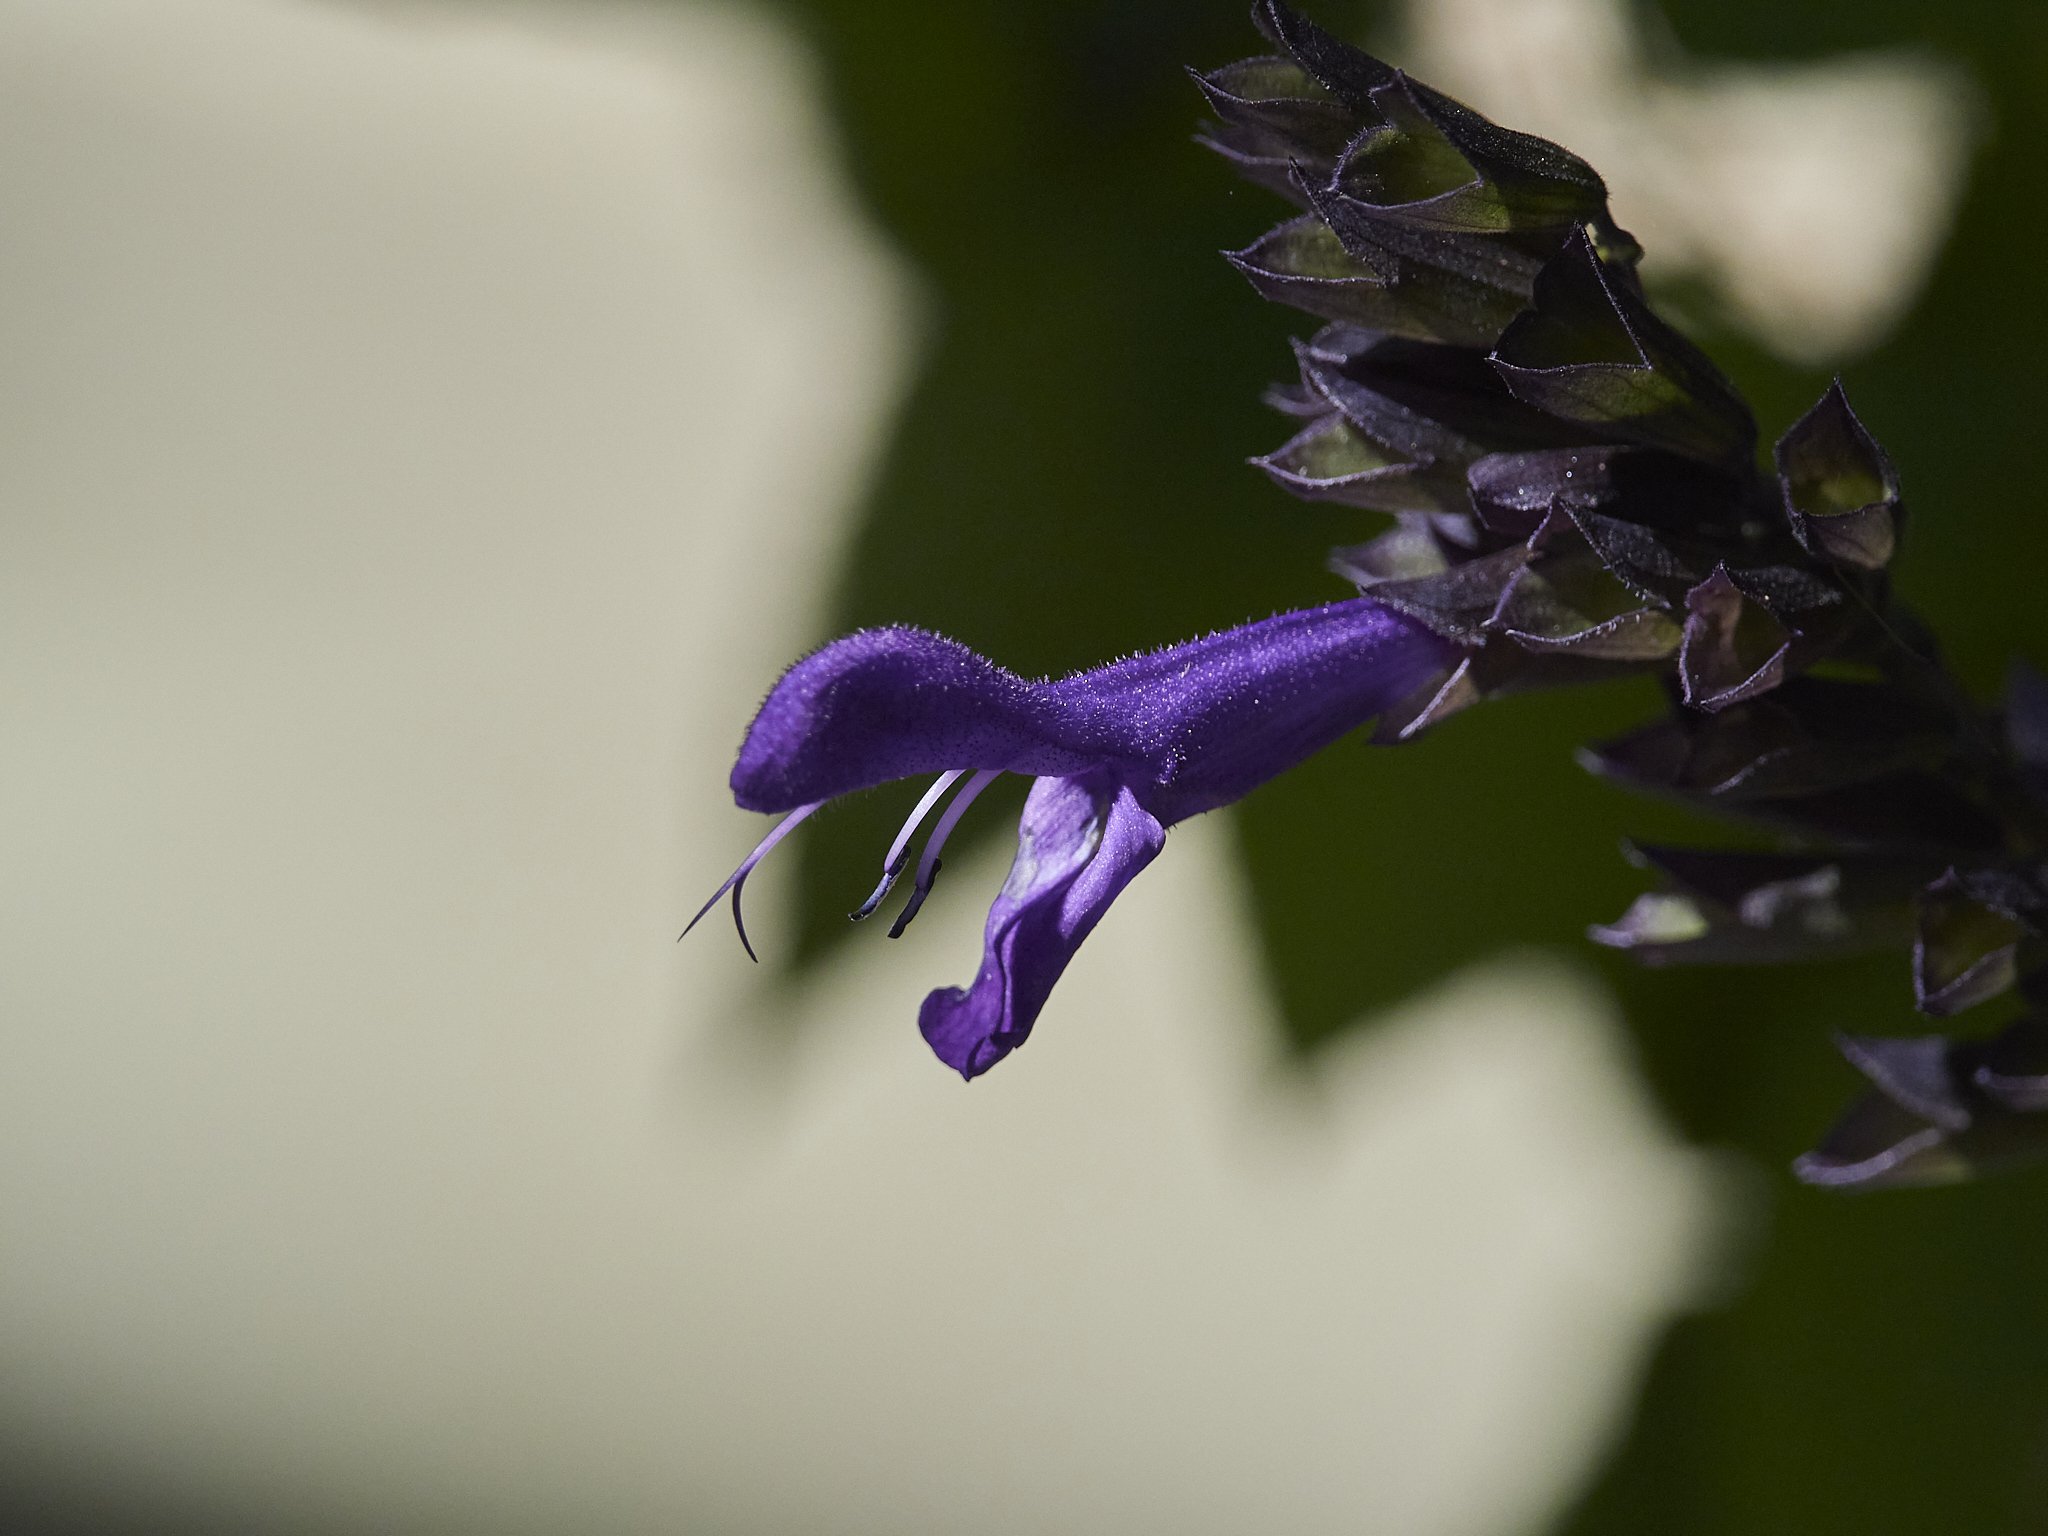
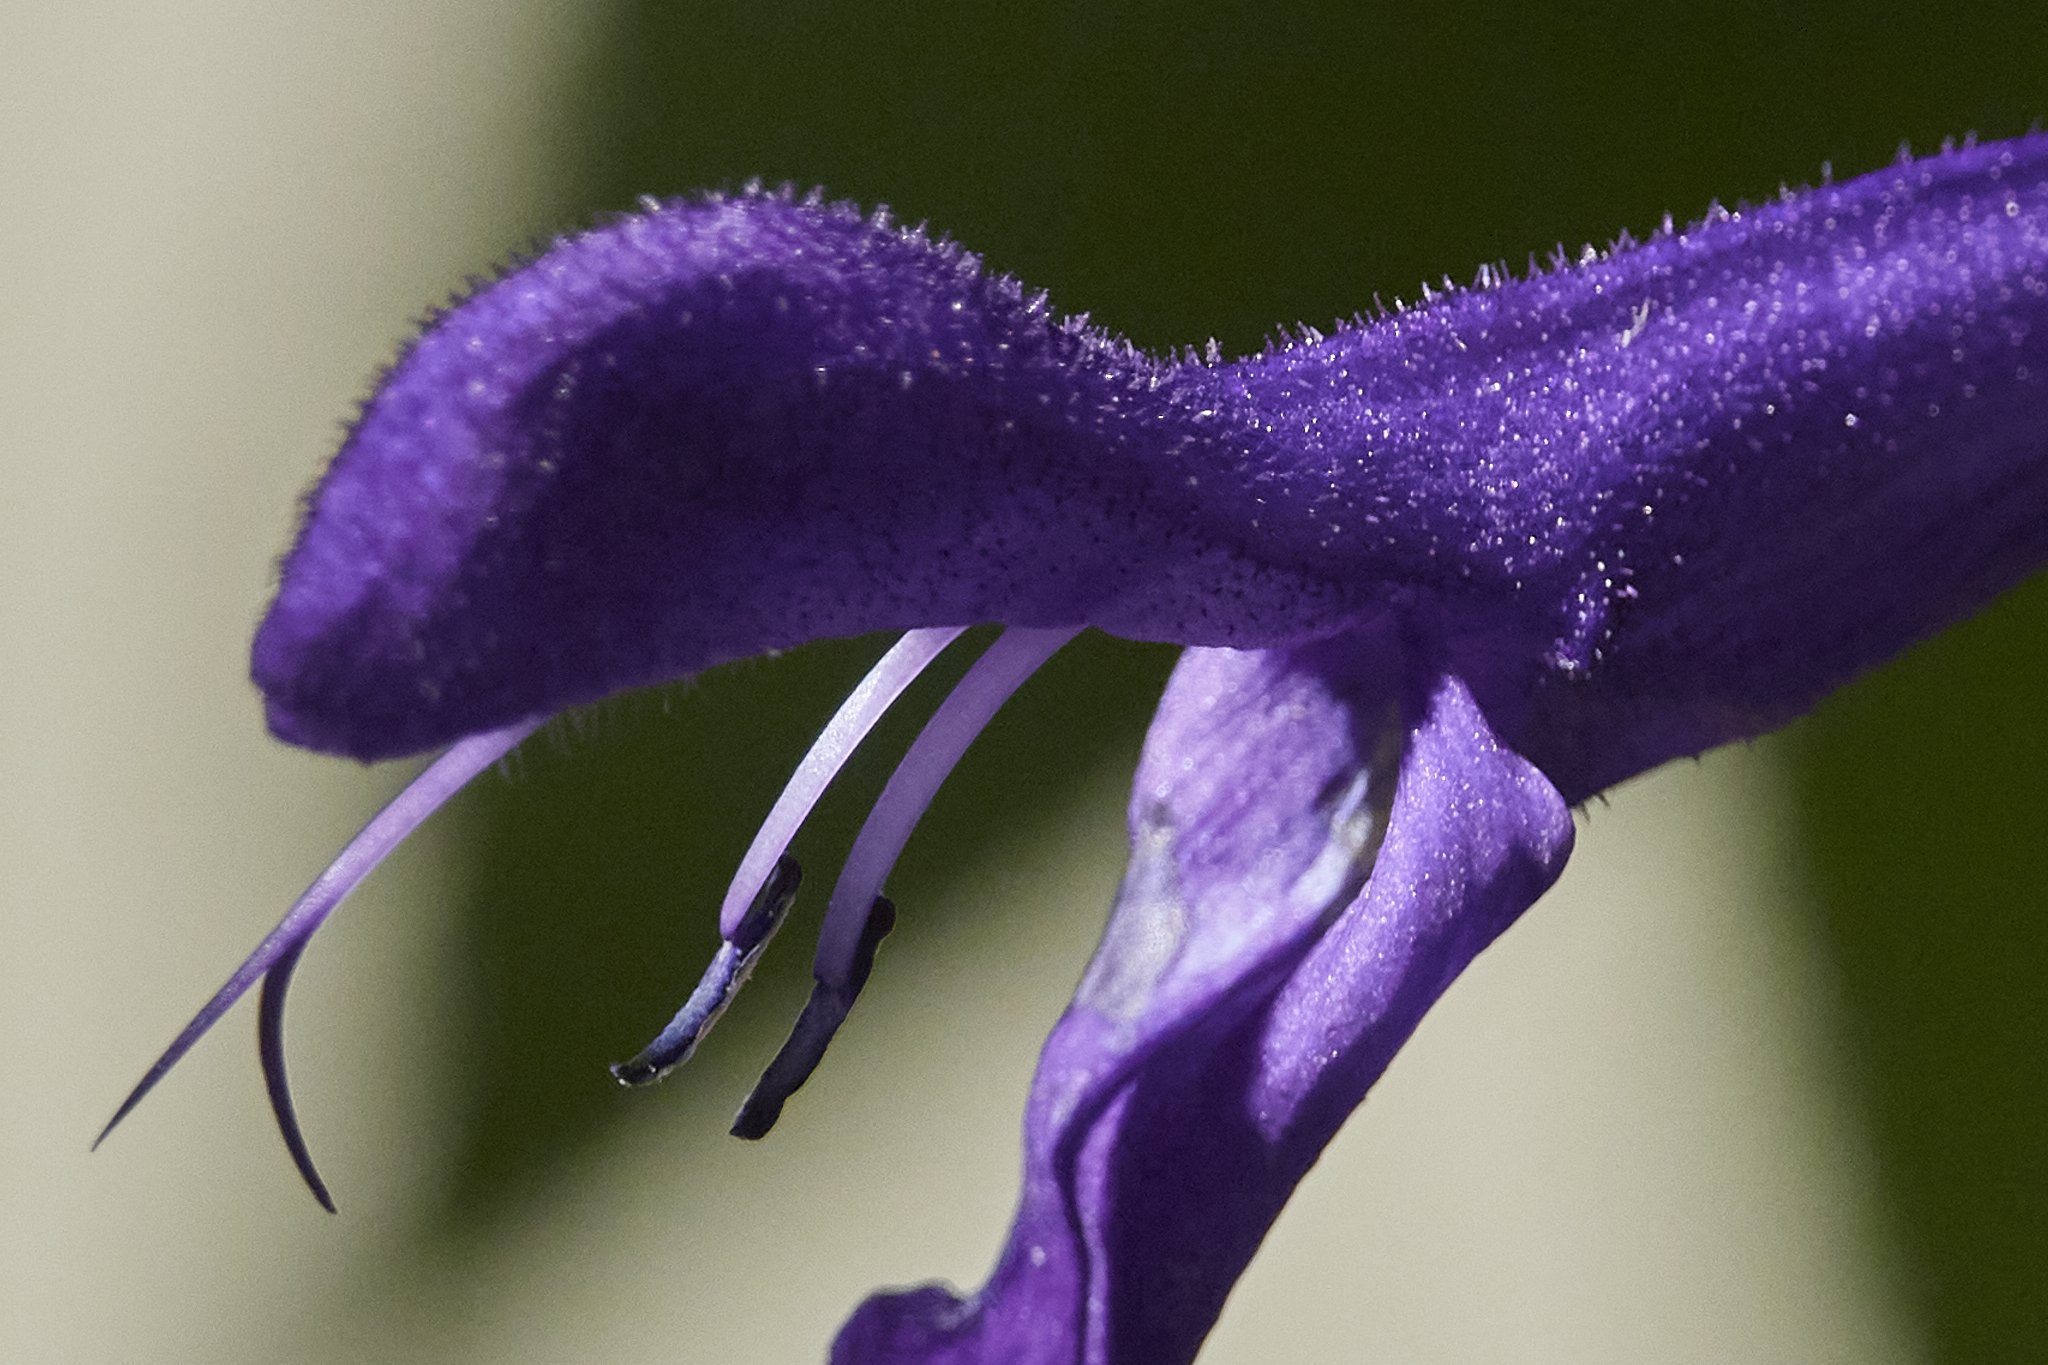
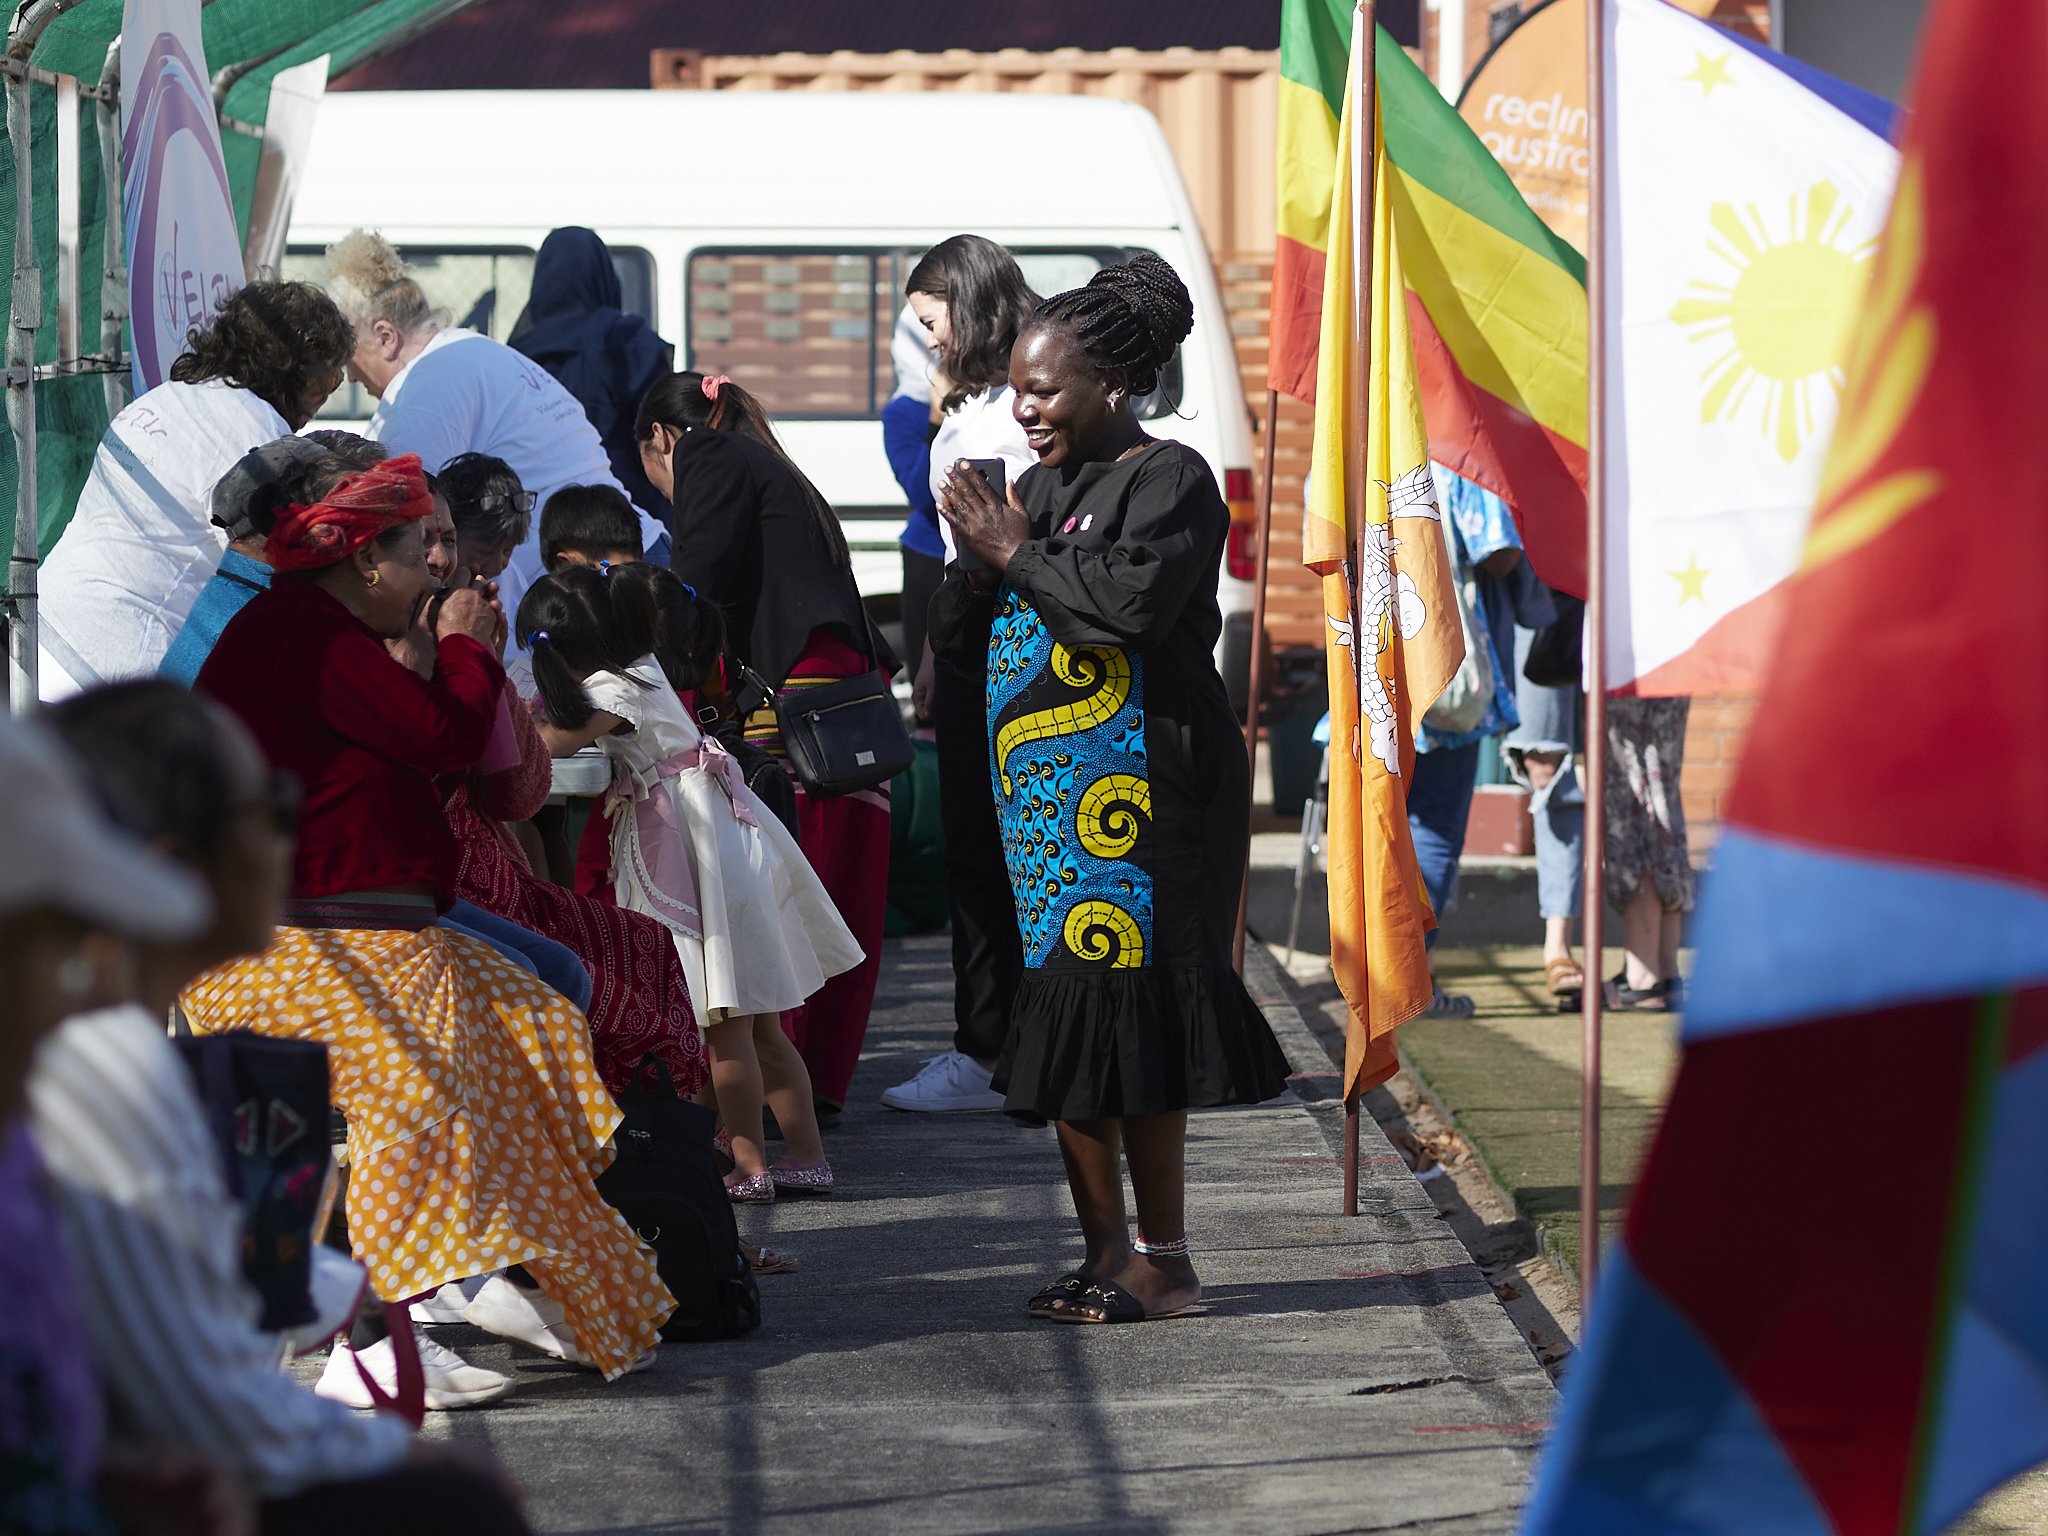
Overall I feel the sliders are more even now, by which I mean, the De-haze slider which I loved compared to the Contrast slider, which I treated with some reservation, now seem to be more balanced and most are seemingly more linear.

The colour shifts I regularly noticed when pushing some (with Oly and Pana processing), seem to be reduced.

Good days ahead.

The main culprit was the De-haze slider that tended to enhance colour as well as other elements, often into blue or magenta, which seems to now be more neutral.

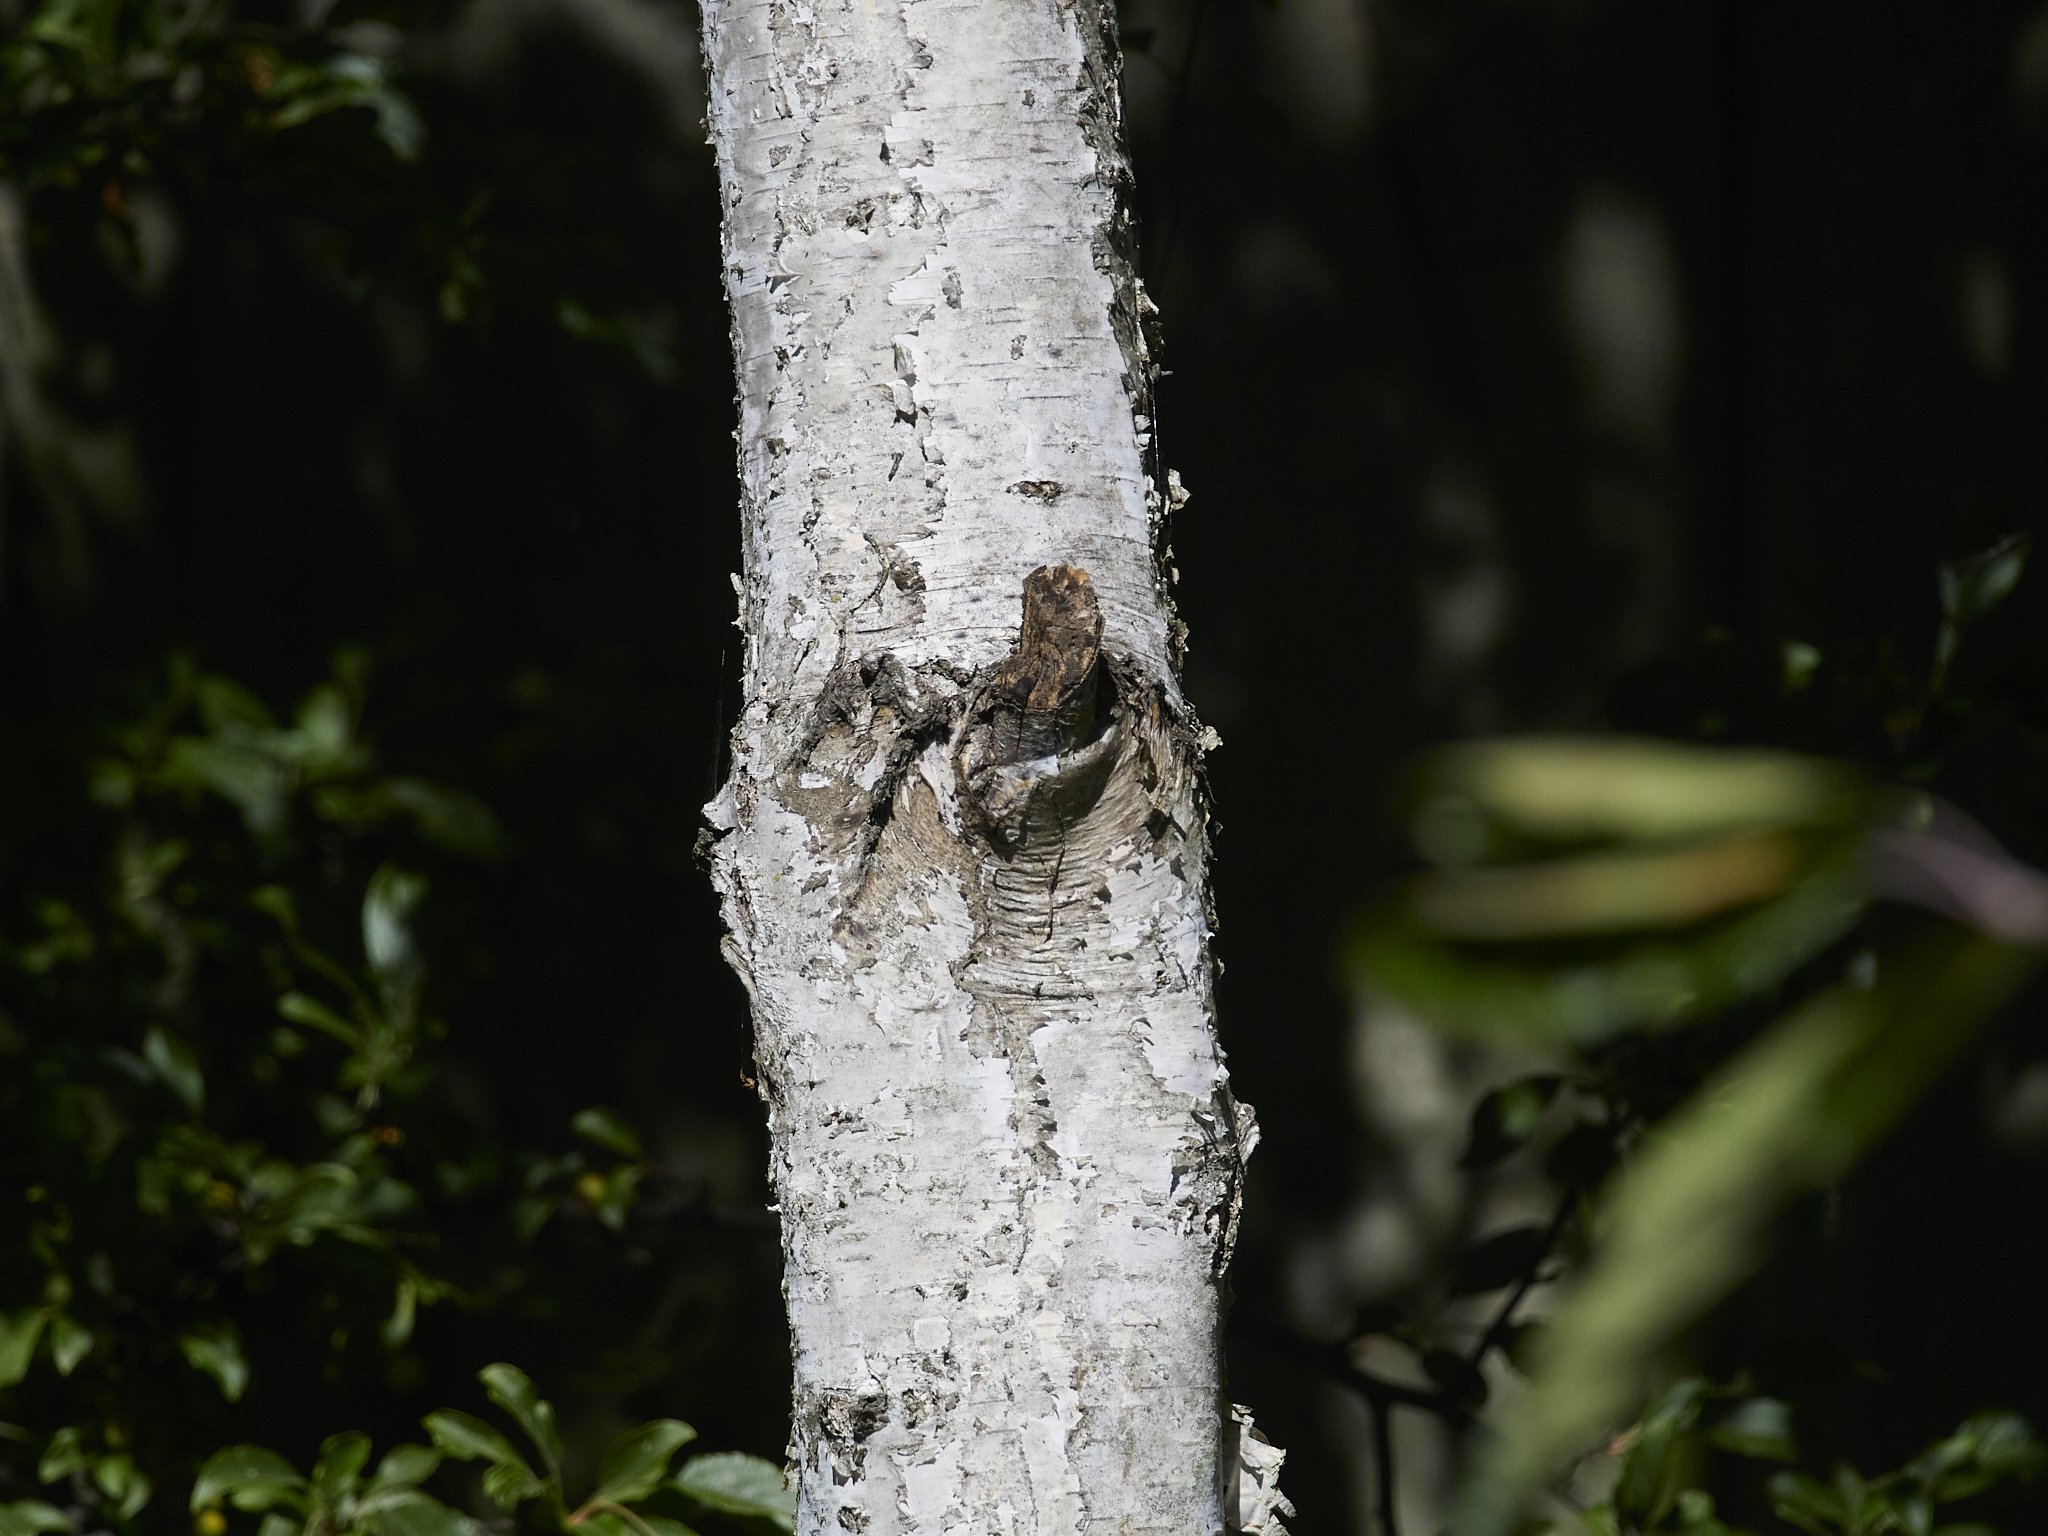
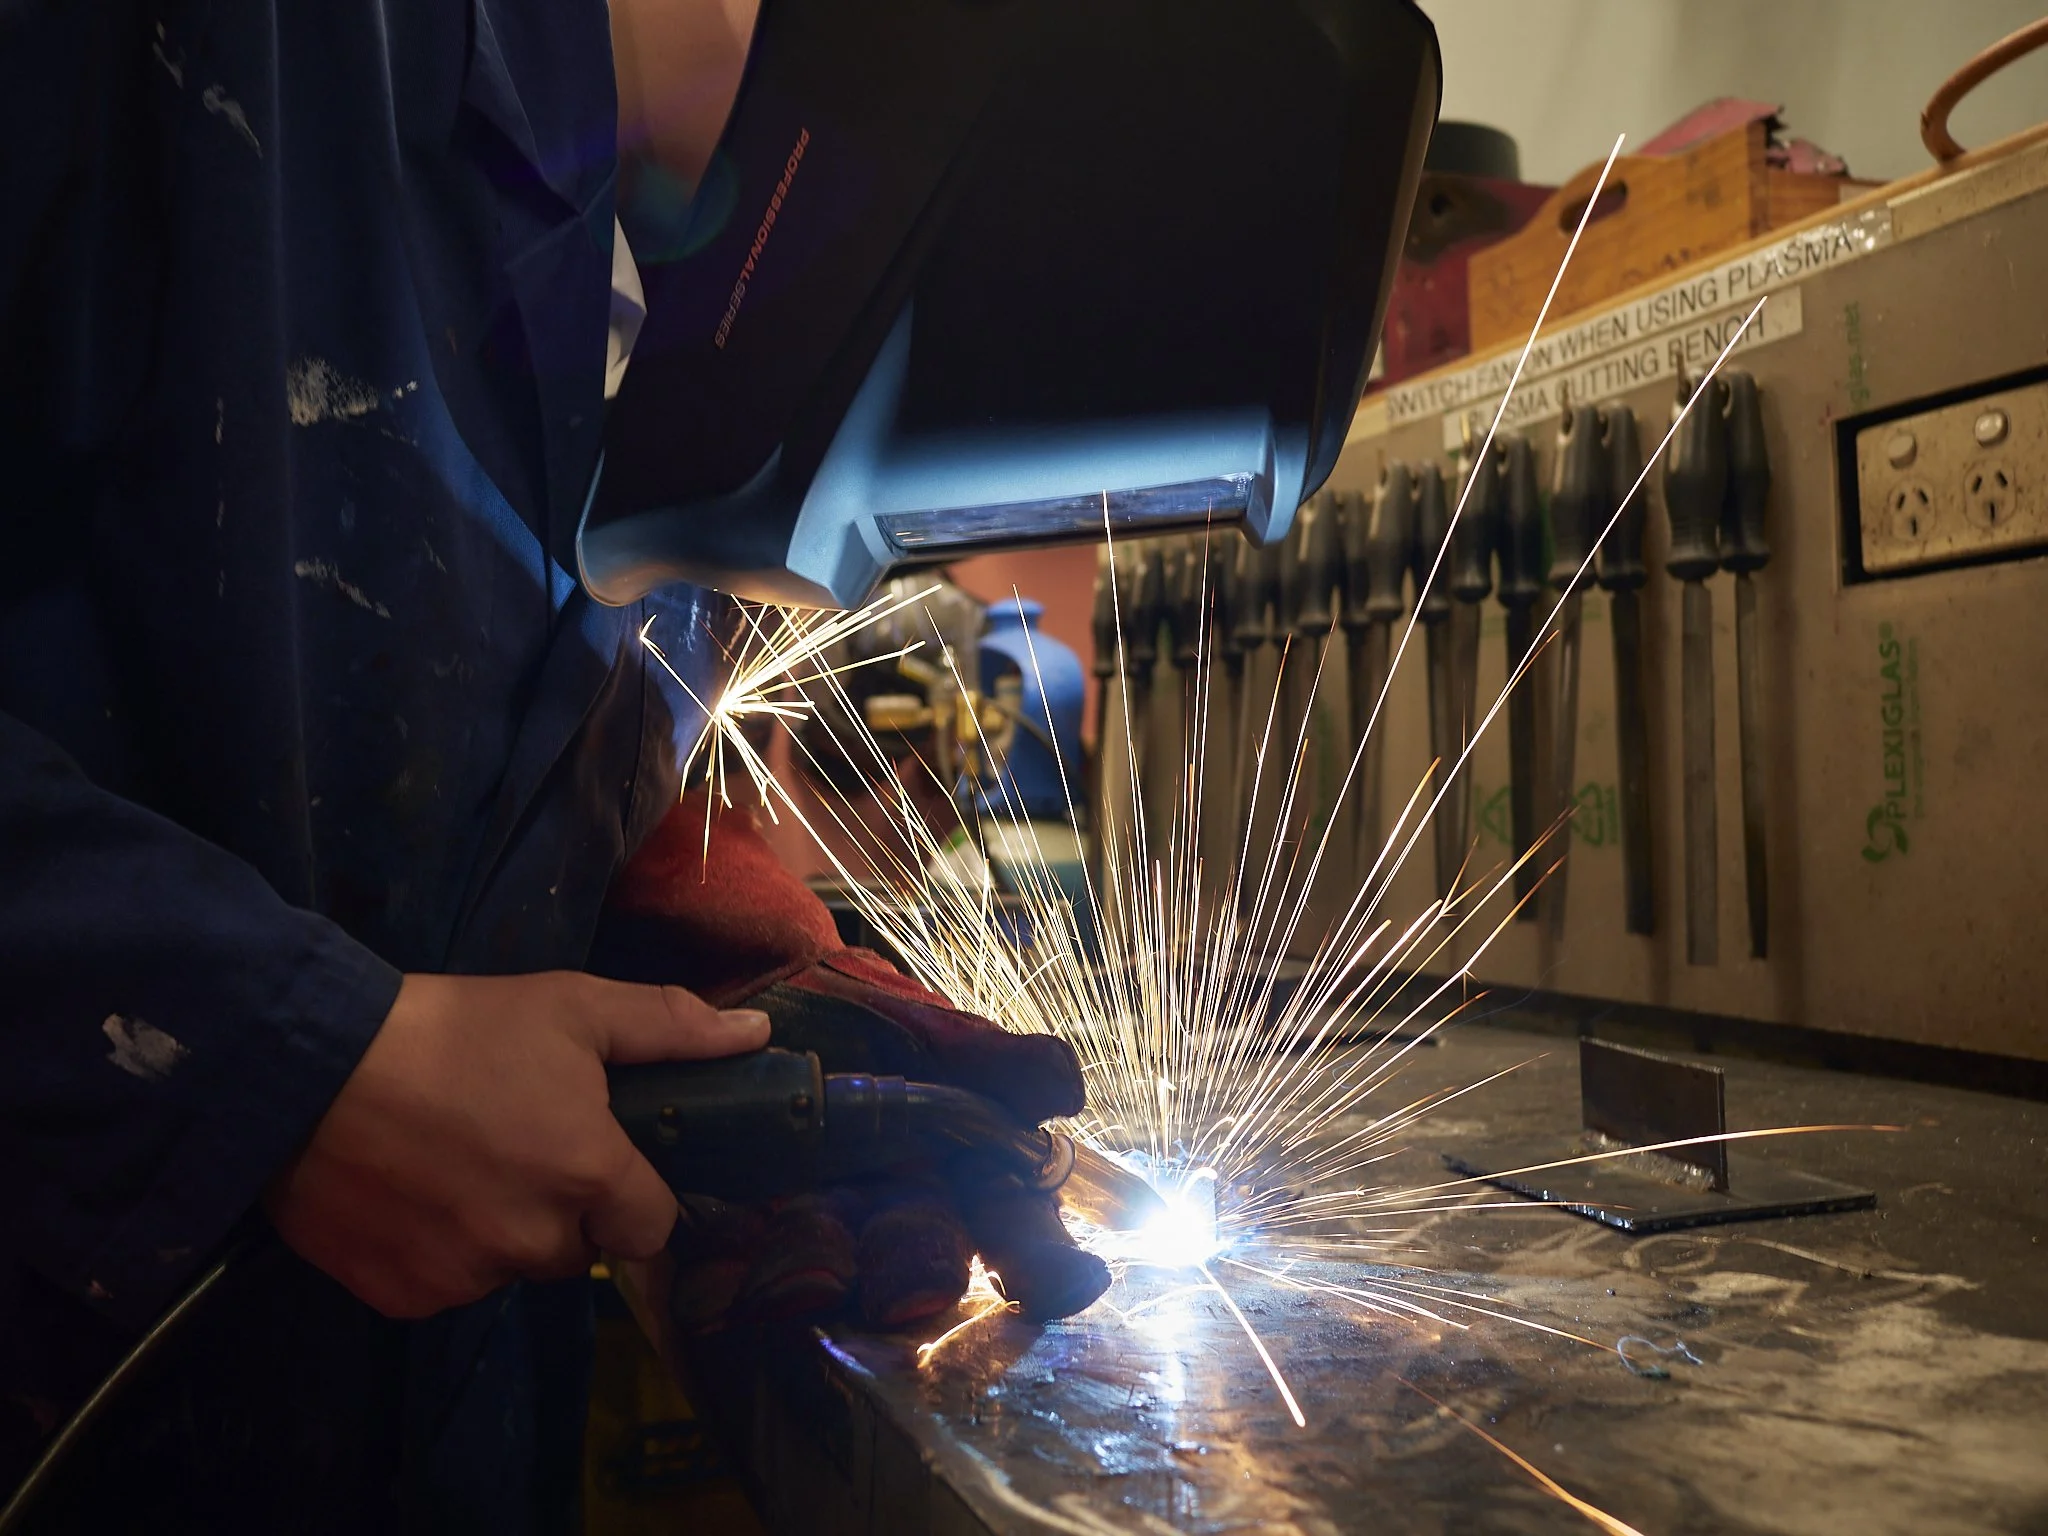
The noise floor may be slightly better from the get-go.

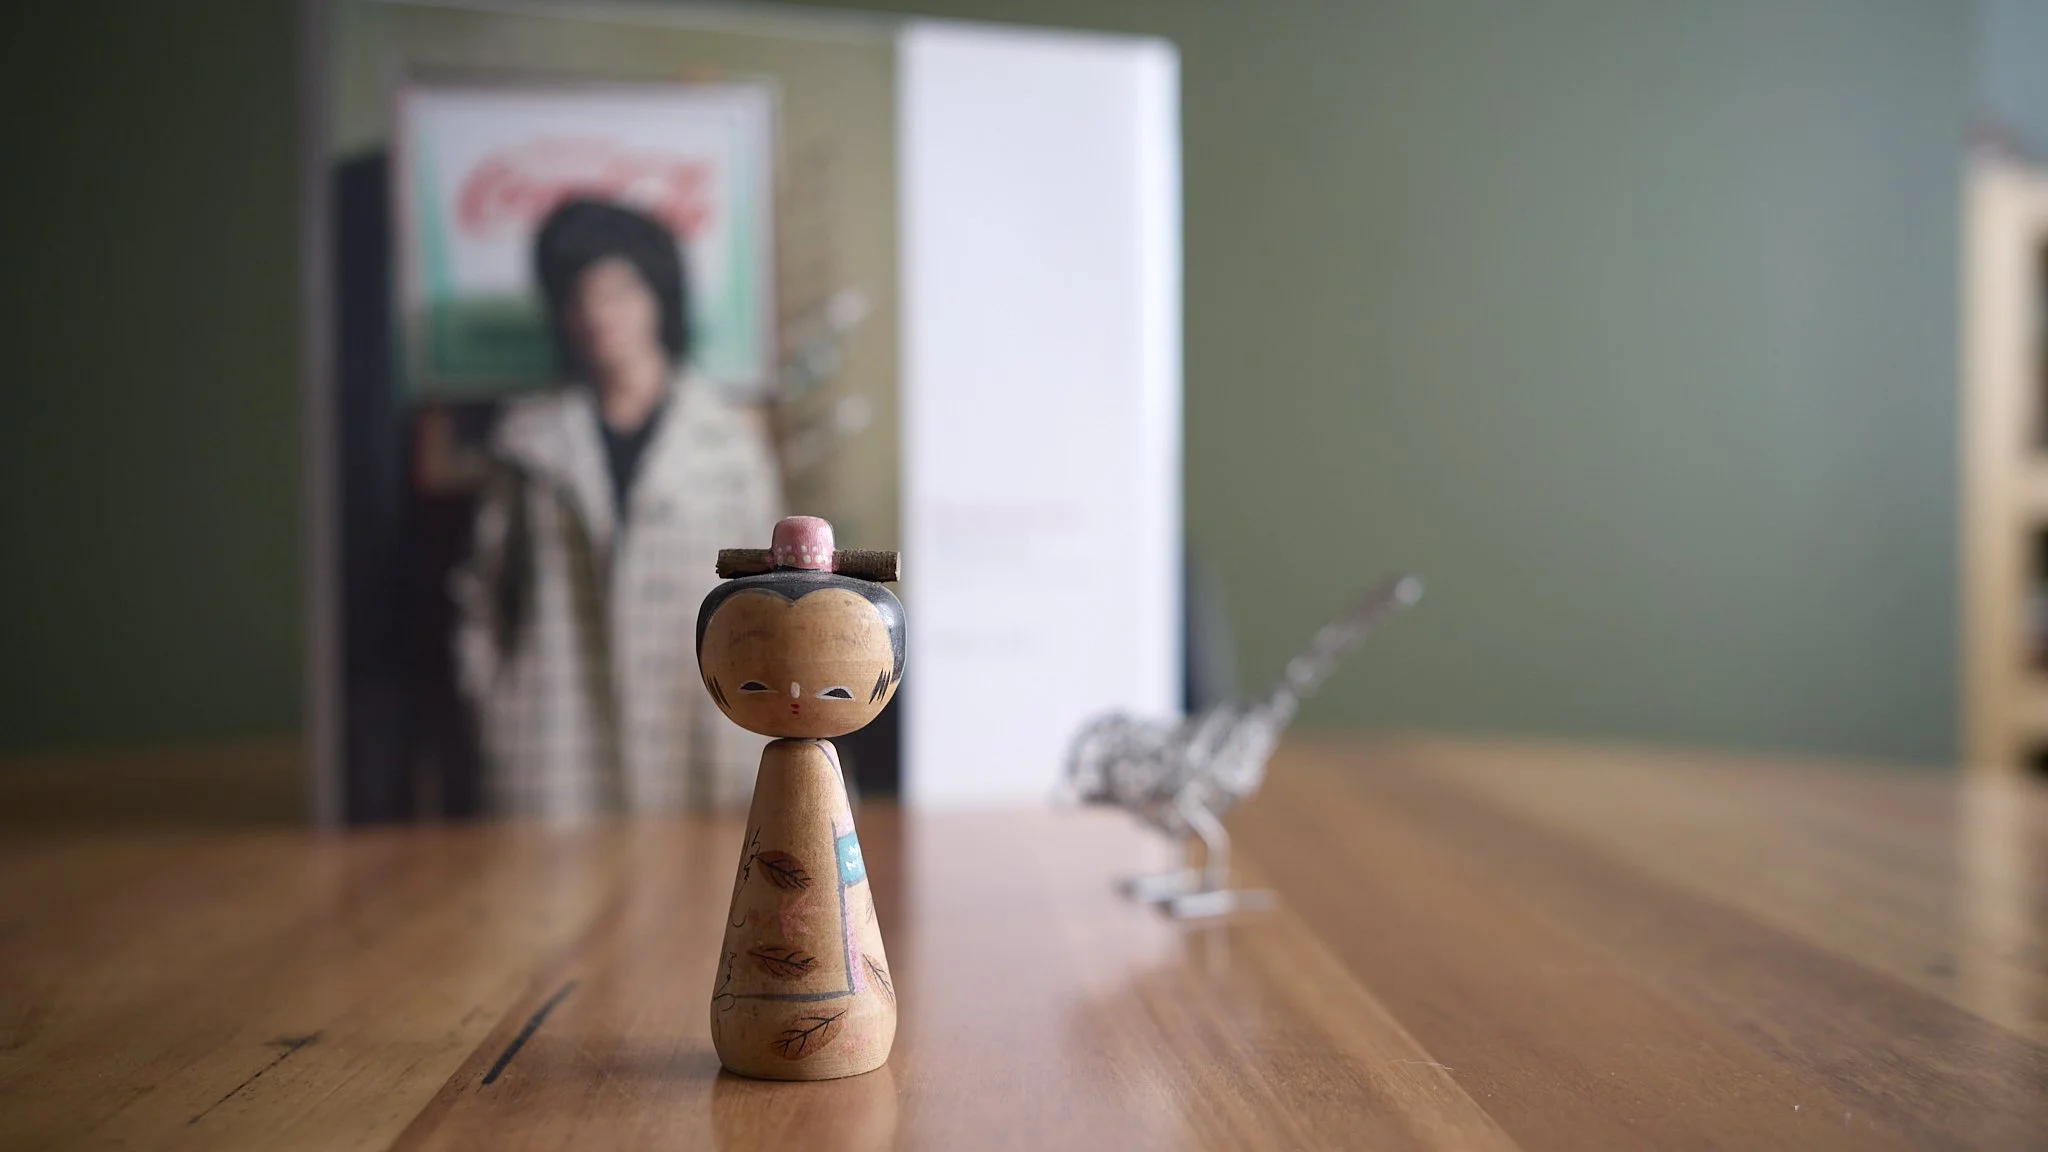
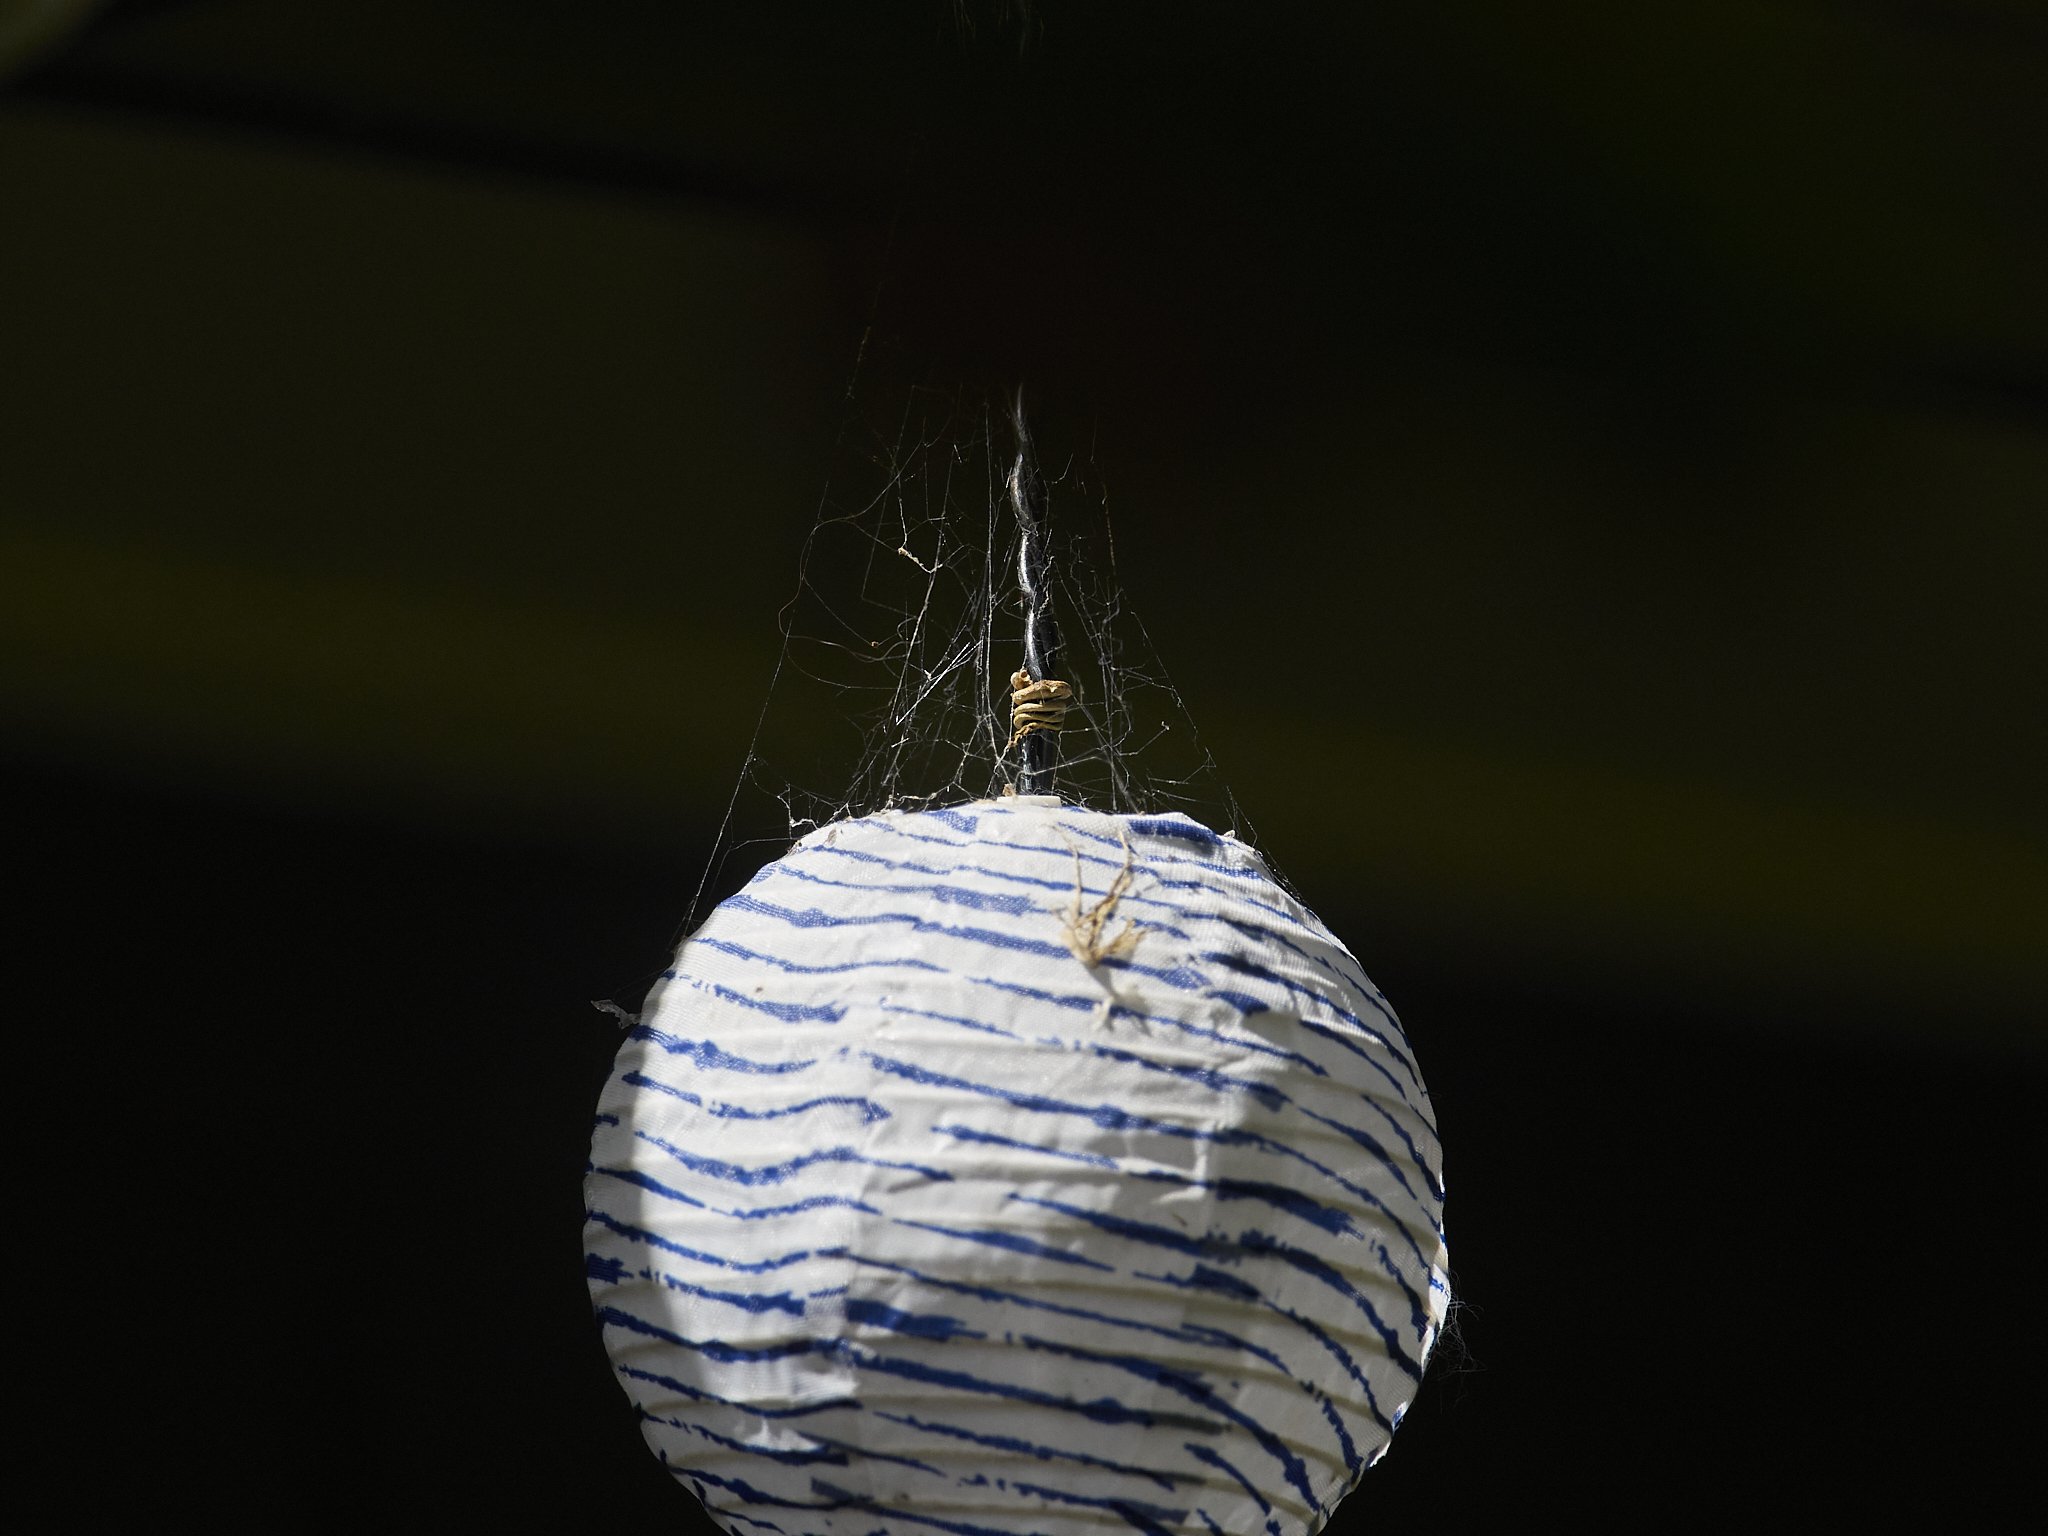
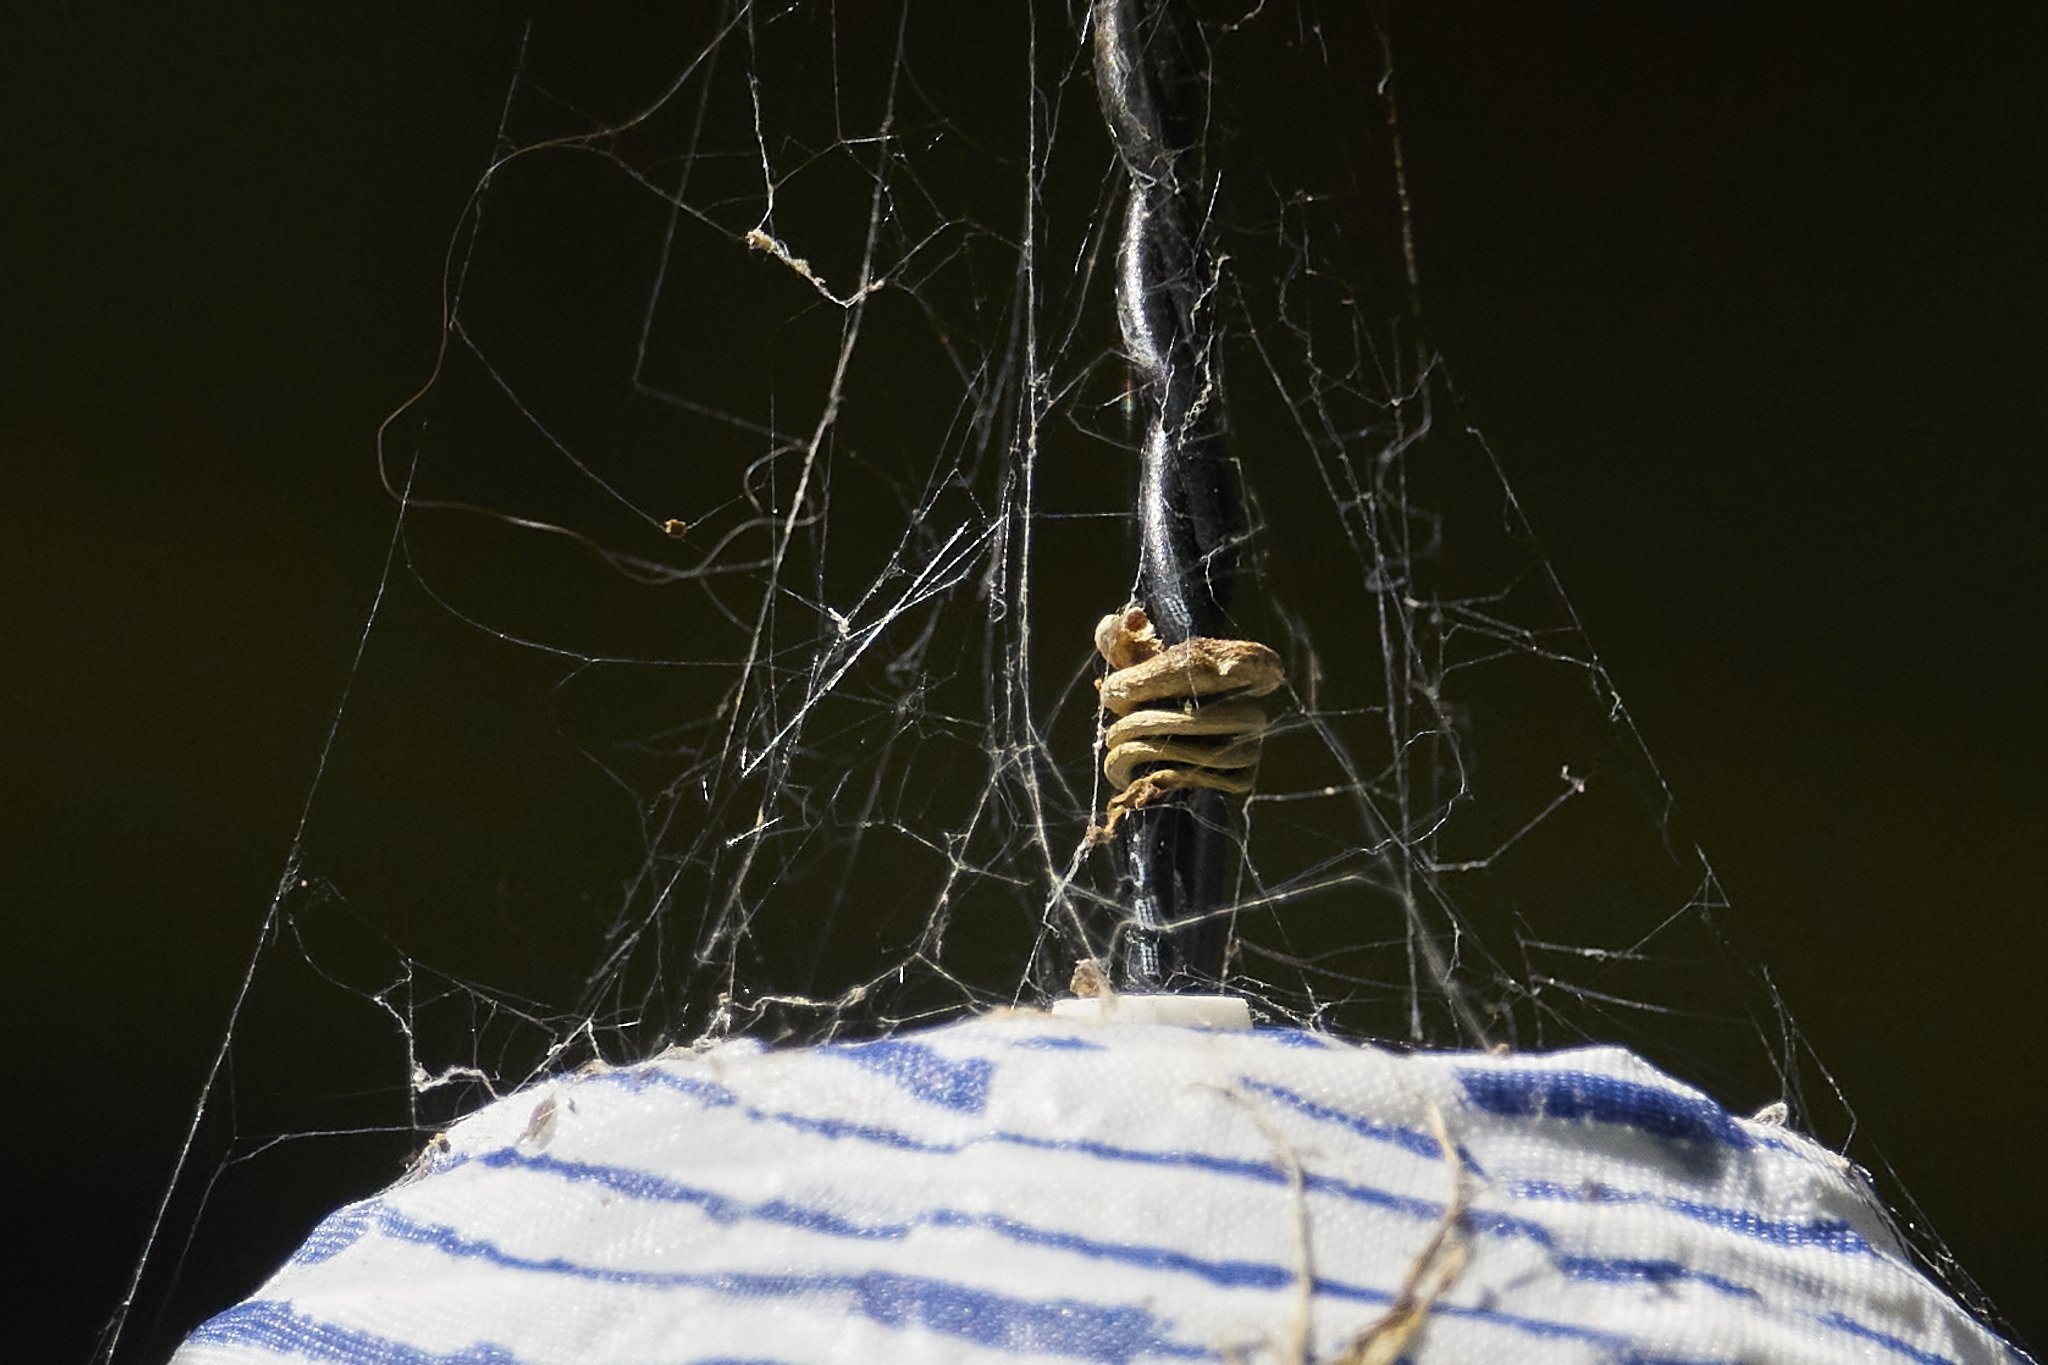
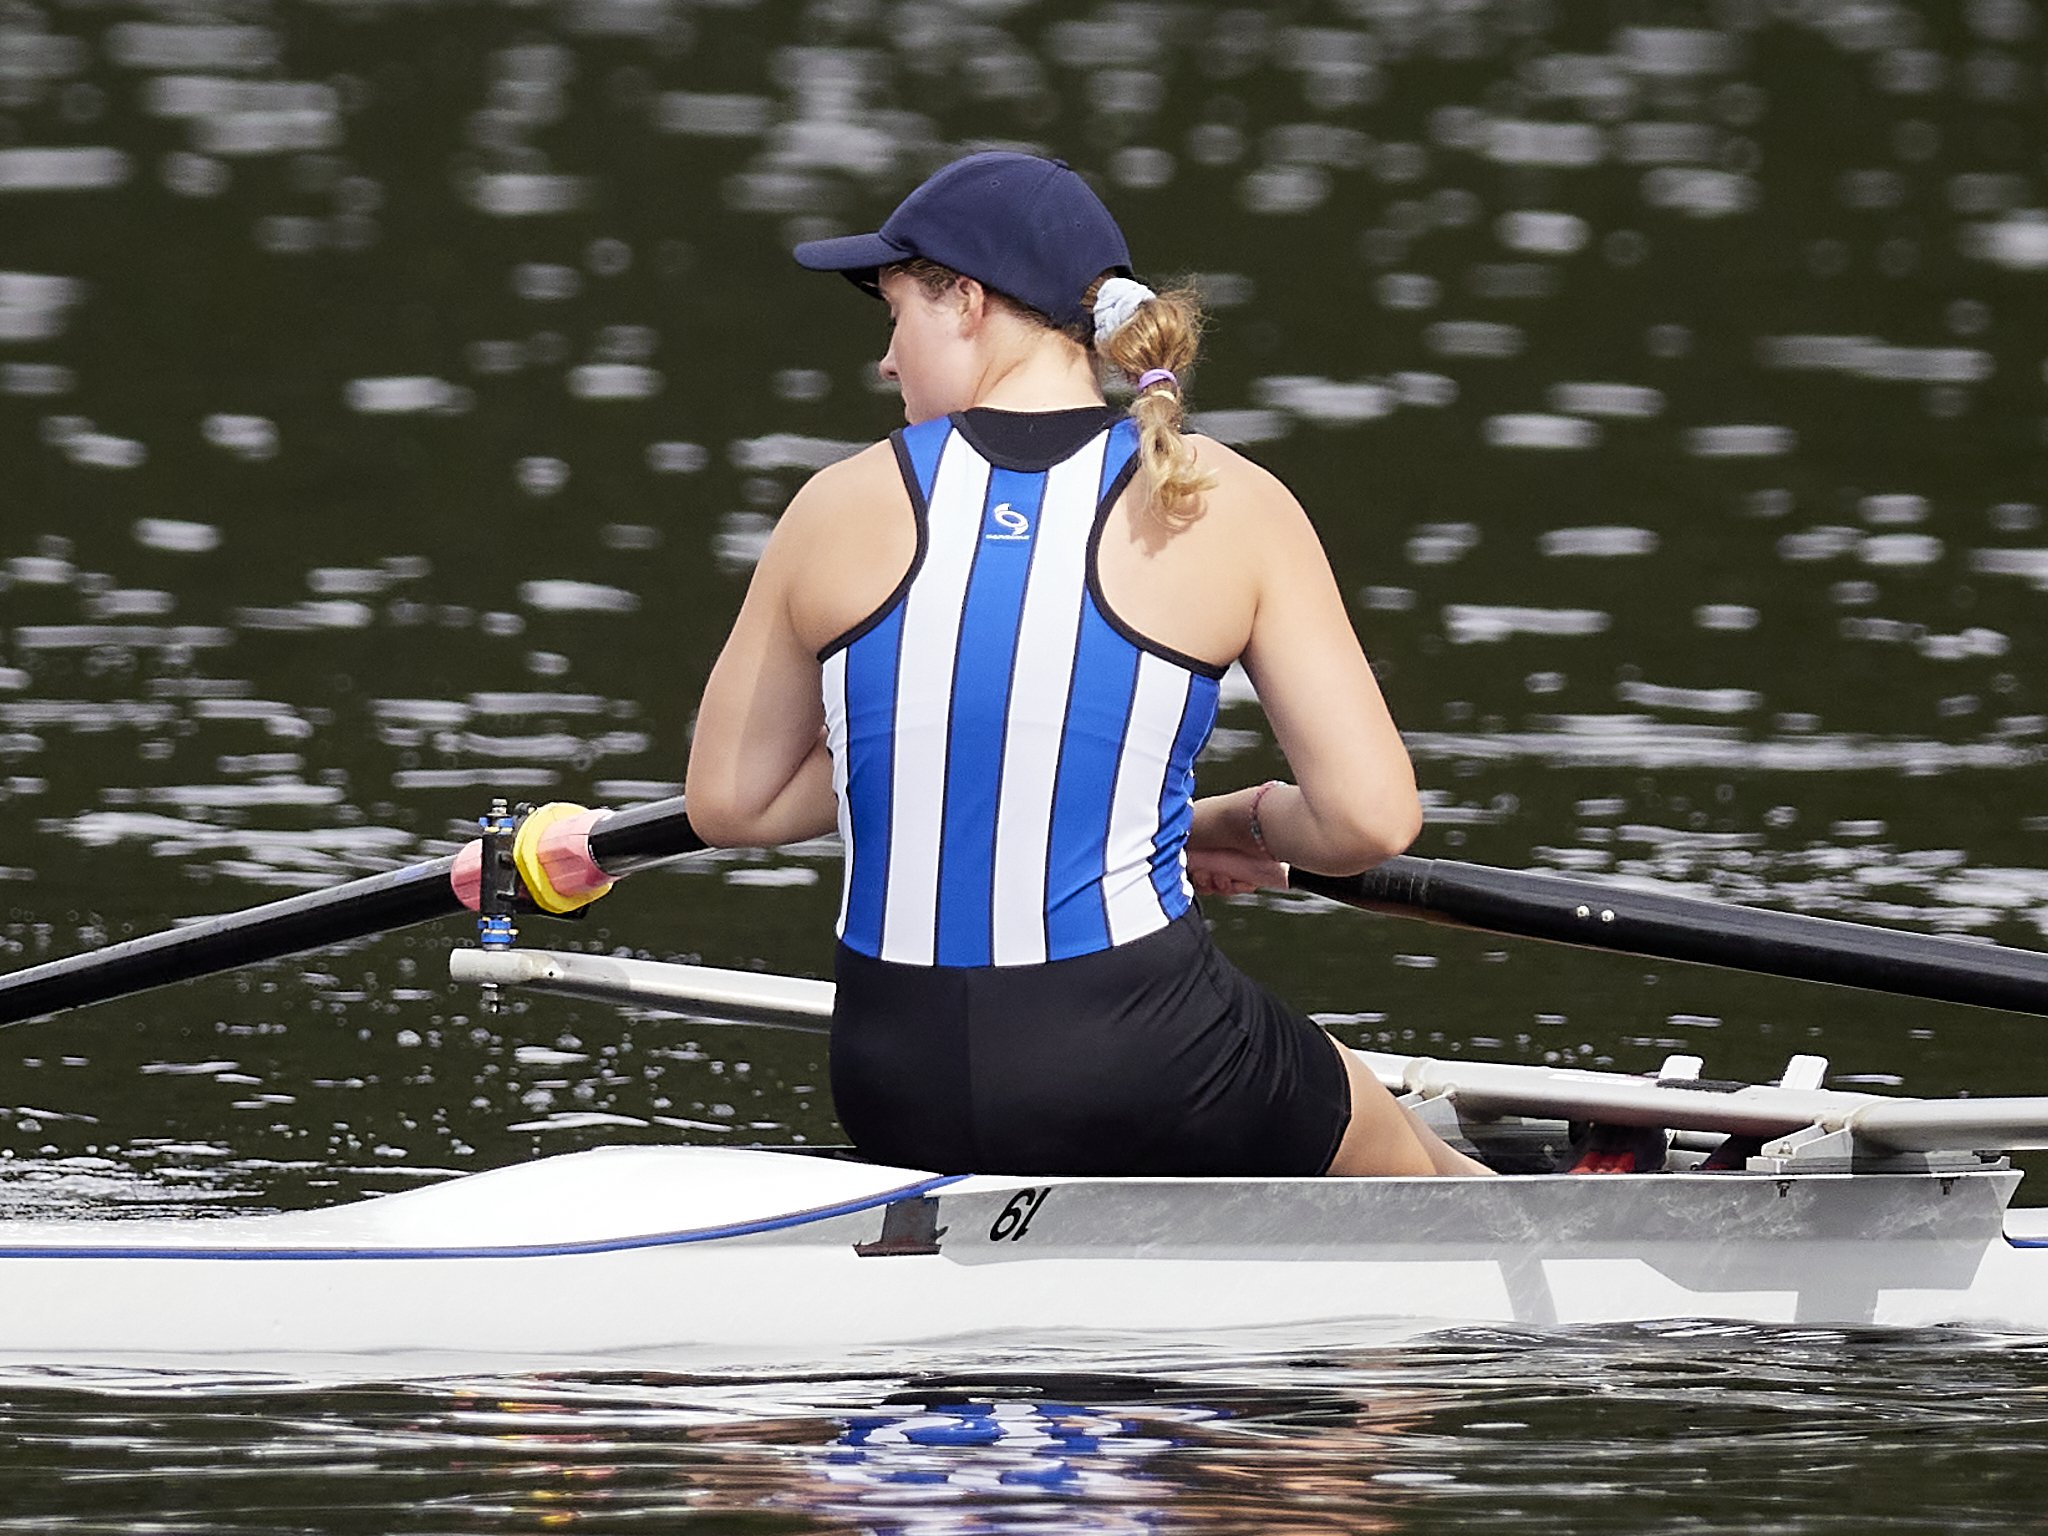
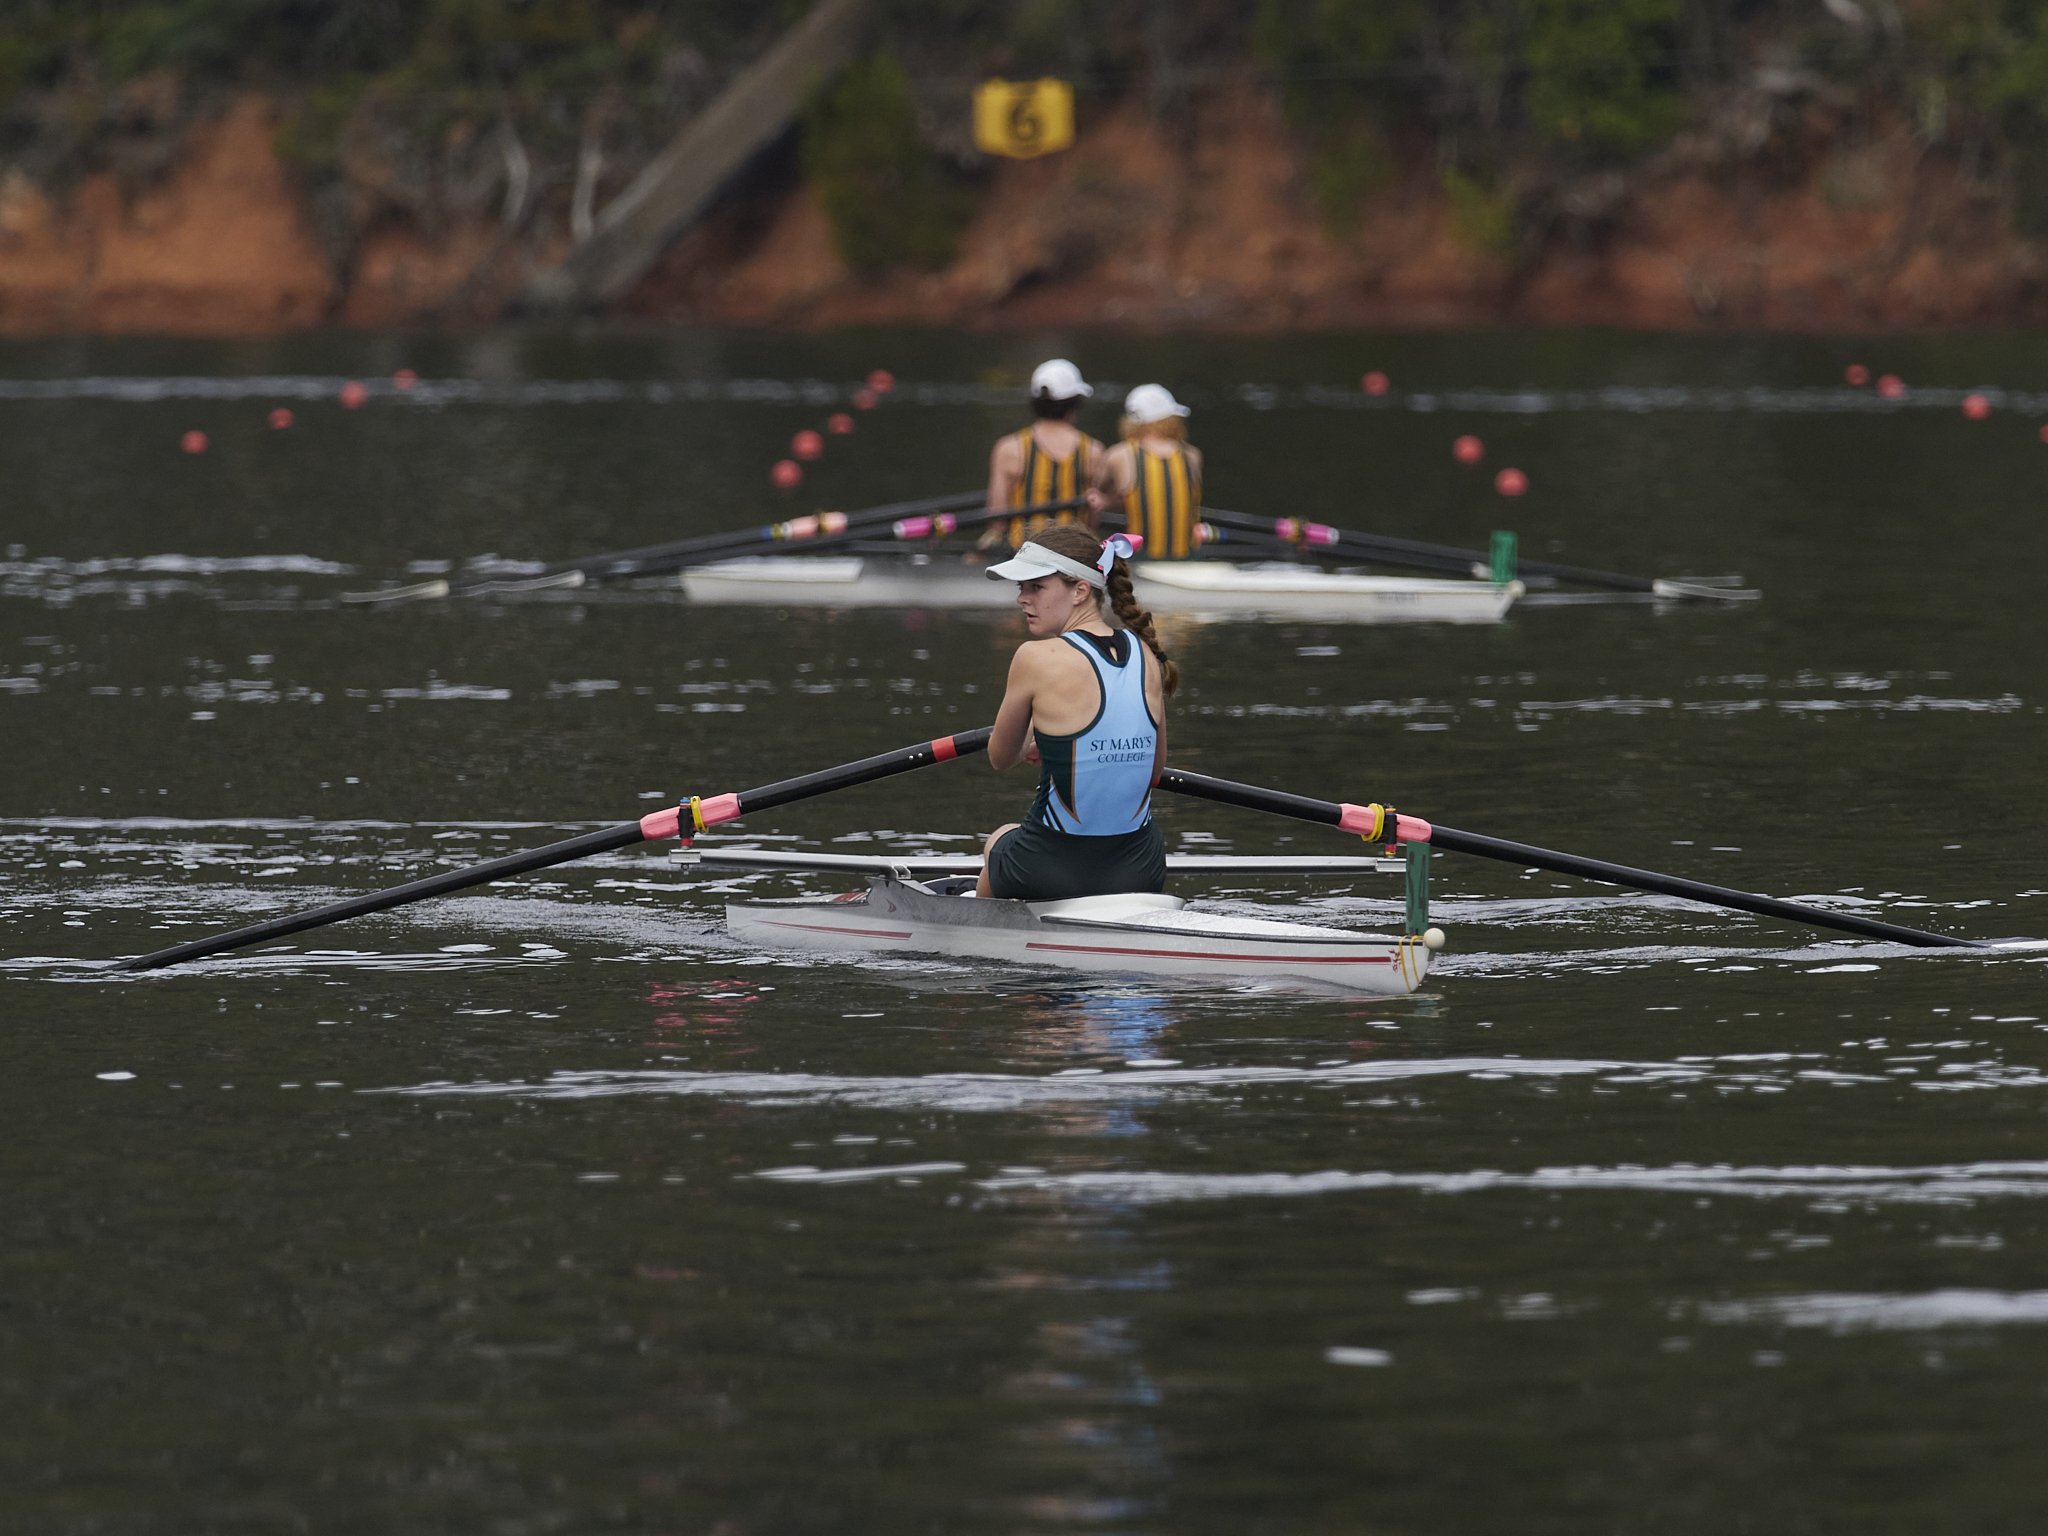
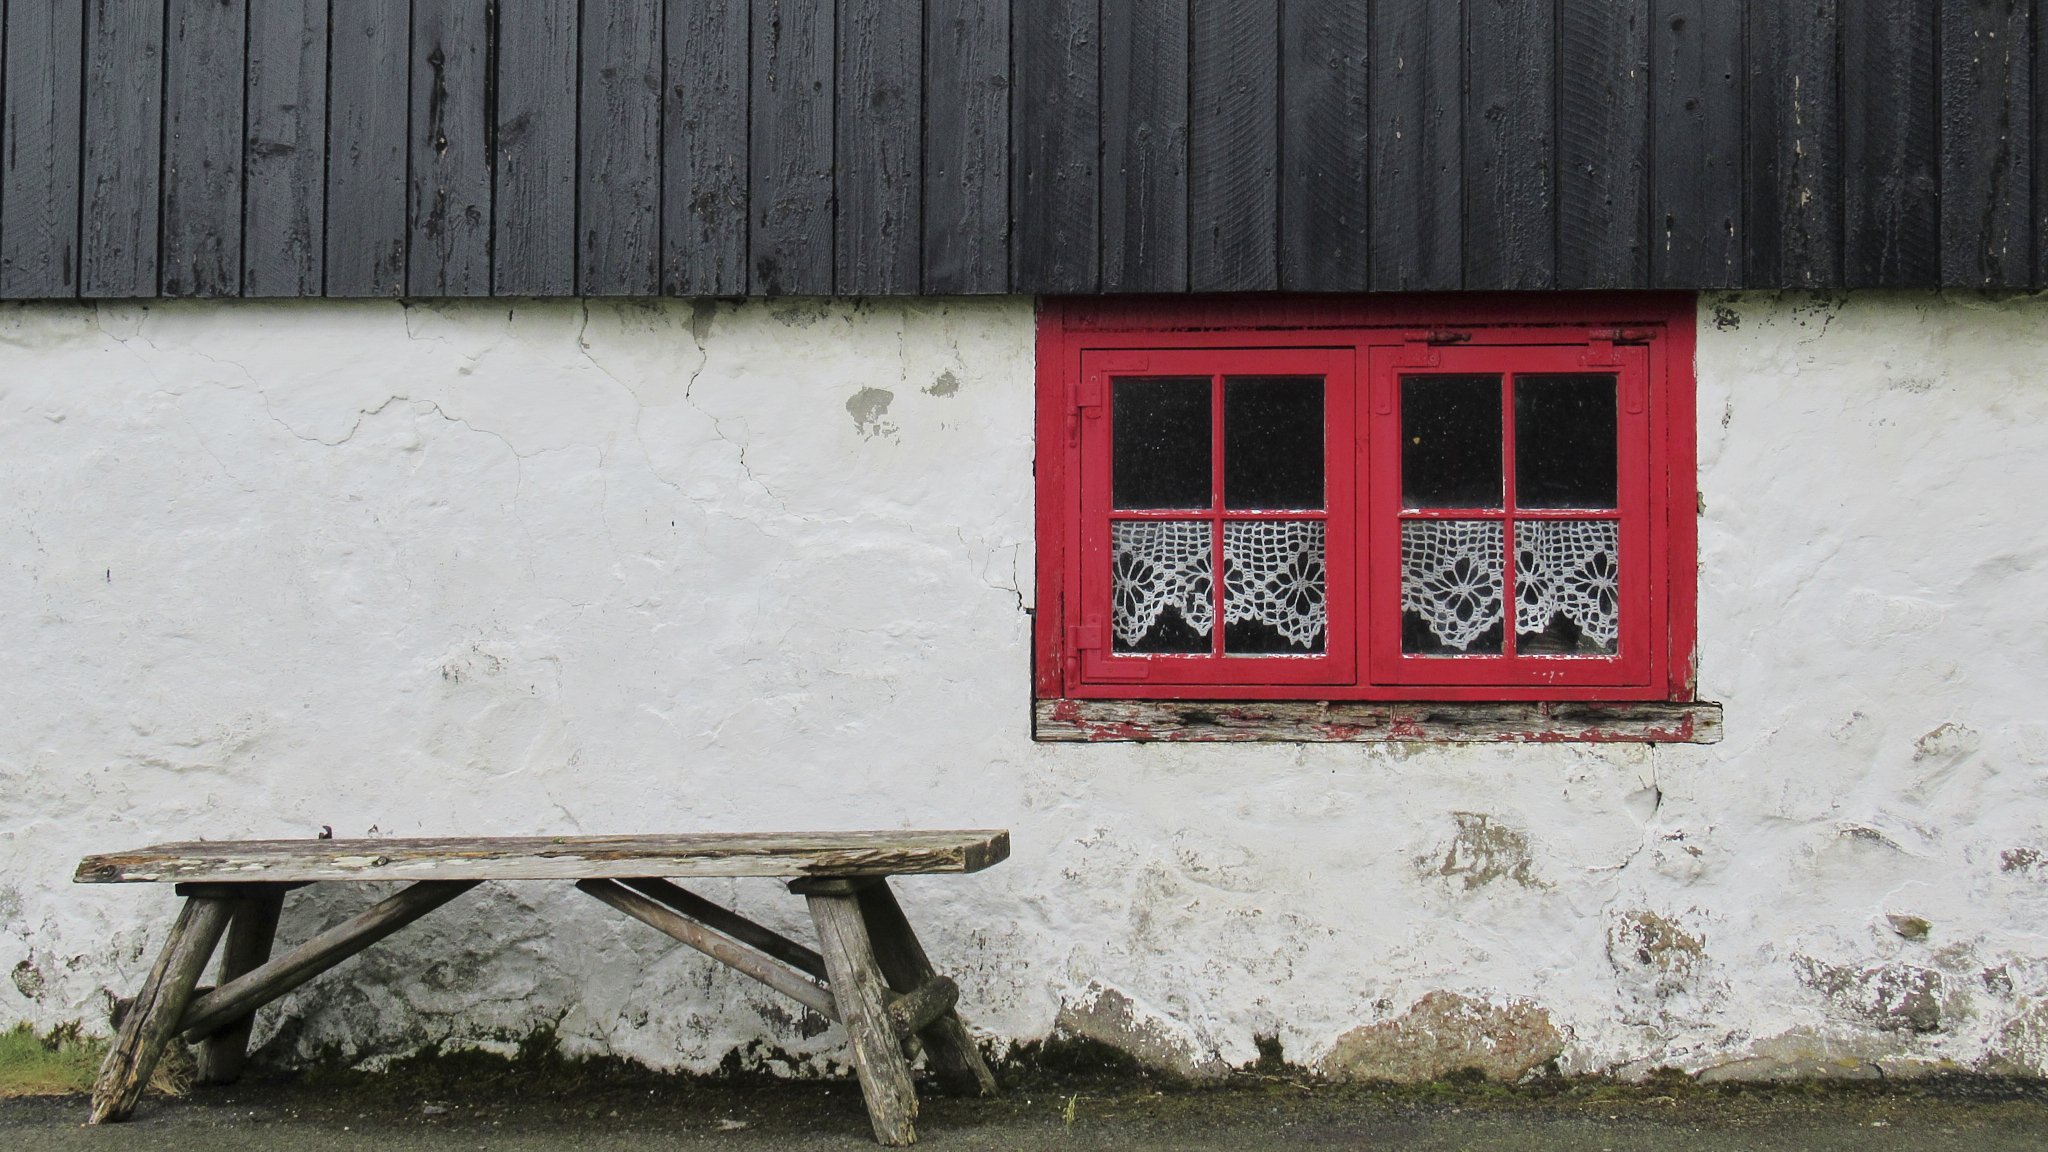
Shot at ISO 1600 in low light. This is really now my ISO 400 equivalent of a few years ago.

Closeup reveals a slight focus miss, but little noise and good sharpness. No noise reduction or sharpening applied to this EM1x file.

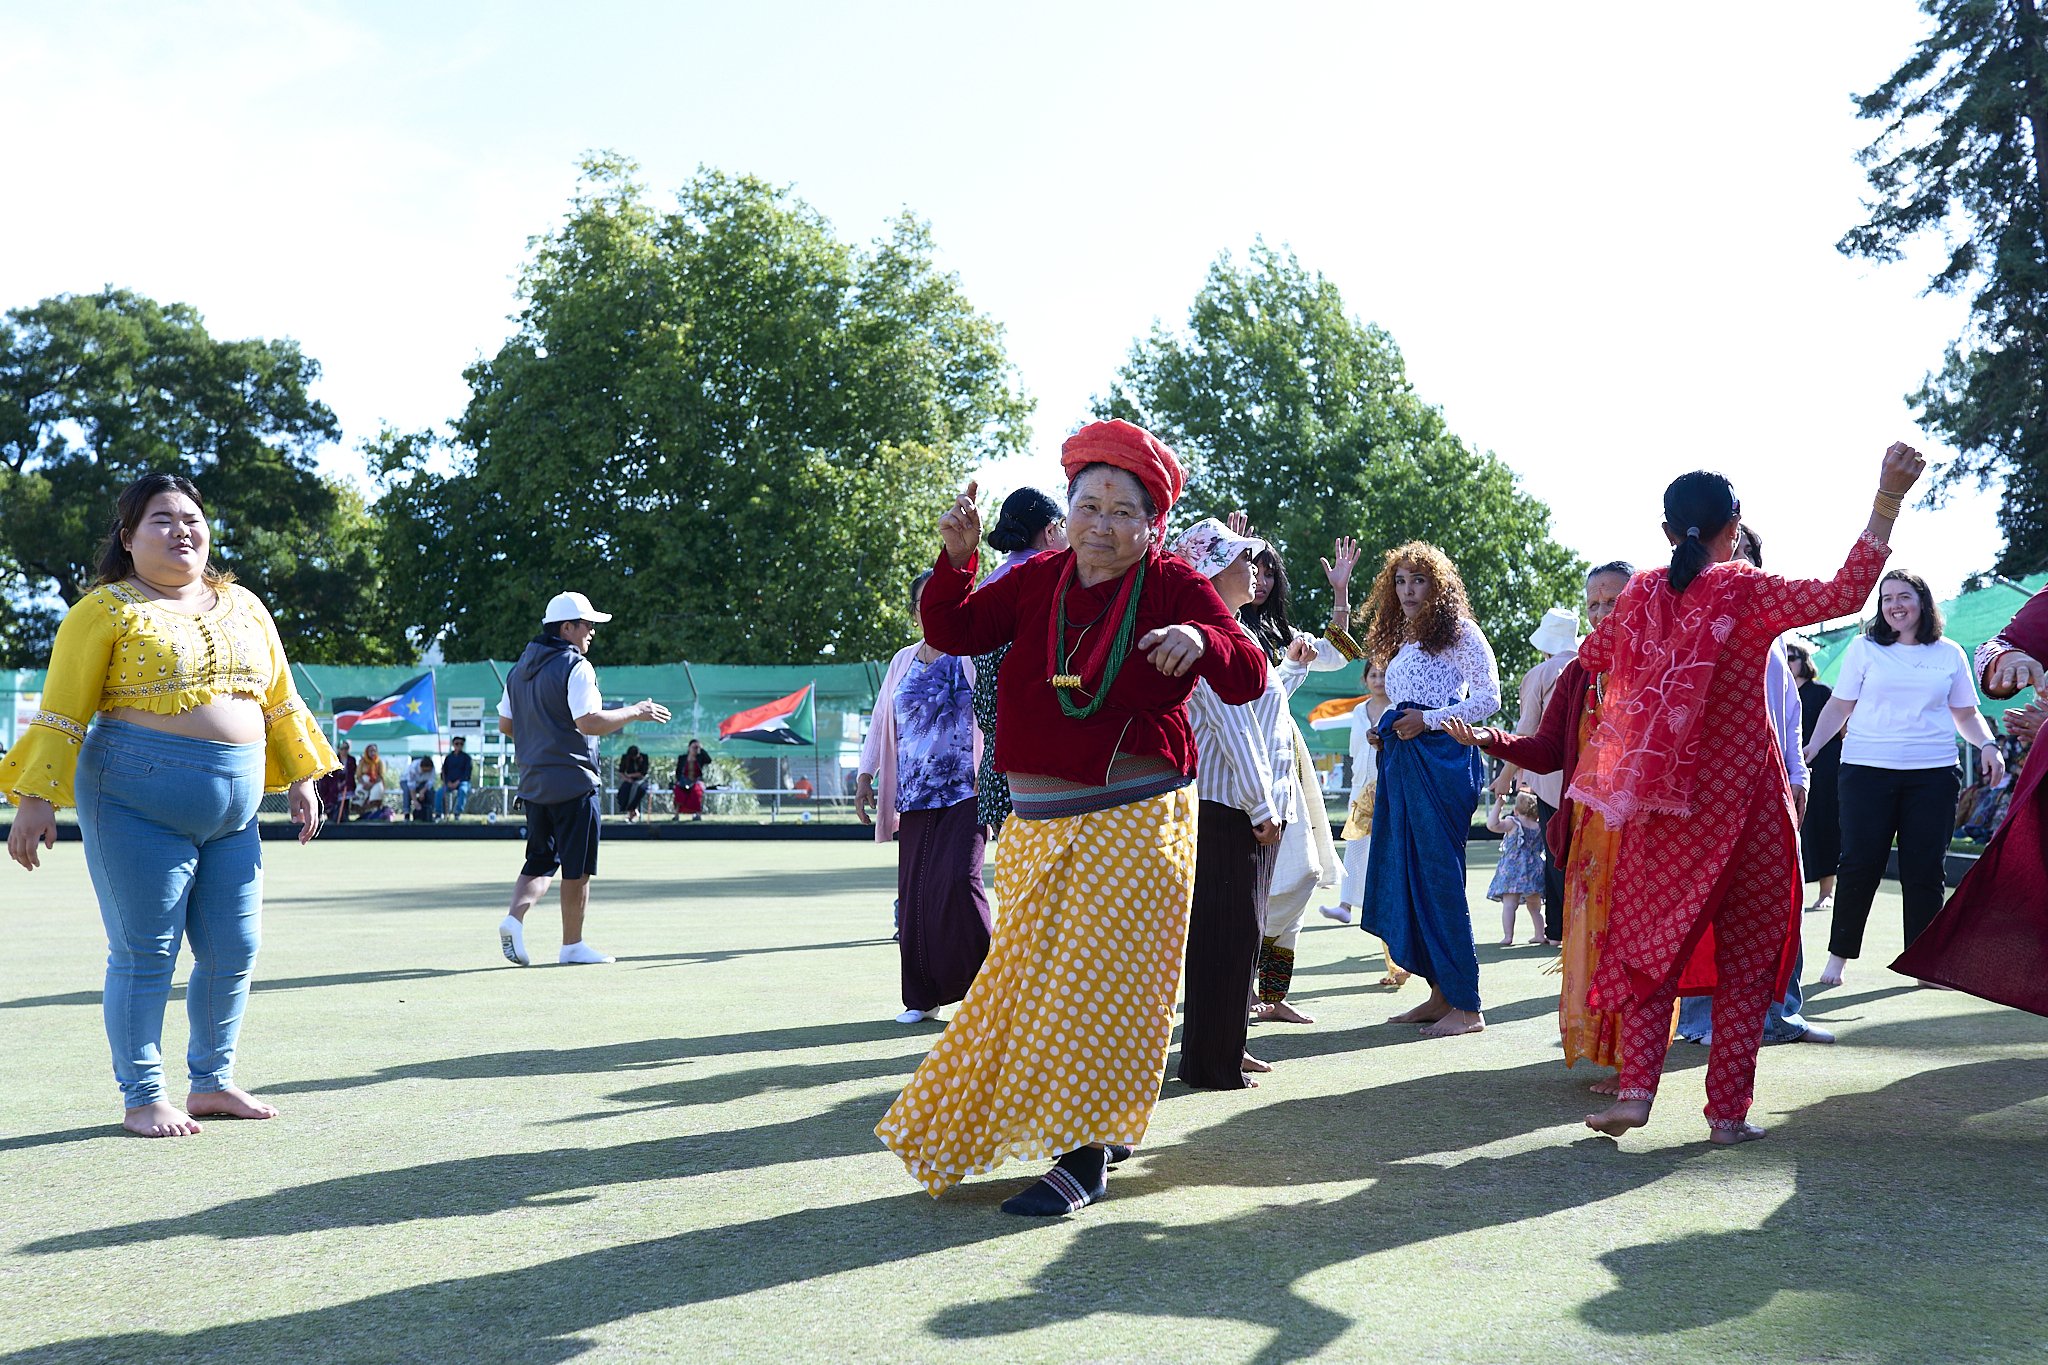
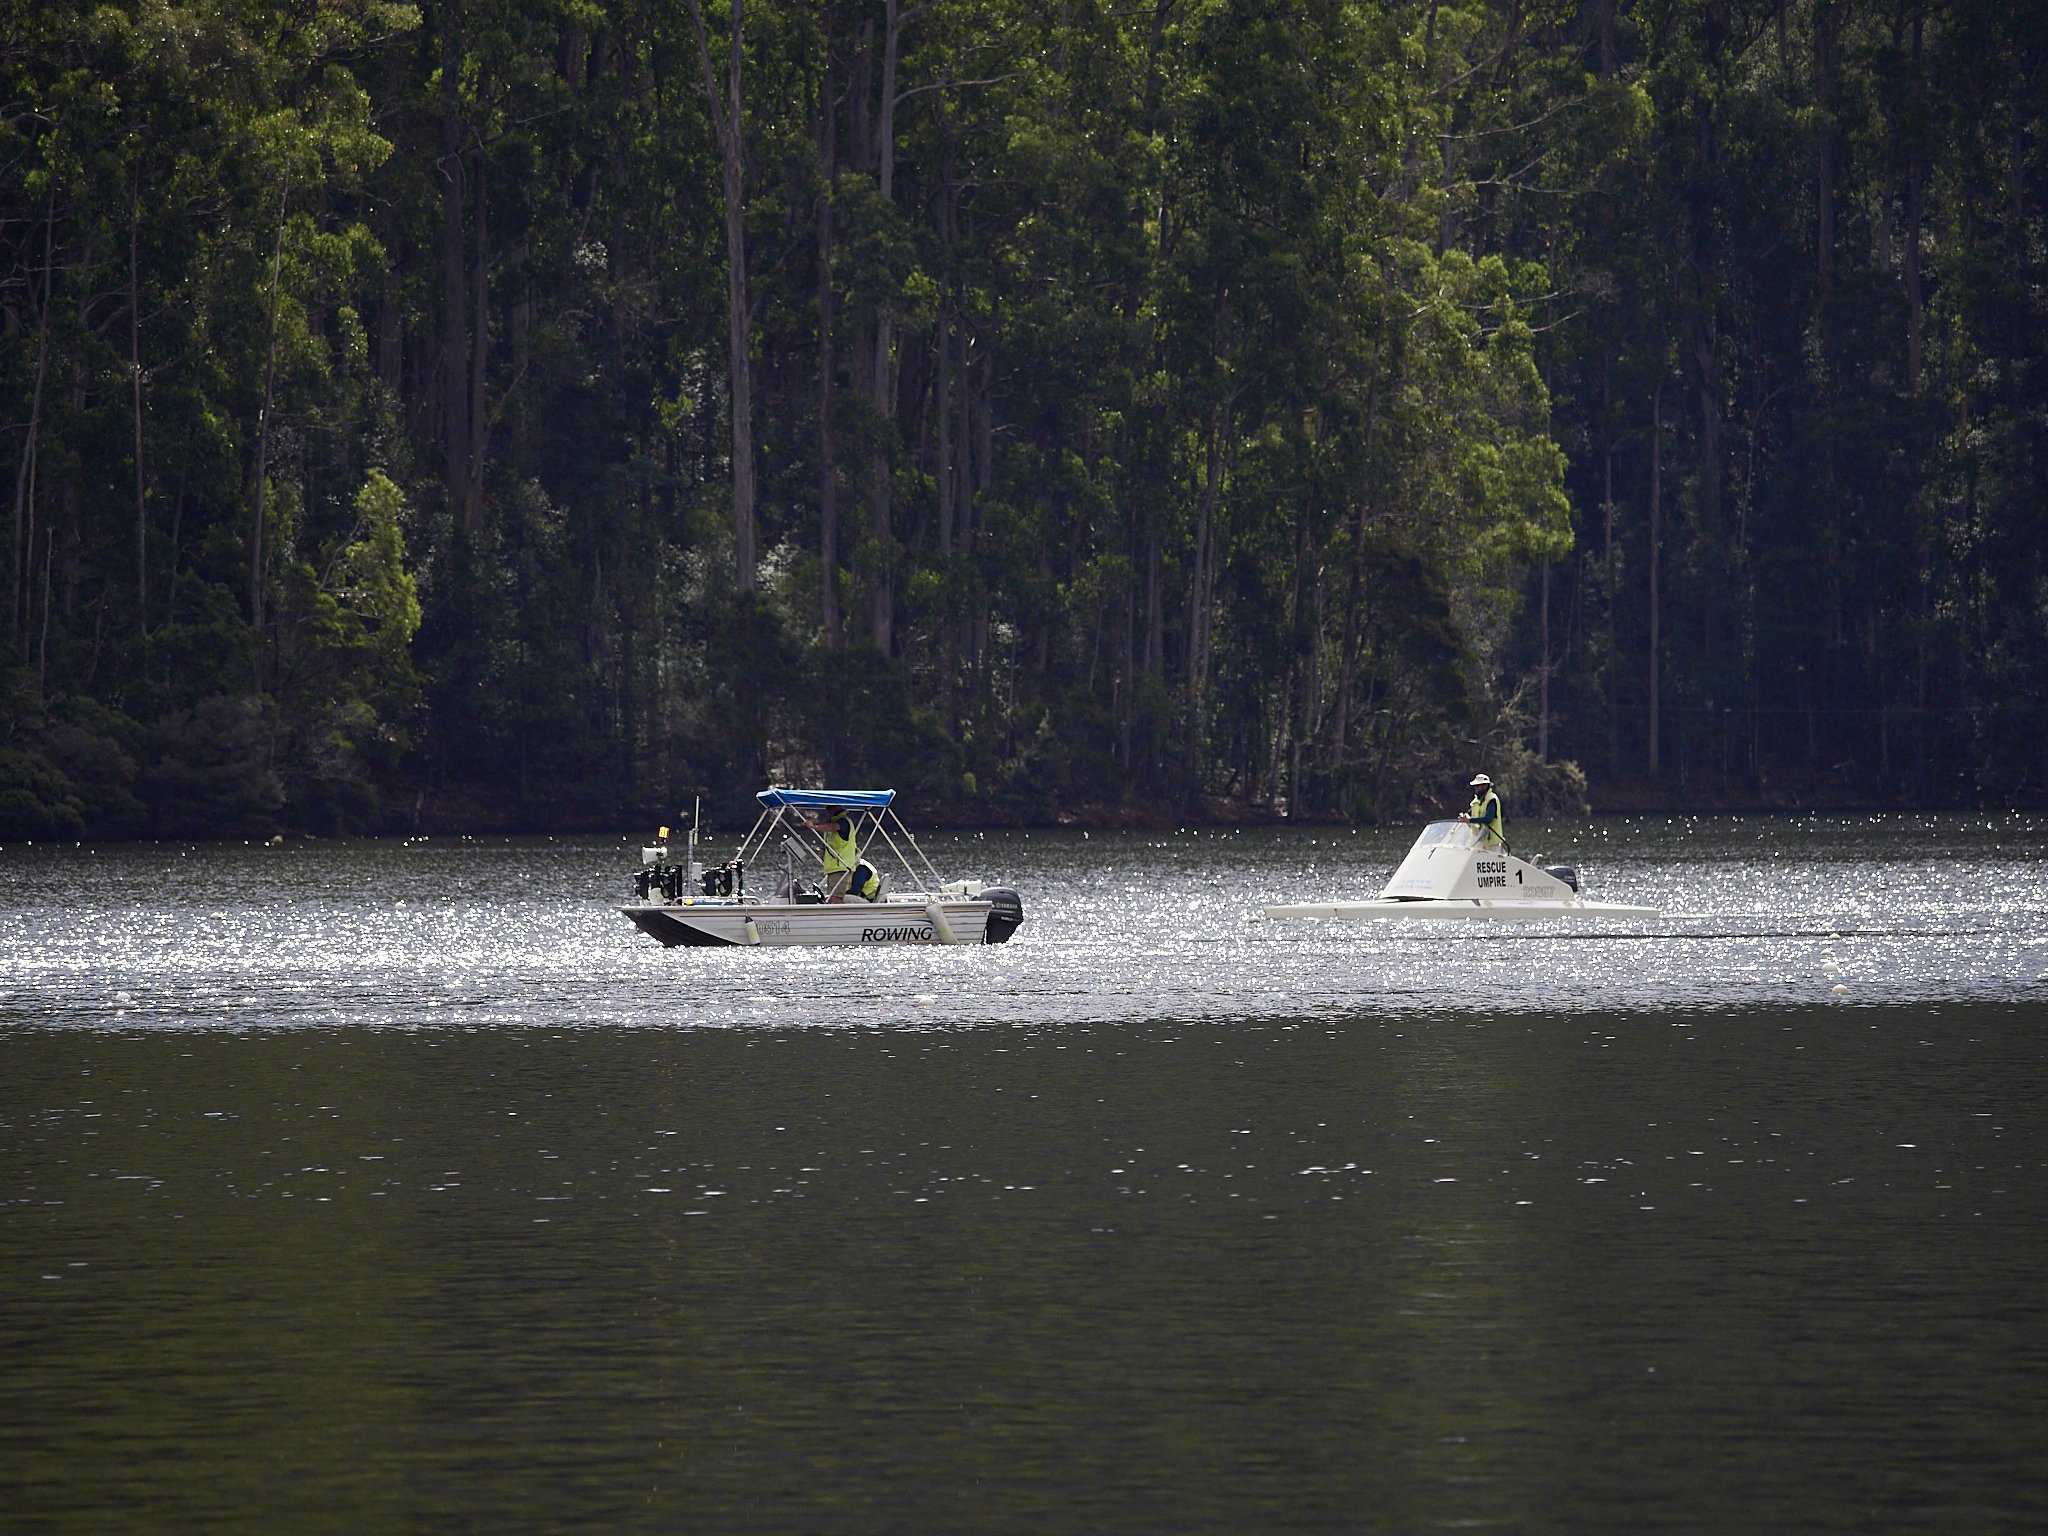
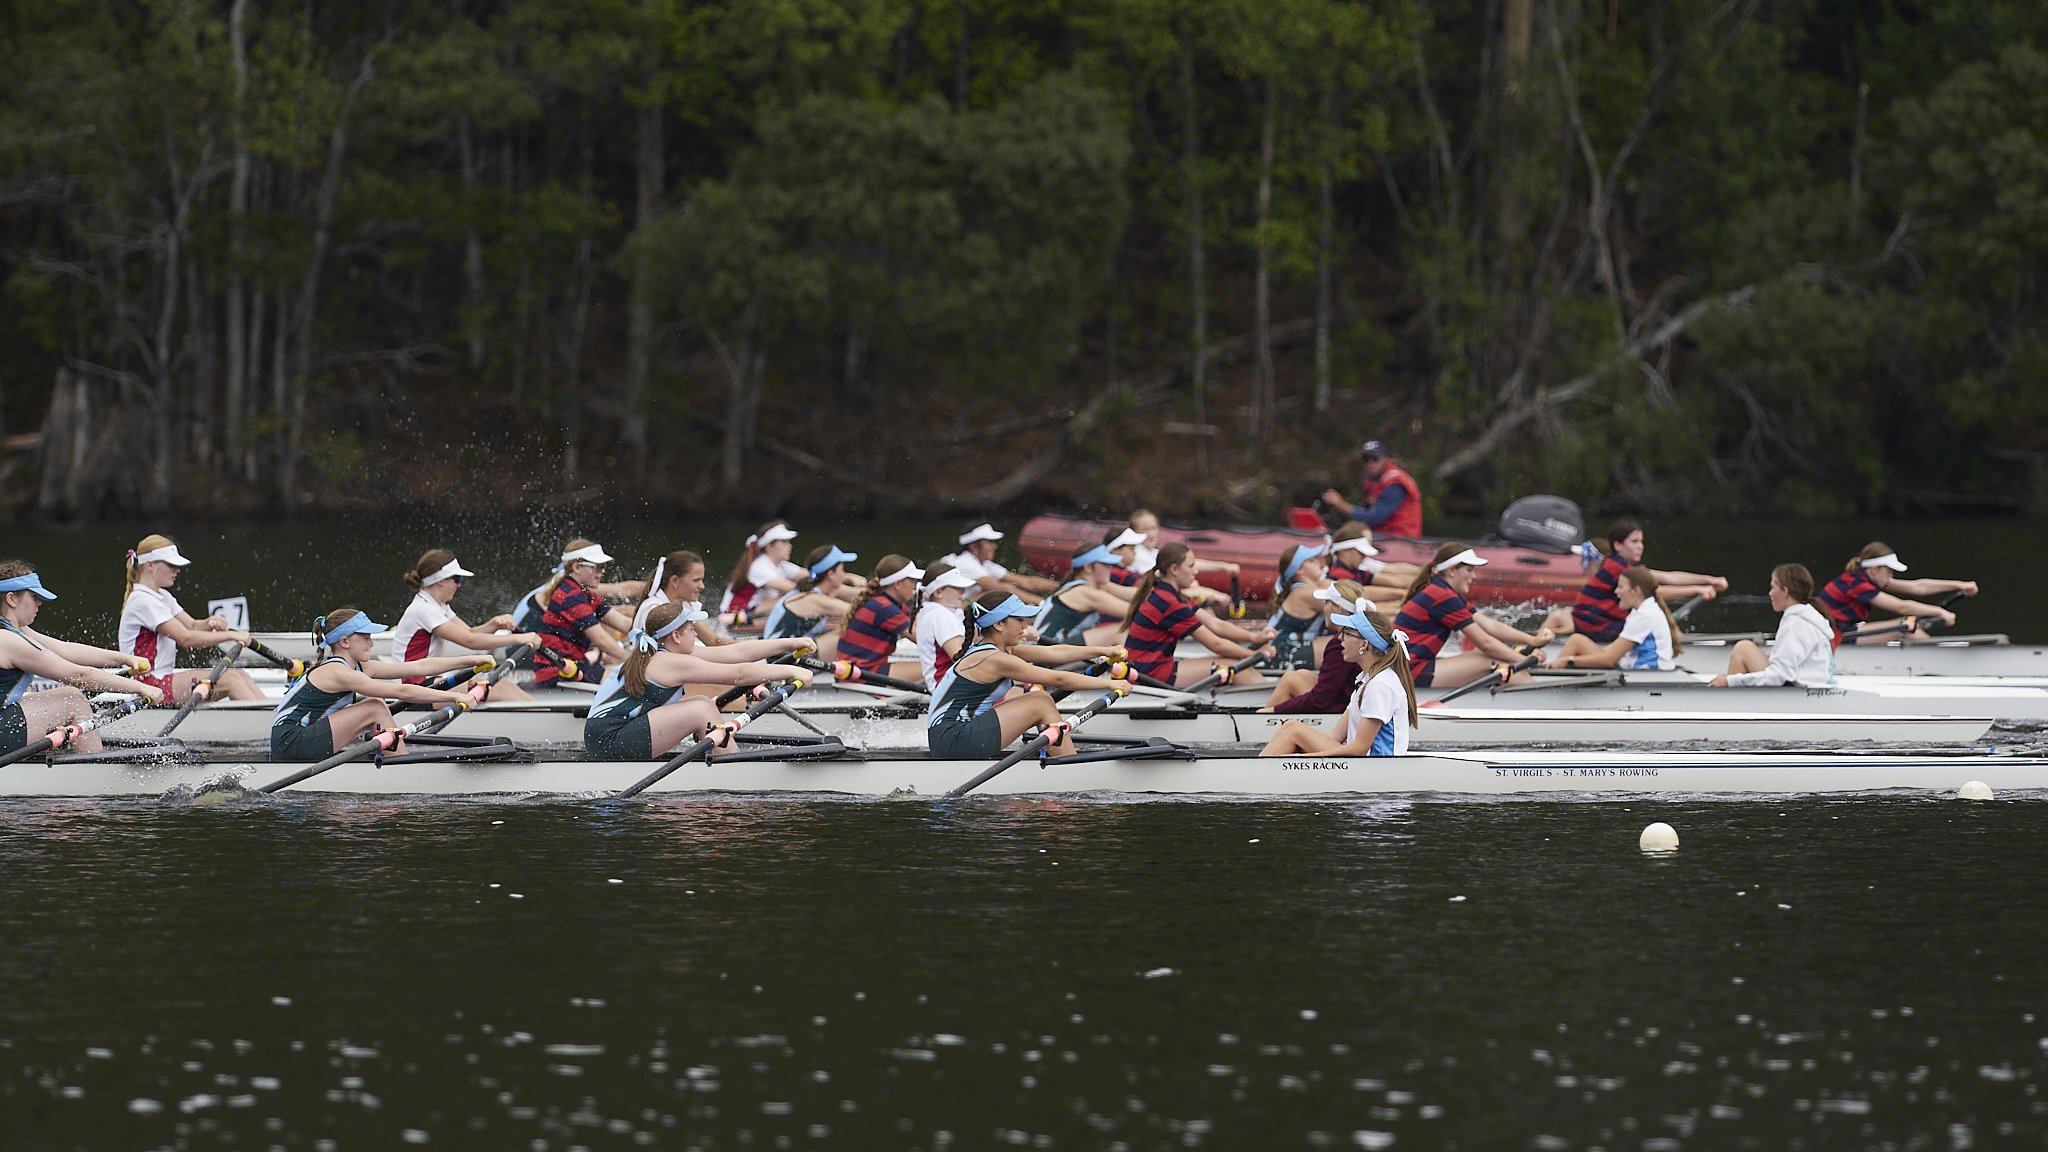
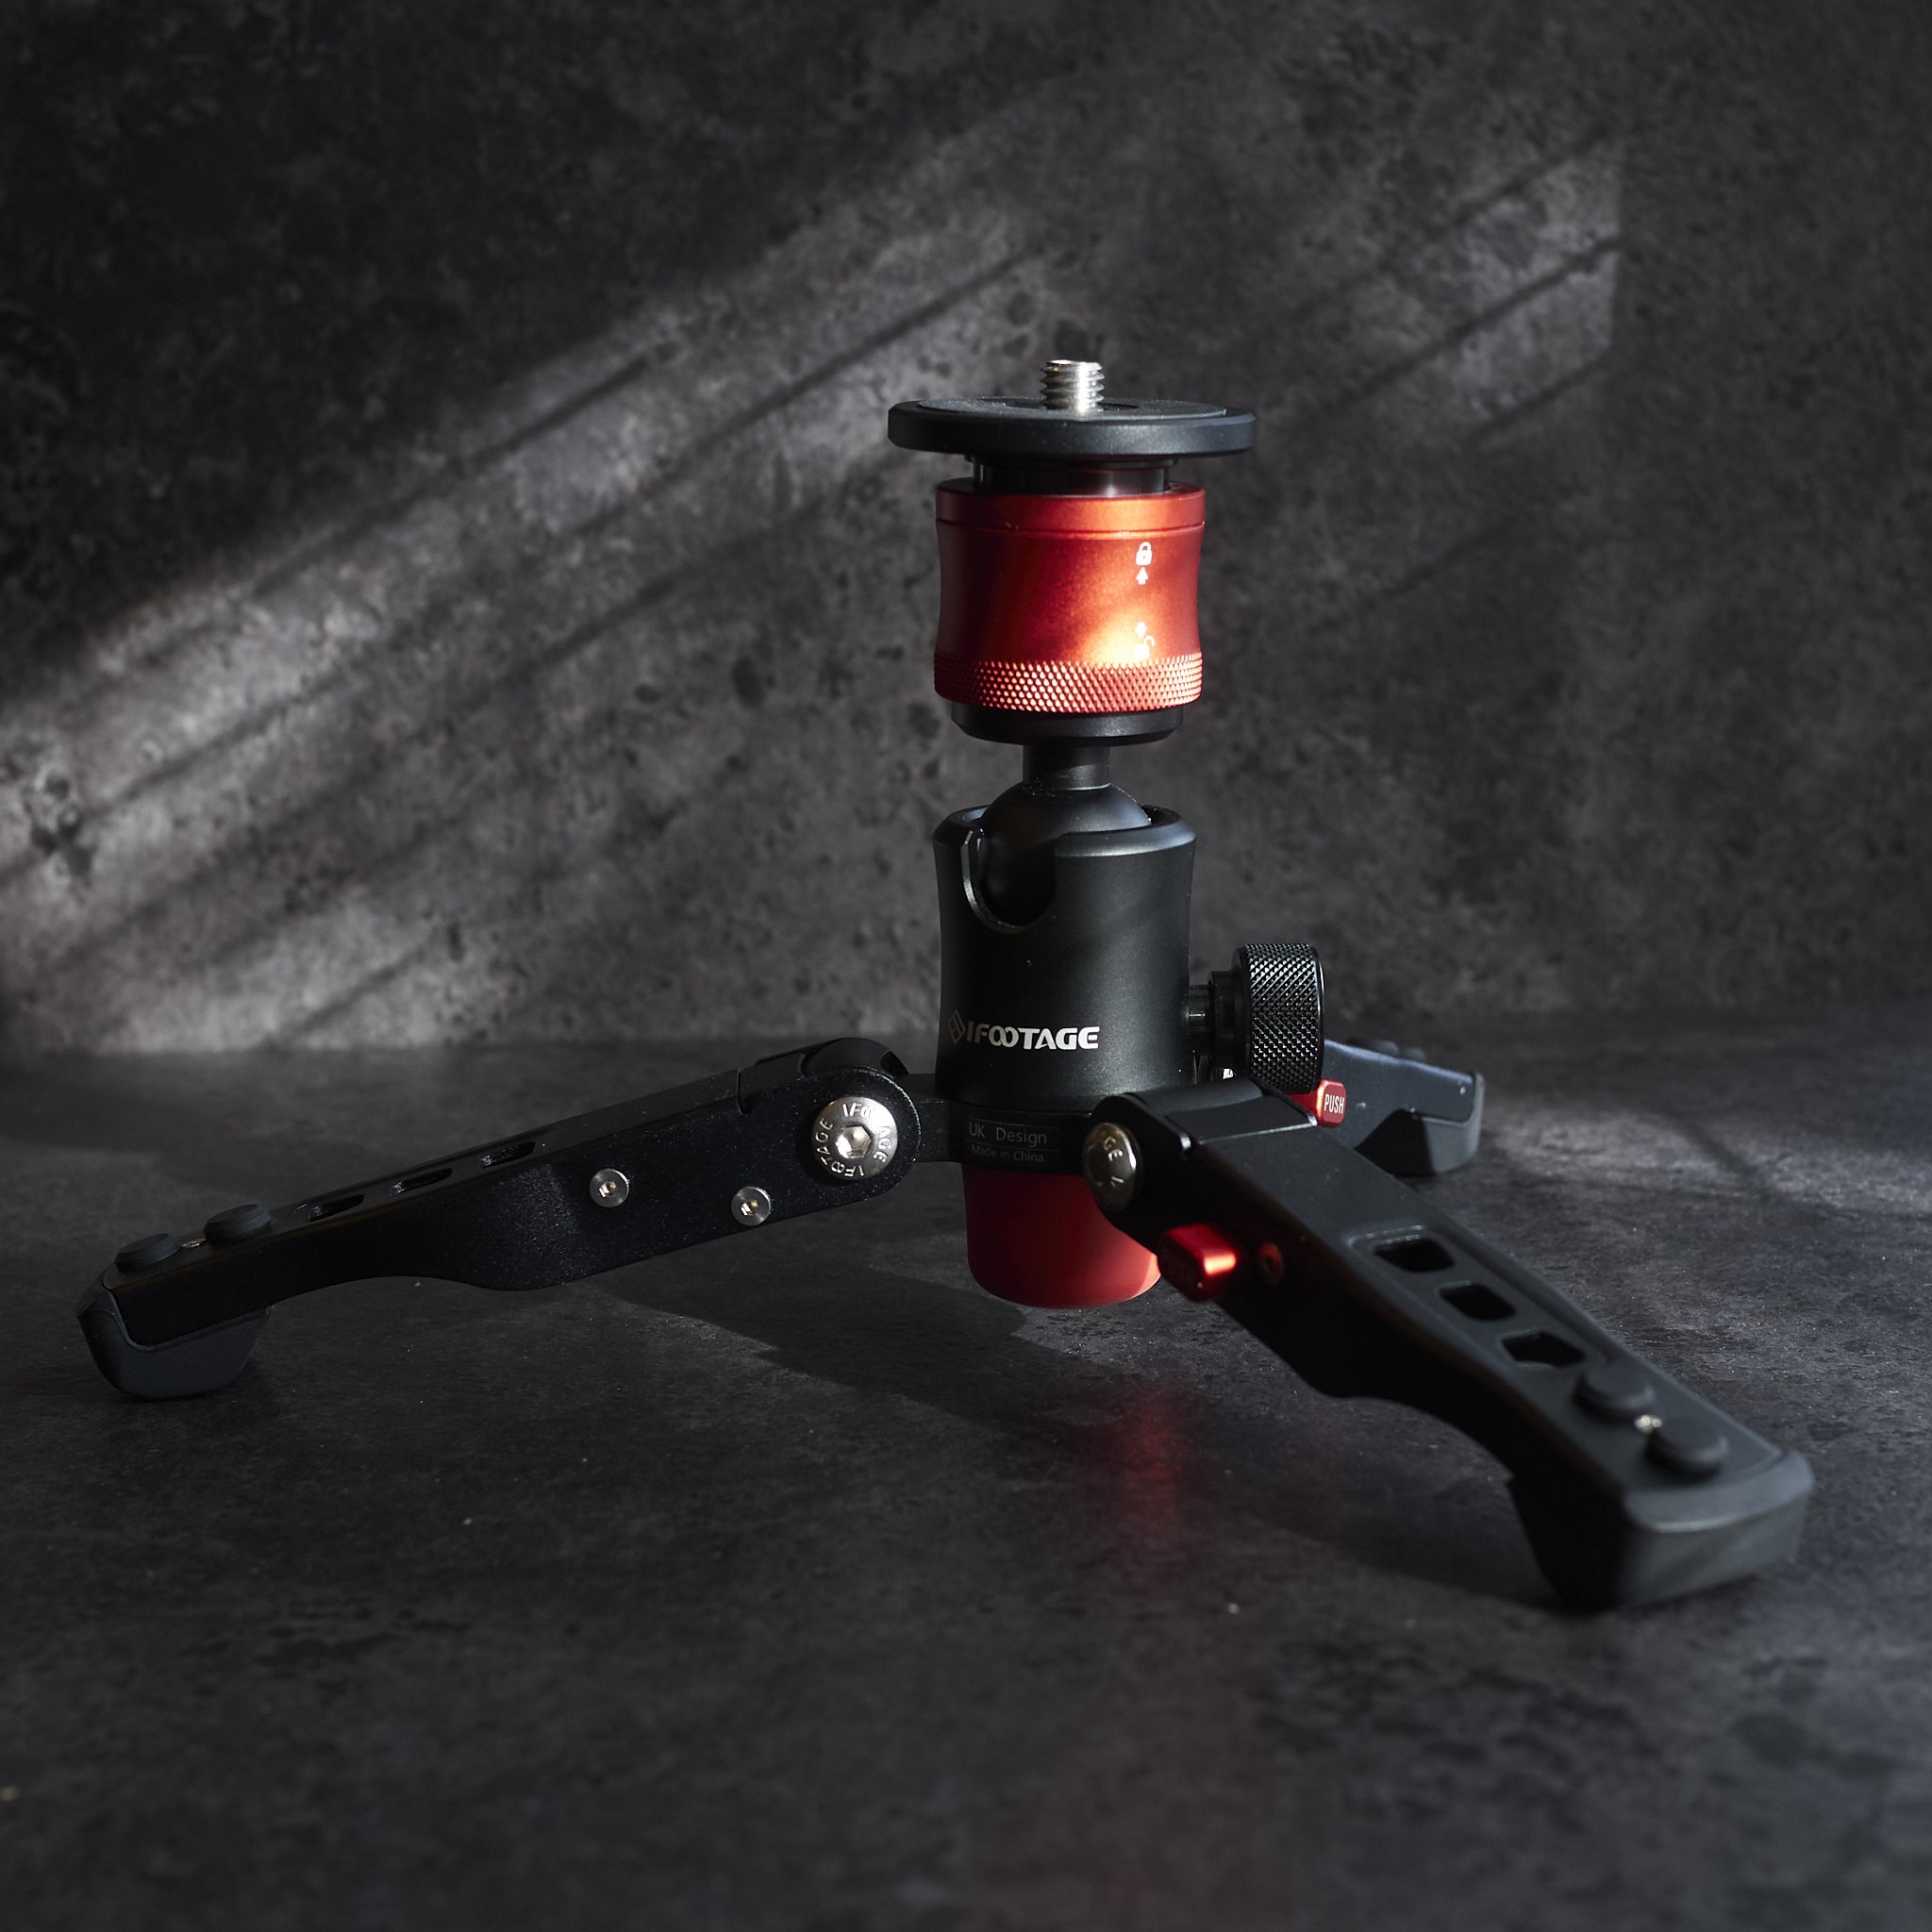
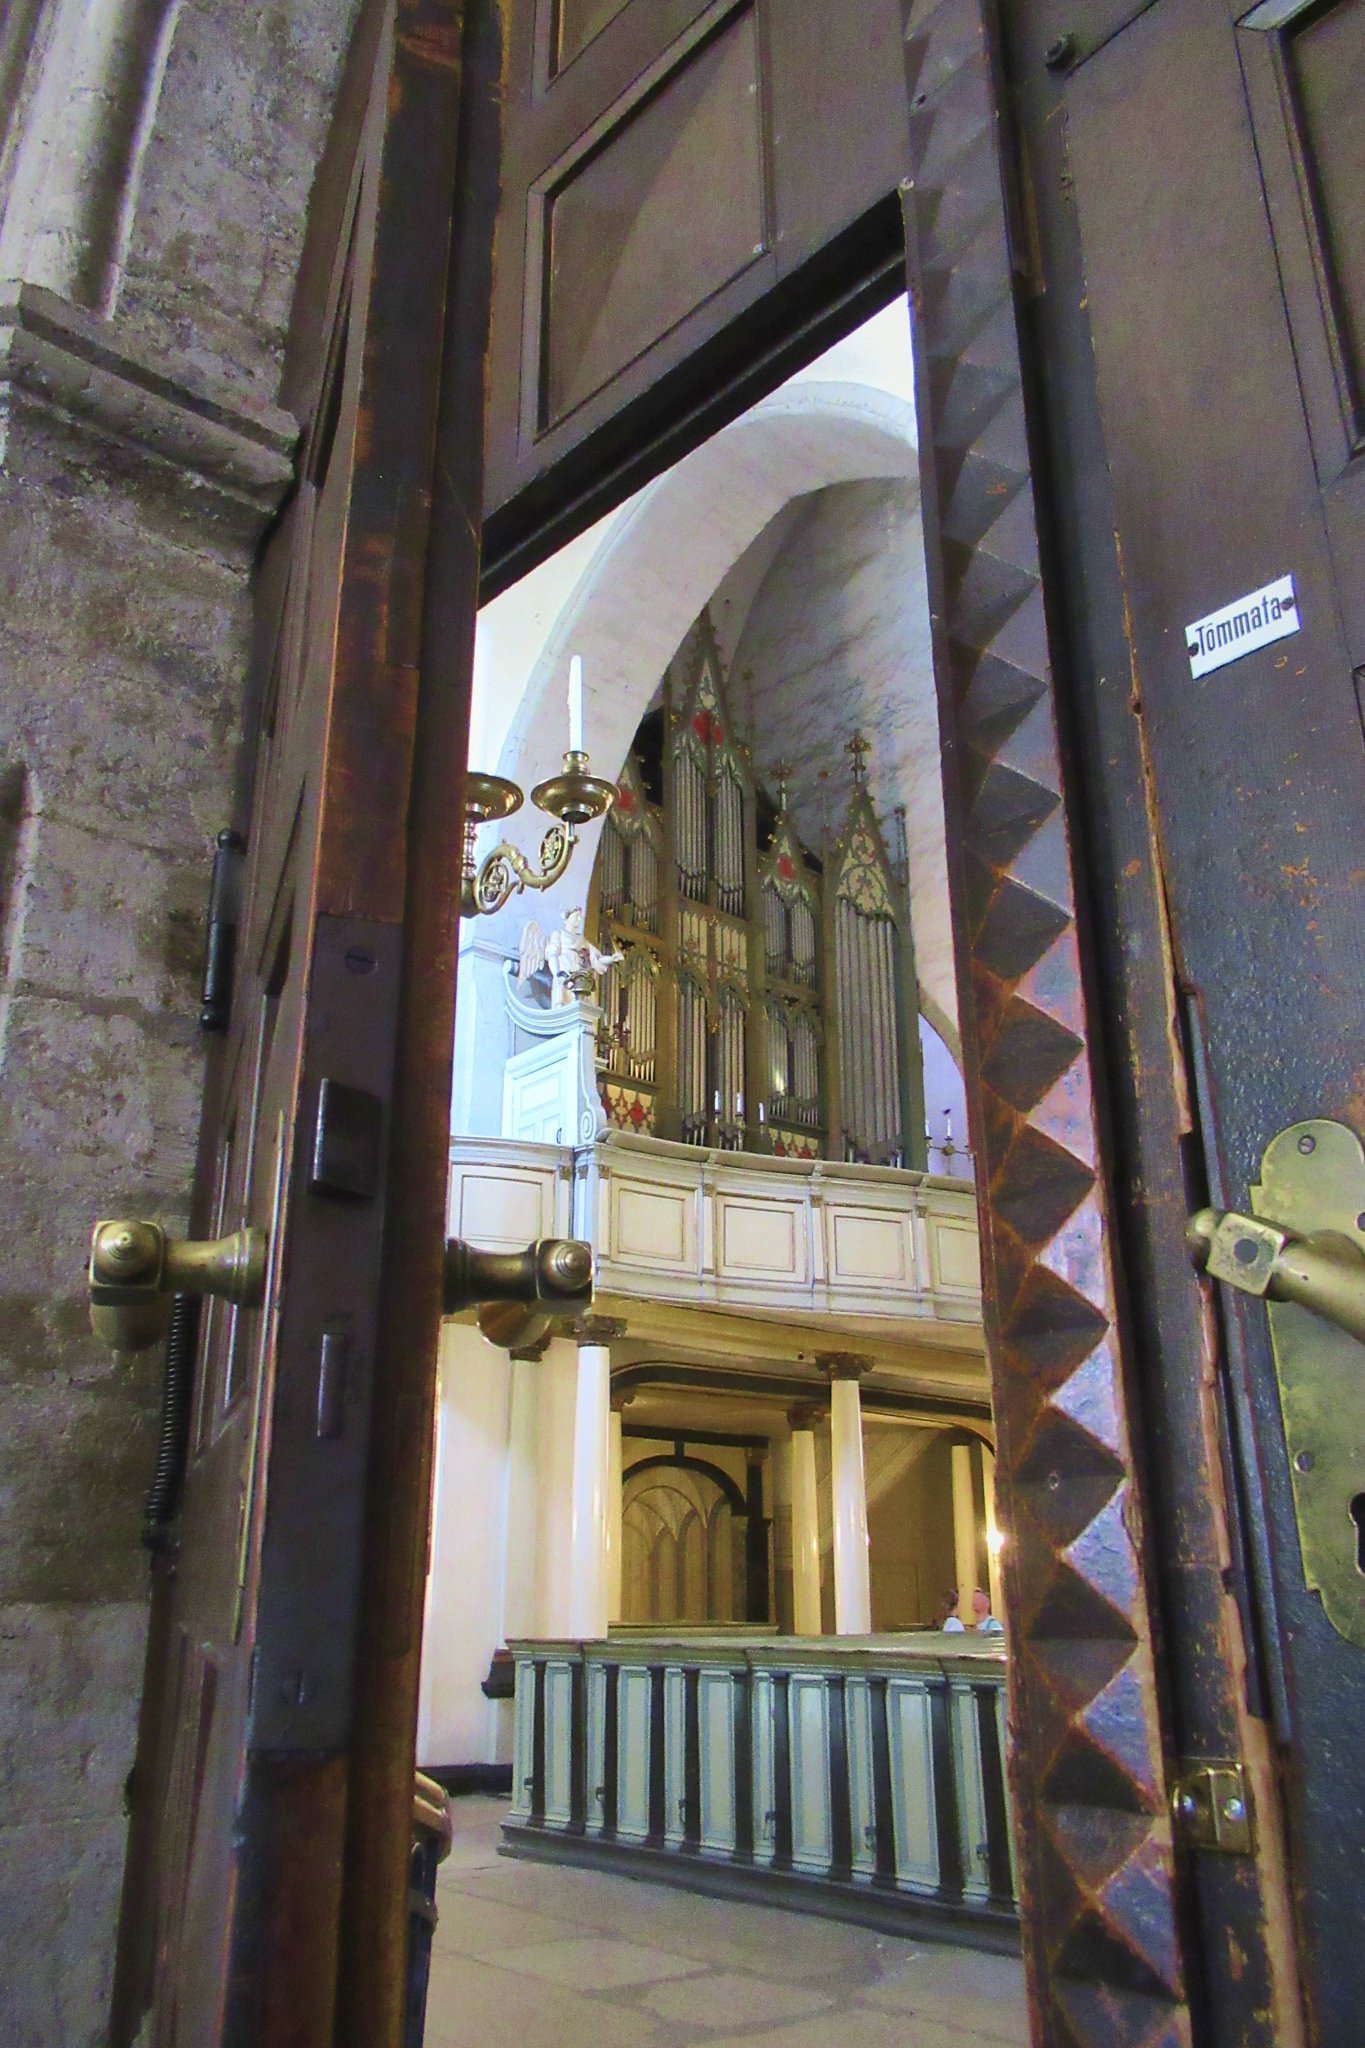
The layers and masks are more involved, the subject/background layers reminicent of the Lightroom system I used fleetingly at the paper, but I am expecting that like most things in C1, this will be more refined, less aggressive and generally smarter.

The layers mask chose the front wheel and leg as the subject.

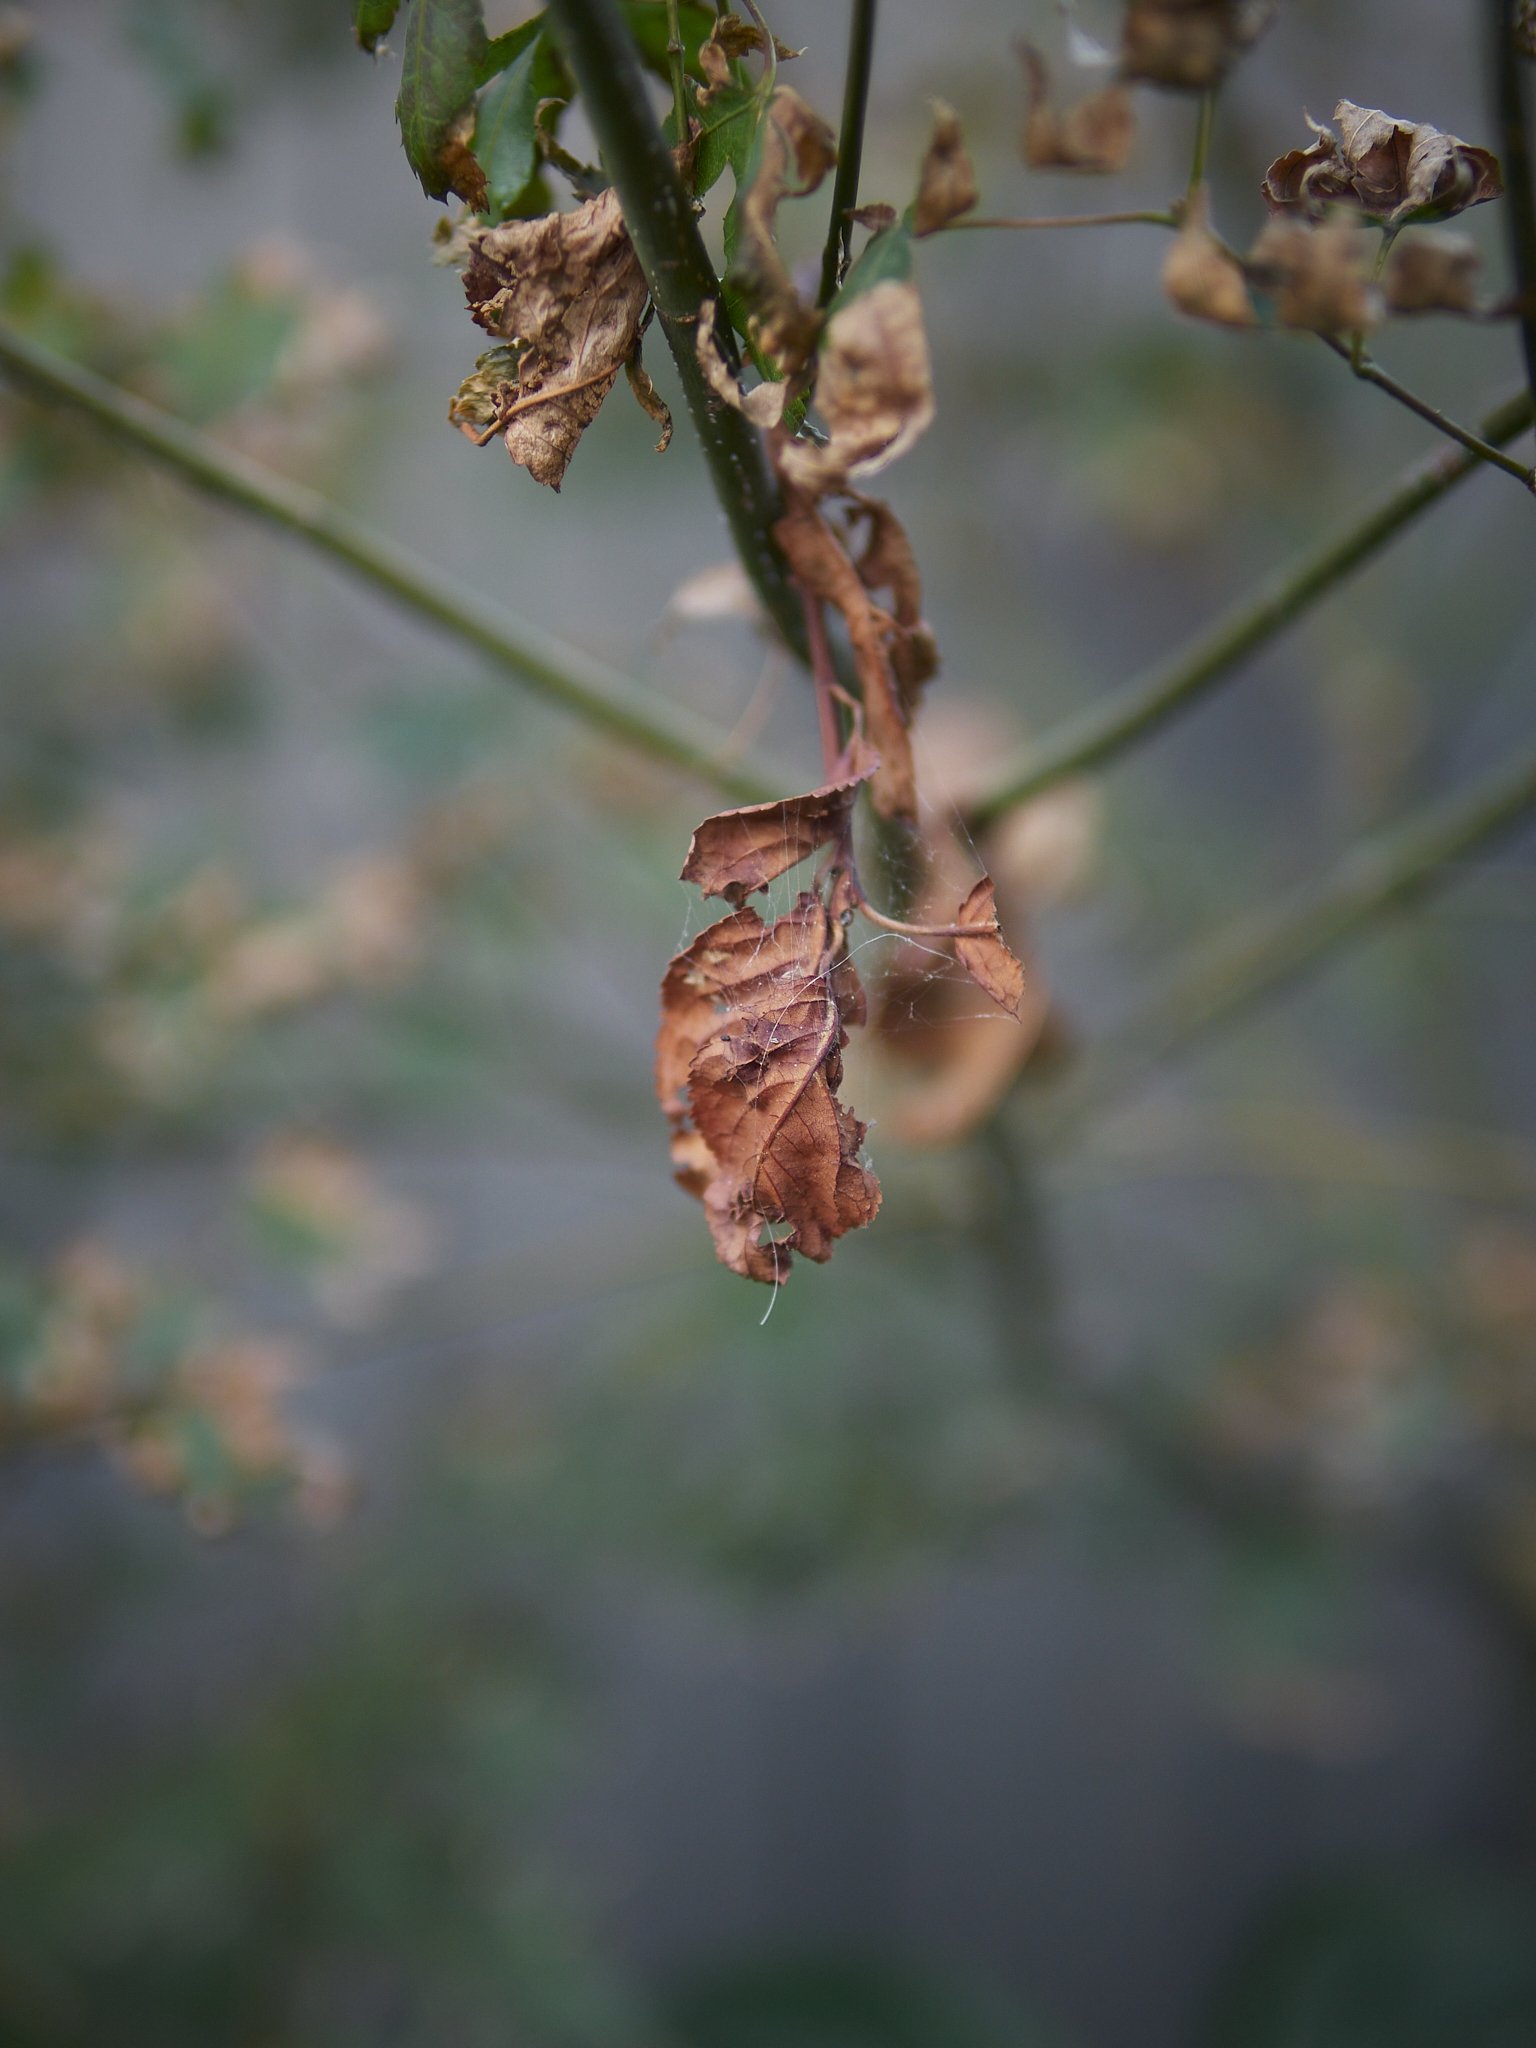
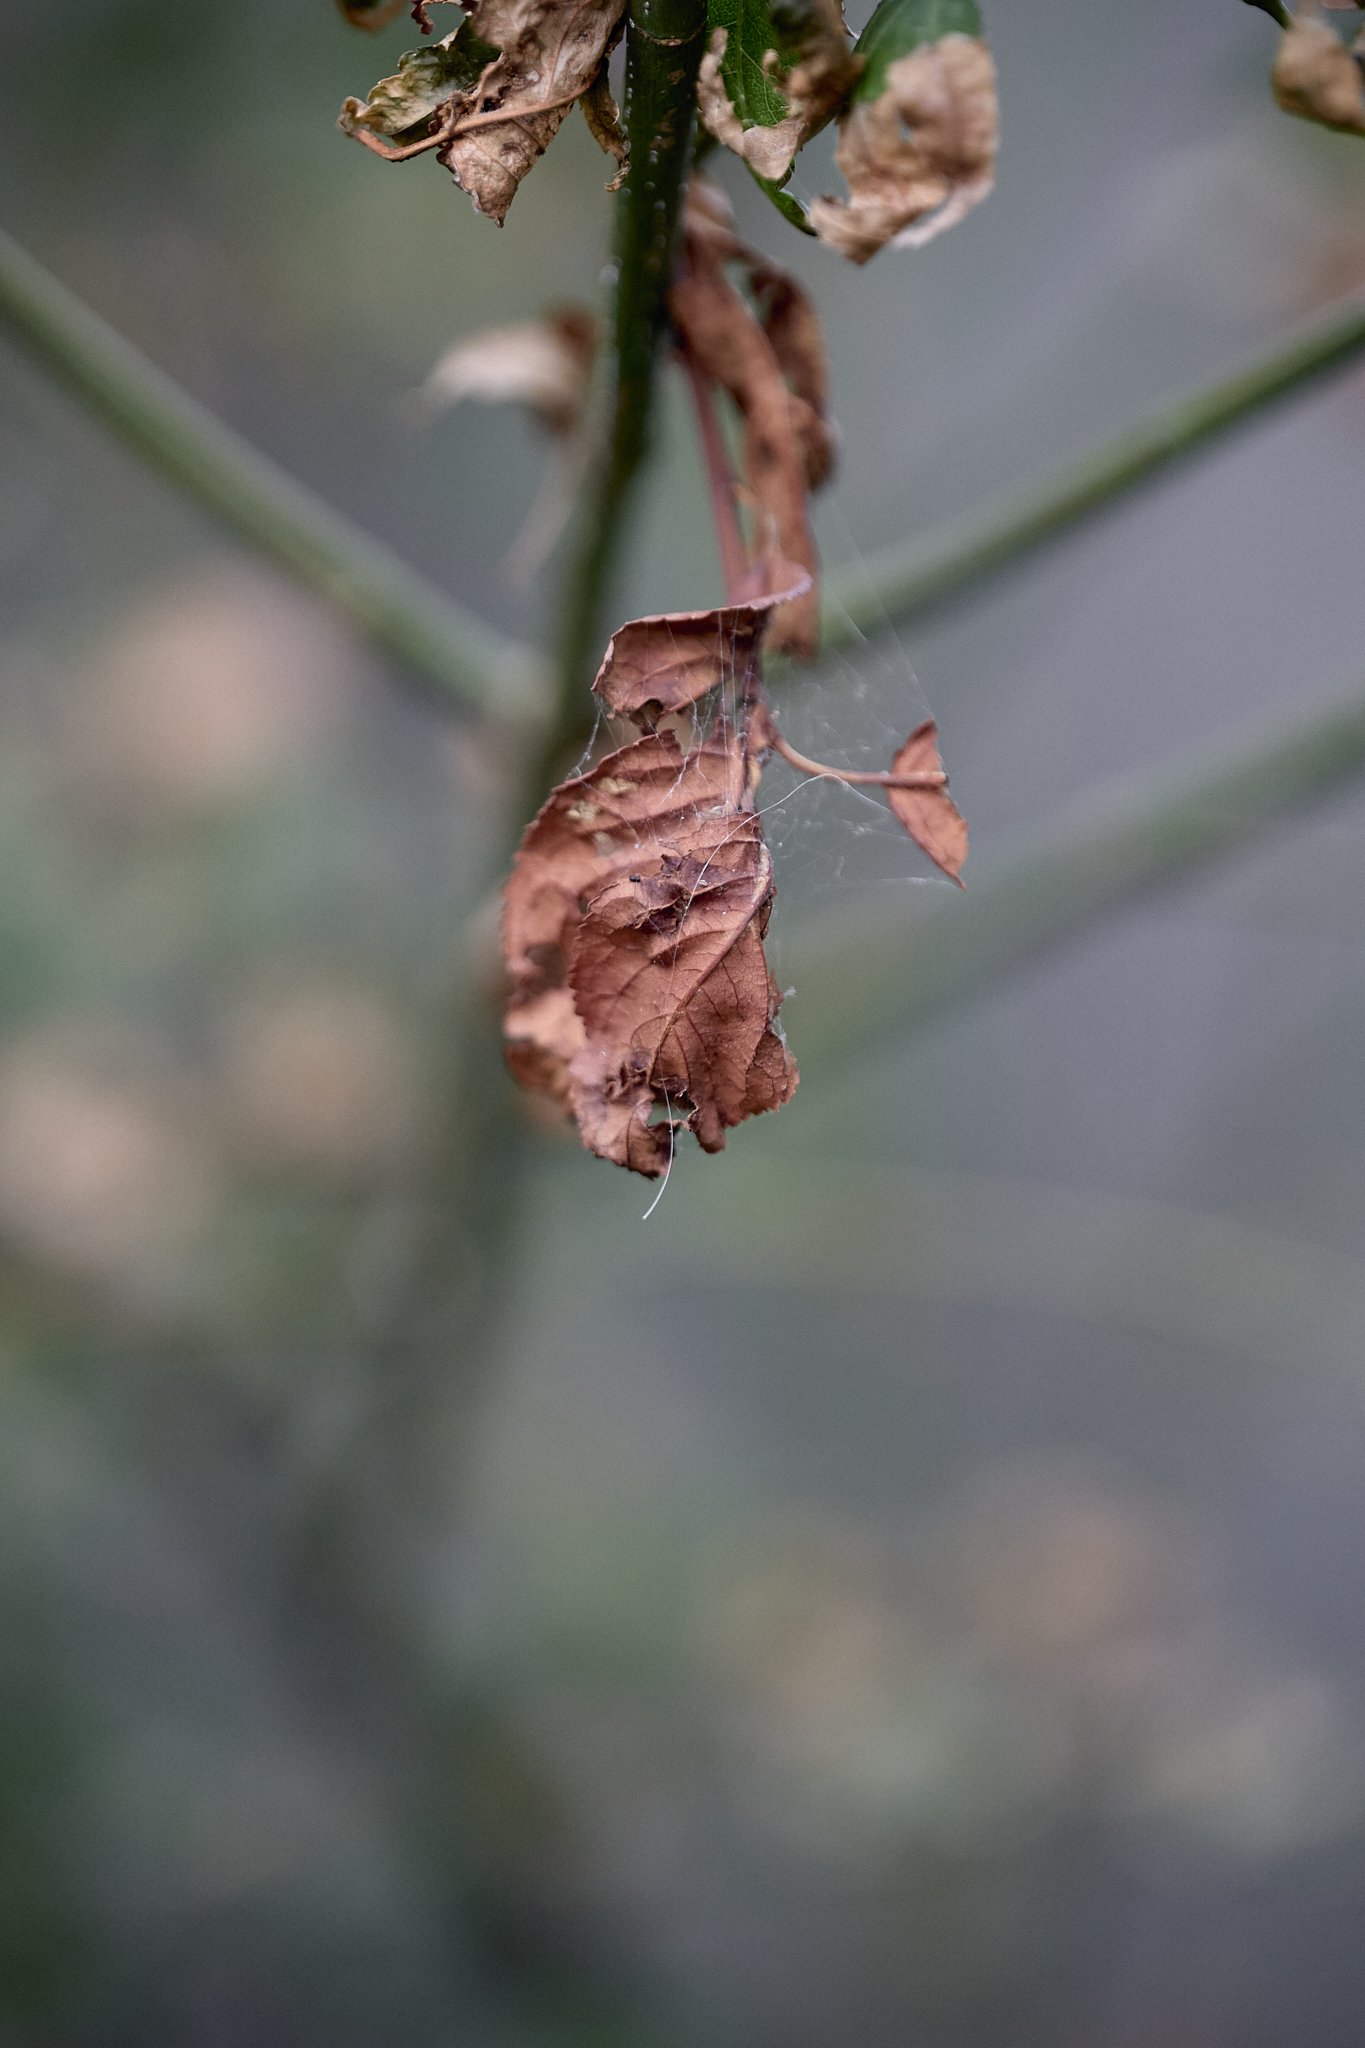
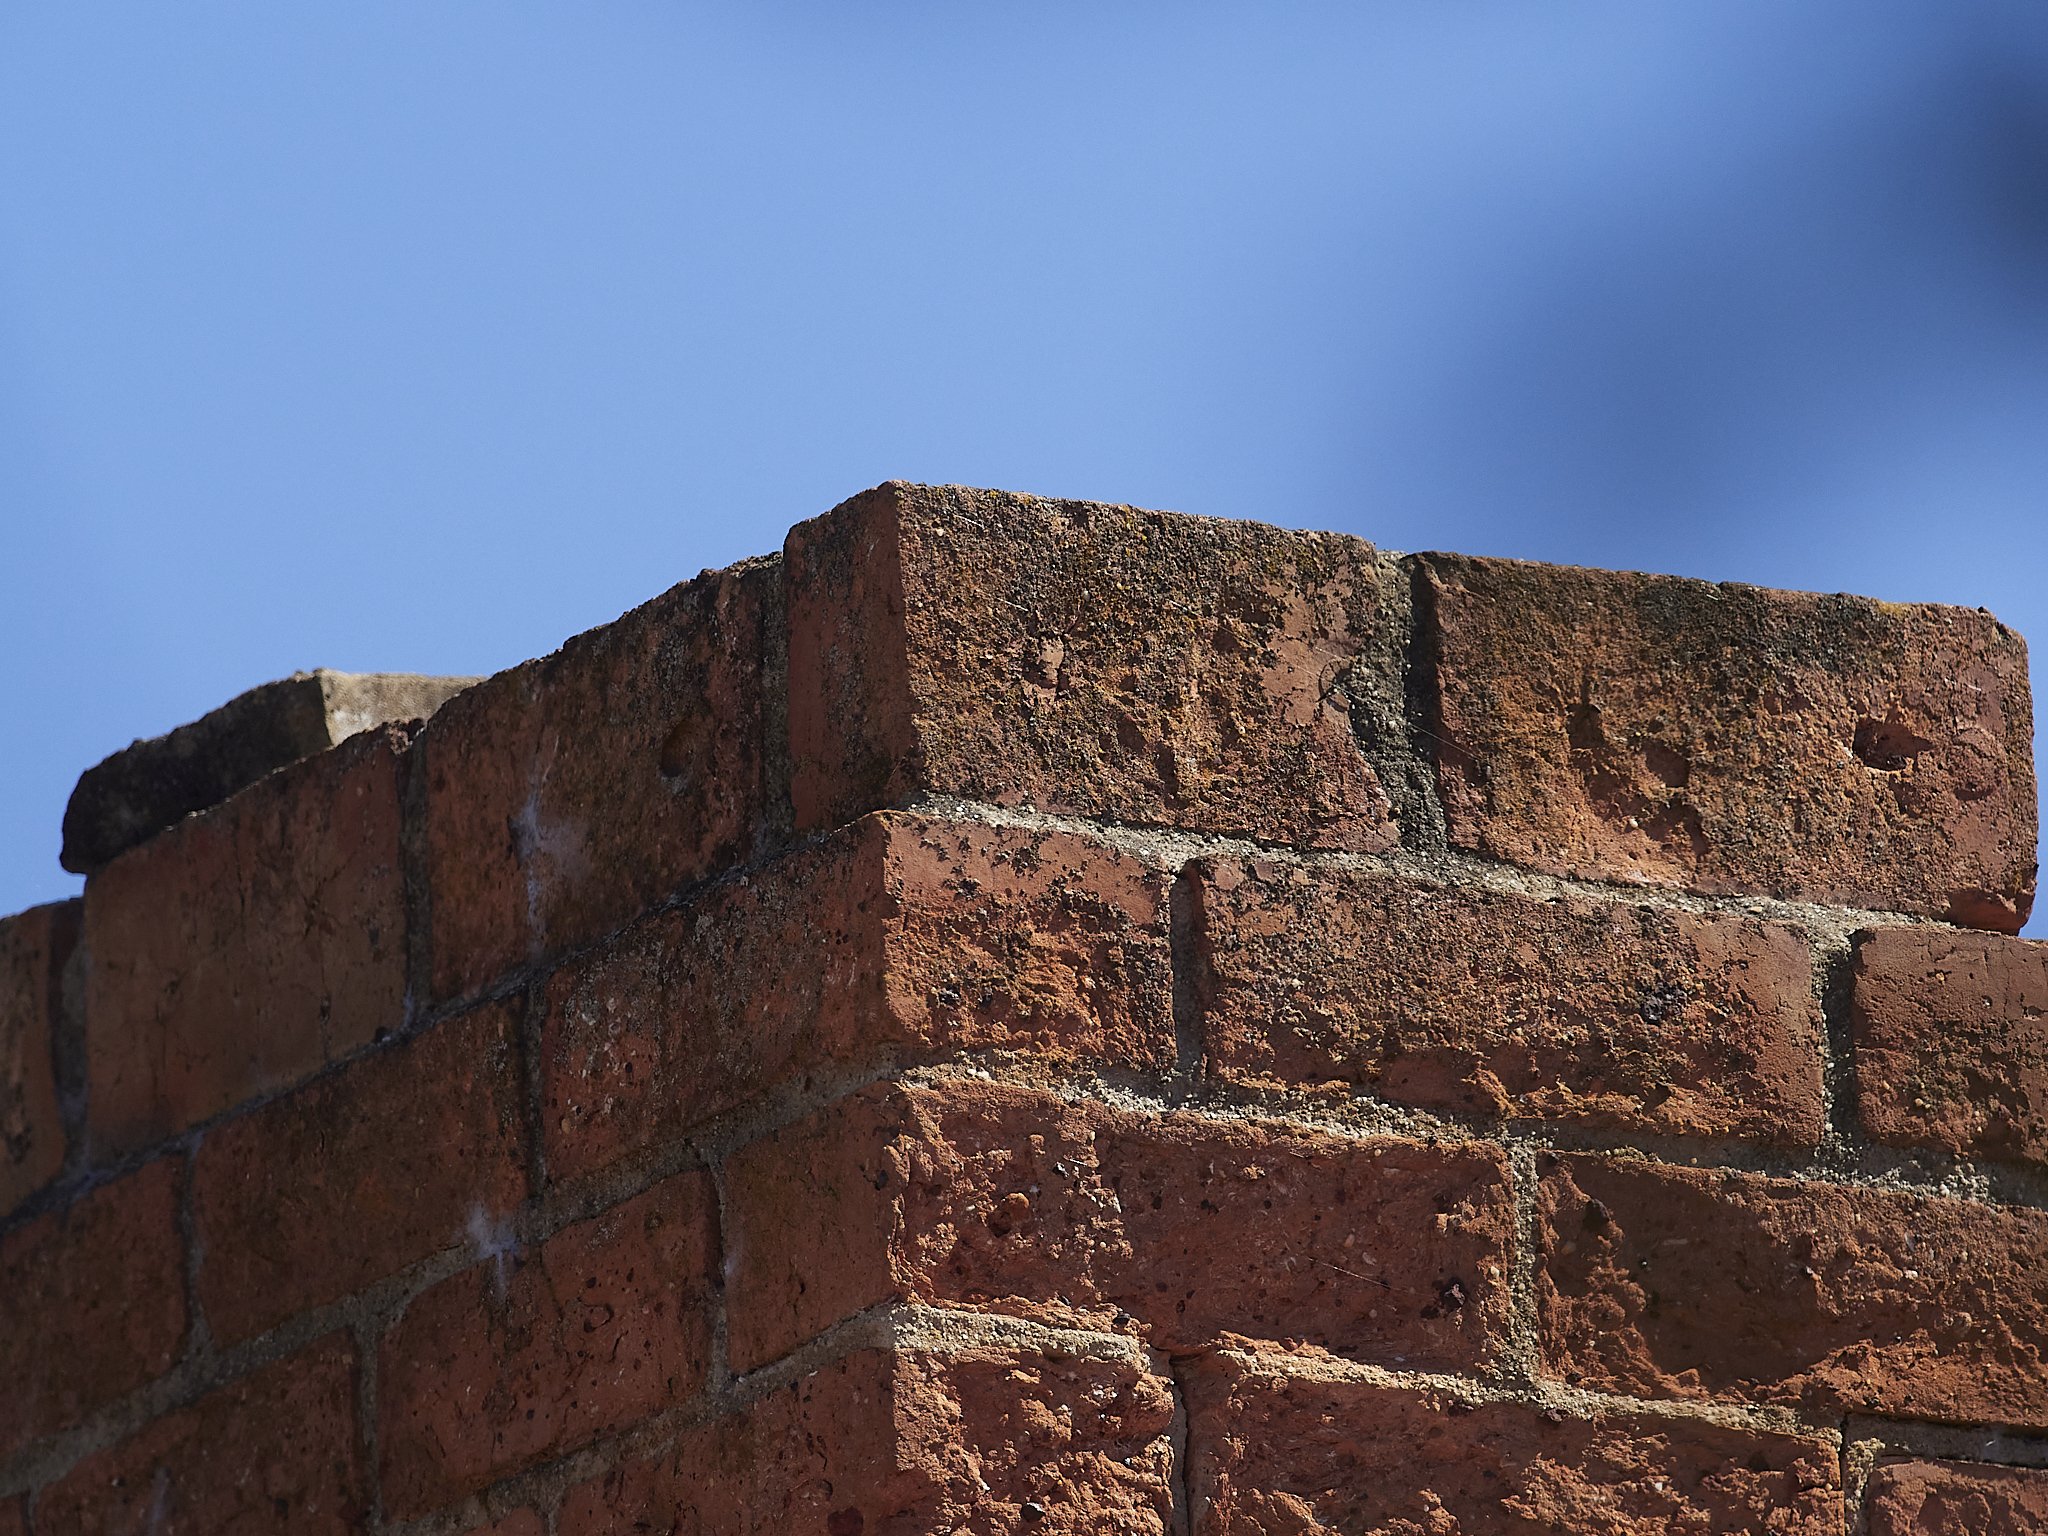
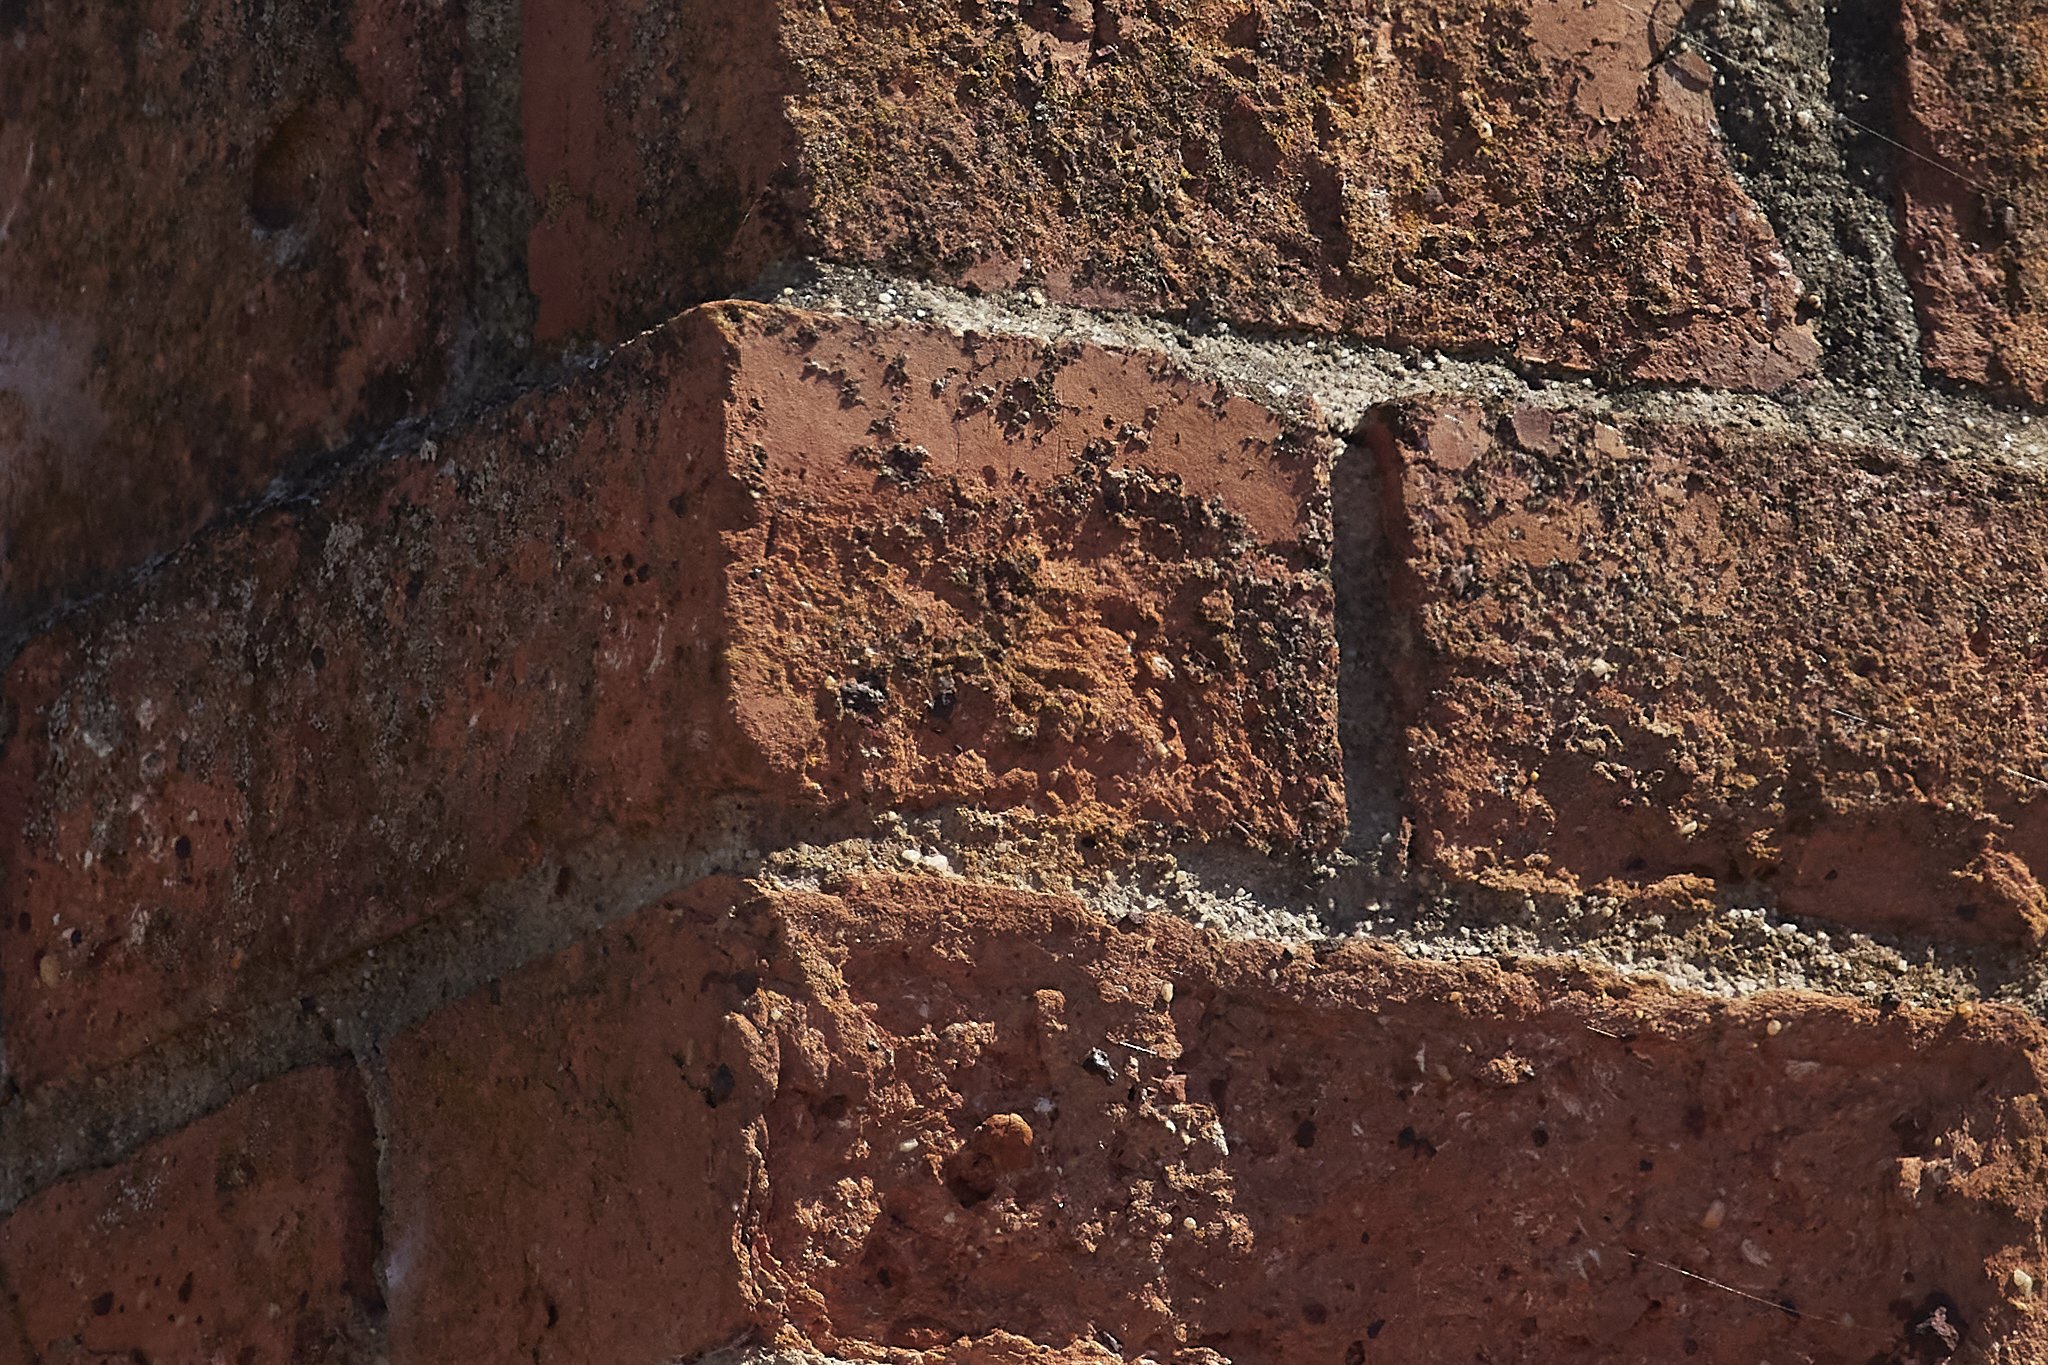
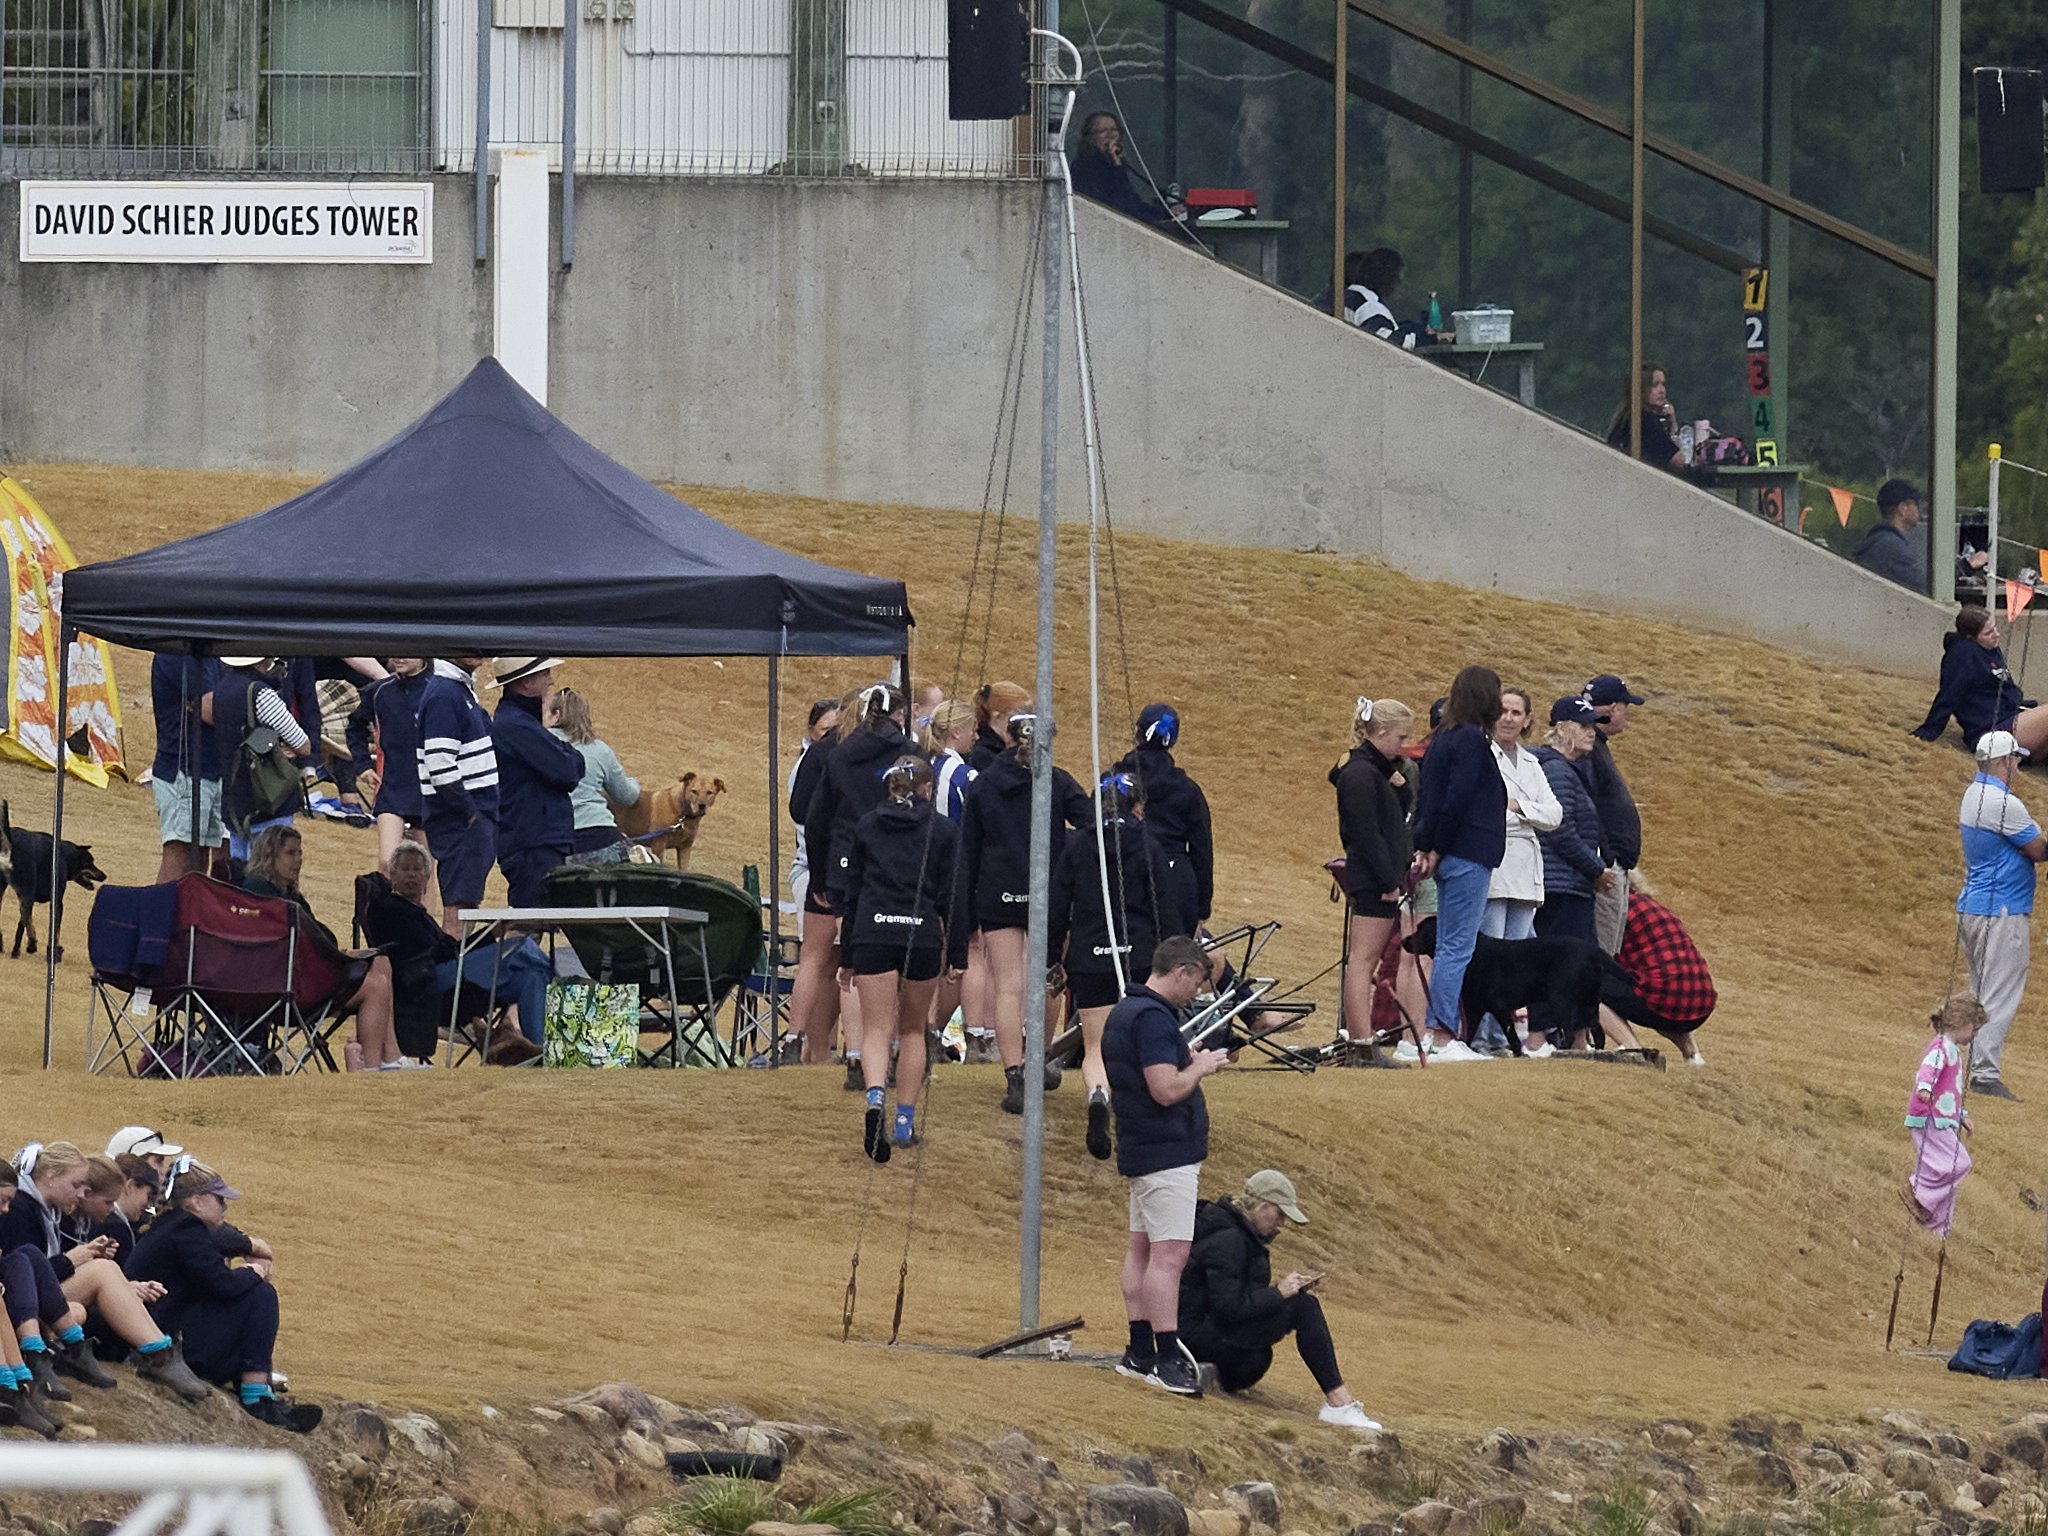
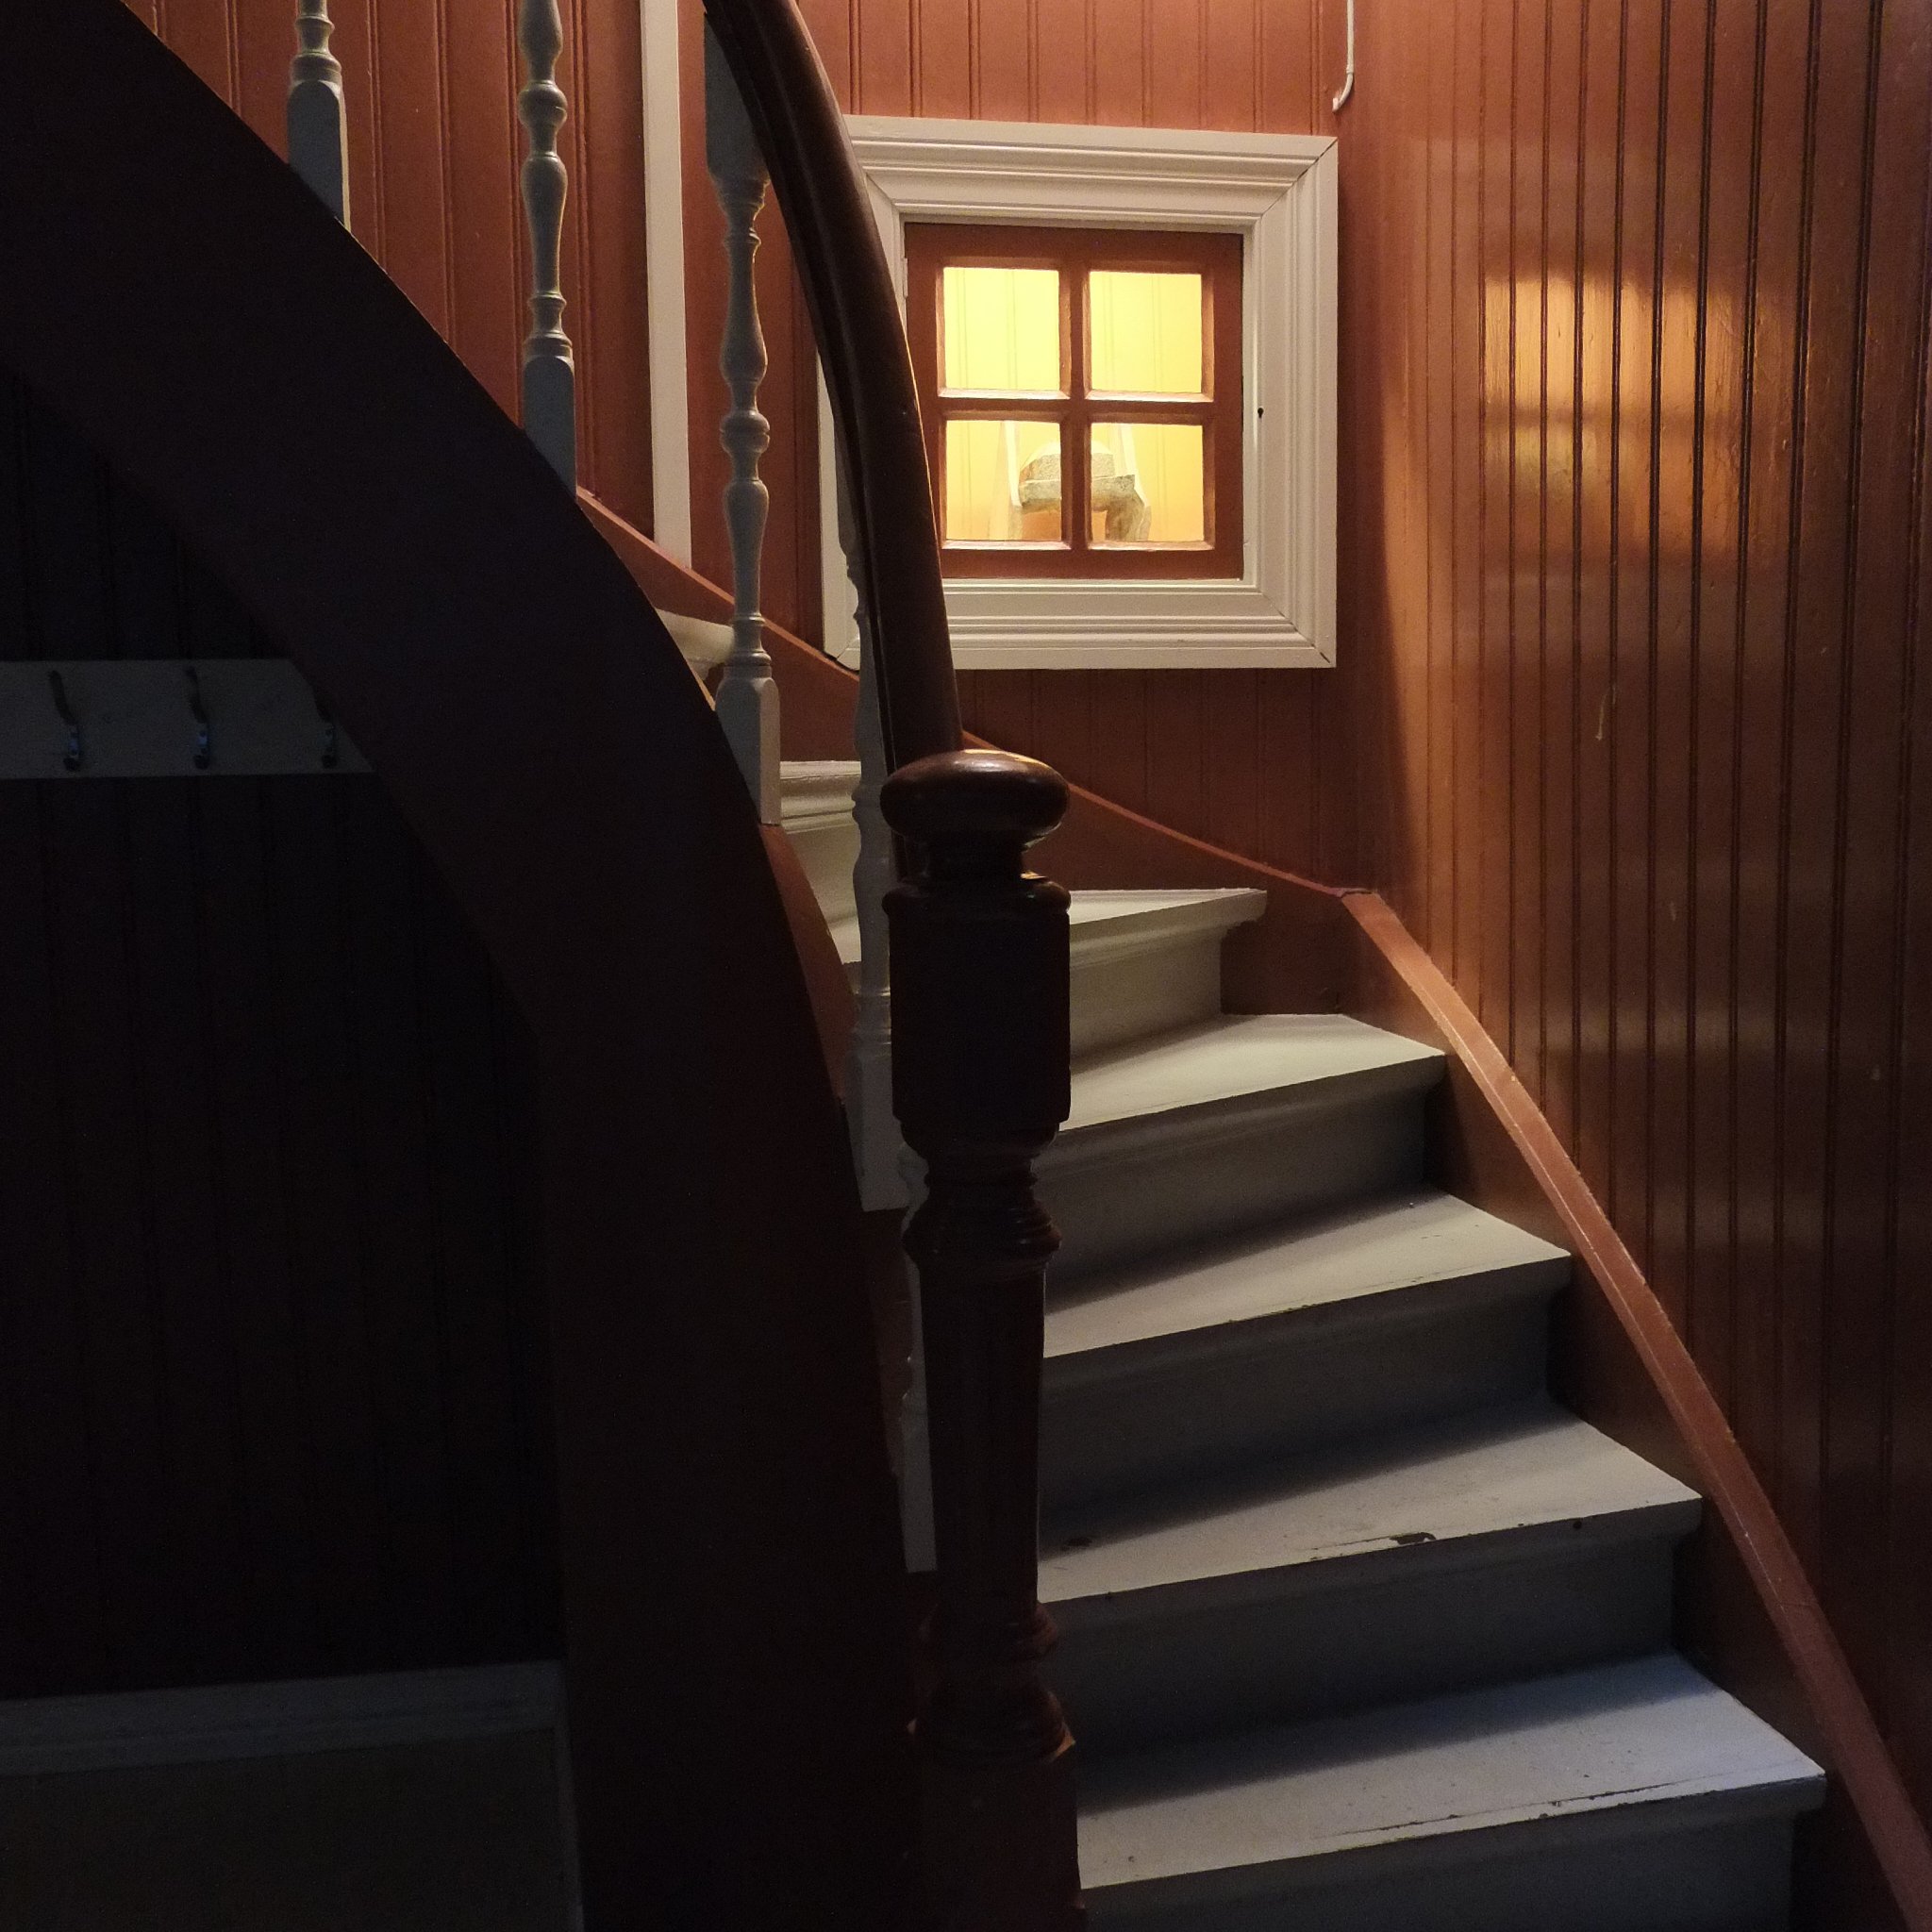
Shadows lifted, highlights gently recovered from pure white, but no colour shift. My usual process here would be to lift exposure, recover highlights, then add a little Dehaze if needed. Colour would then be dealt with if it shifted. Two less steps in this file.

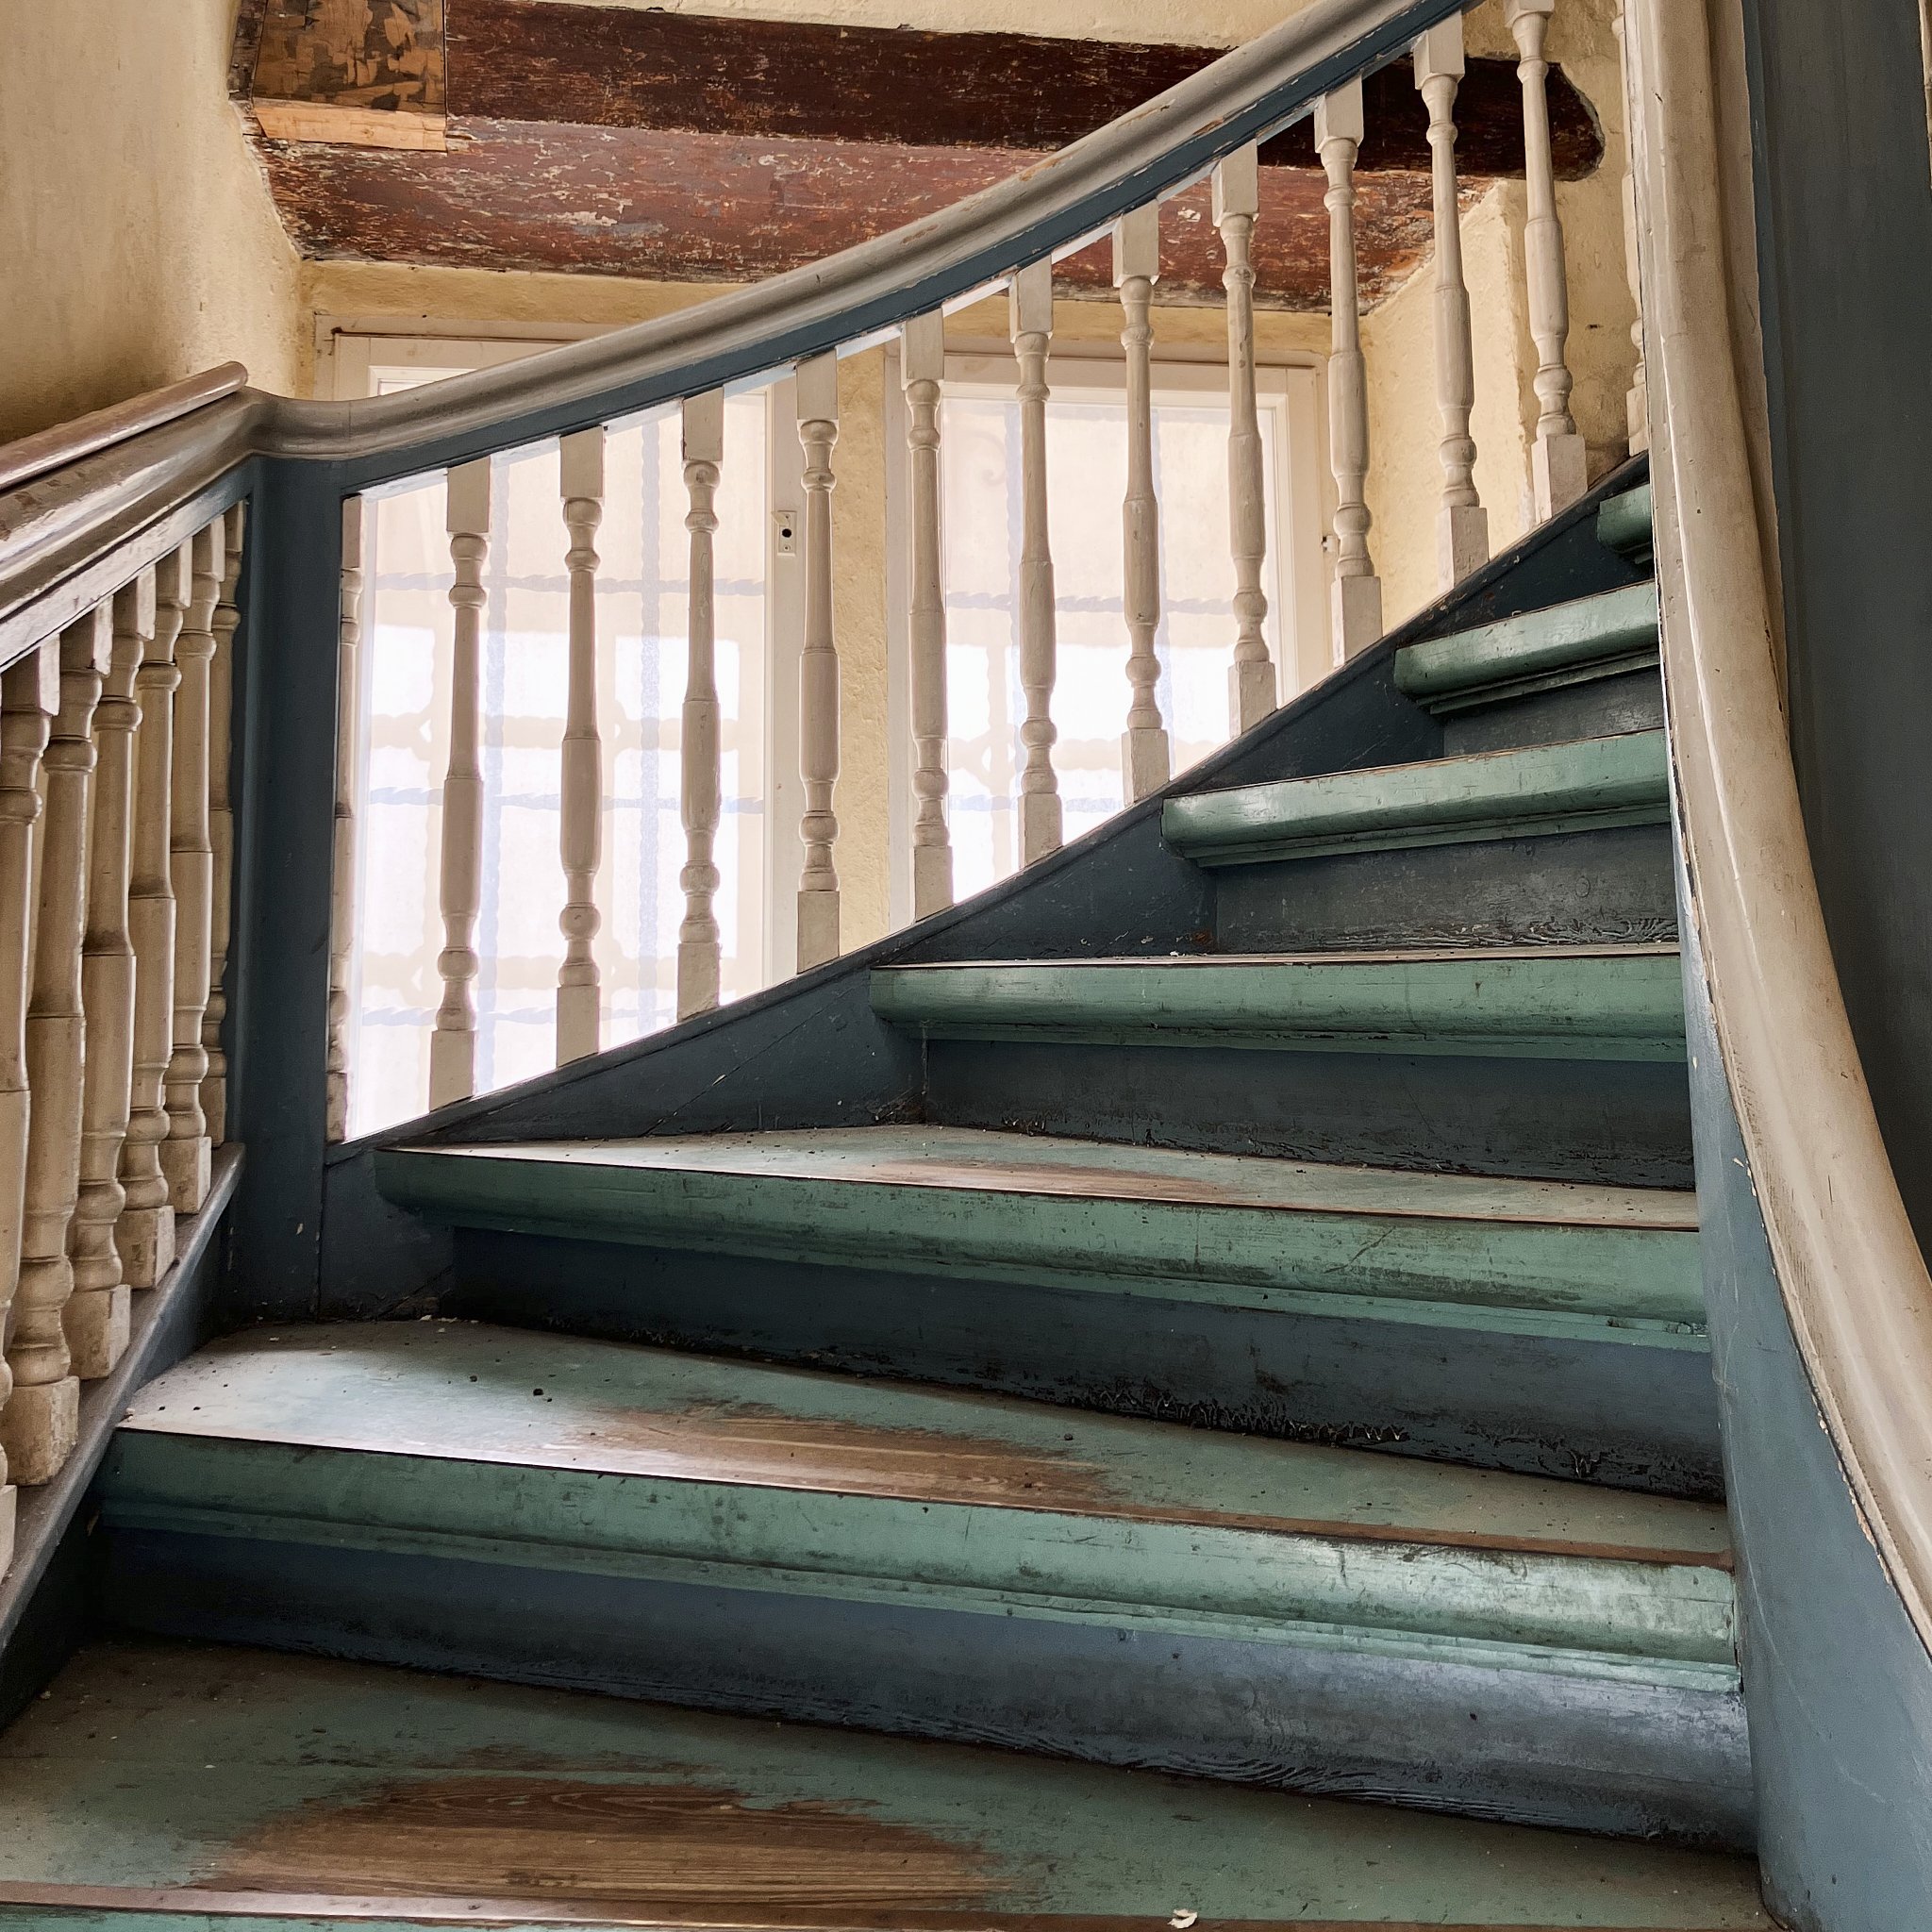
Early days, but so far I do like the subtle changes and the potential of the bigger ones.

Ed. exporting seems slower, the brush tool is more sure footed, the sharpening is better and the programme does stall occasionally, but I still like the results. I will upgrade ON1 No Noise to the new “AI” version soon, but already feel like I have taken a half step up.

Nikon And Red, Super Power Or Too Late

Nikon + Red

Industry powerhouse or missed opportunity?

Red created quite a wave when it first broke on to the scene, even apparently holding up the making of Avatar until the first camera was available. The company history is as bizarre as it is interesting.

Cemented in the cinema world as a player, but probably not the player the company felt they deserved, it is still respected. Arri and Sony Venice cameras are more commonly used for movie making and with the shift to “lesser” cameras, there is a feeling Red never reached its potential and never will, possibly becoming a smaller player in a shrinking segment of the market.

The fact RED owns a patent that controls RAW compression in higher end video formats means they would always wield some power in this space, but that has made them few friends. Nikon among others have challenged this in court, I guess wanting quite reasonably a similar playing field to fully open stills RAW compression, so buying the company means I guess, they win.

Filler image, because I have nothing else relevant.

It will be interesting to see if they choose to share as they argued, should happen, or pick up the reins of this selfish horse and ride on. We will get either a big or a small change either way.

Nikon, until recently was doing a really good job of taking their once unassailed dominance of the stills market and slowly let other brands eat their lunch. Slow to adapt to auto focus, they lost ground to Canon when they stubbornly stuck to their legacy mechanical mount.

This led to a similar languidness with digital and in video, their lack of prior credentials in this space along with being one of the slowest to transition to workable mirrorless put them behind well……. basically everyone (oh except Pentax/Ricoh). Even Olympus, with an even less video history at least got the mirrorless AF and stabiliser thing sorted.

Nikon acquiring Red means that the mild under achiever in video gets a bigger name in photography to add a large, if maybe aging and video apathetic supporter base. Nikon on the other hand, after finally showing much promise with the Z9, may now have the video chops to mix it with the other brands, who mostly have their own video depth already*. This is the crucial bit, as “prosumer” cameras become more desirable than unaffordable options.

A sub 10k video-centric Zx super camera to take on the A9 mk3 or pending SH1 mk2 and the only one with true RAW internal?

Market changing, if it happens.

The trick now will be converting a generation of Sony loyal young creators back to the fold, which maybe the Red label will help them do. Maybe not.

Personally, I feel it may be the jolt Panasonic, Fuji, Canon and even Sony need to expand their consumer level offerings, if Nikon and Red work hard in this growing space. I hope the usual Nikon lethargy is not going to achieve the opposite and take all the wind out of this otherwise innovative companies sails.

Canon needs to grant the key to the pro-grade room cheaper (ditch the “cripple hammer”), Fuji needs to build on their recent wins, Sony need to stop feature swapping and just put all the good in their newer cameras, Panasonic needs to release their new models and push forward and Sony need to do a little of all of these.

Can Nikon and Red magic-up something that will beat them all?

Might be an interesting next few years.

*Fuji, Panasonic, Sony and Canon all have proven pro-end video divisions, Nikon, Olympus and Pentax, not so much.


LUTs, Creative Conformity And Going Rogue

Ok, a bit over the top, but this is a serious topic, something that I think needs a bit of a roll-back for the good of the generation coming through.

First, what is a LUT?

A LUT is a saved “Look Up Table” of processed settings saved as a pre-set and applied to video footage to balance low contrast and often de-saturated Log or Flat footage to better suit the needs of the creator. Add a cool name and they can seem like a gateway to something otherwise out of reach, which is the world of the professional colourist.

Using the standard profiles already in the camera are technically a LUT also, just more limiting ones.

In stills parlance, a LUT is simply a pre-set, something that has never really been a thing (otherwise known as a jpeg), because every still image is basically its own precious little snow-flake.

If you shoot in locked-down all-manual mode, which requires a controlled space and identical end requirements, then a pre-set could be applied to a batch (called, you guessed it, batch processing), but it is likely each file will still need it’s own little tweak to lift it from the others. Even jpegs are only the base-line colour and contrast settings, responding to changing situations as they go.

An ideal location to shoot in manual and batch process, but only as a start. Every image needed its own issues corrected, depending on subject angle, lighting and cropping.

This is because we look at stills as individual stills. Each has its own presence, none are identical unless they actually are. Video is similar in a clip equals frame sense, but needs more consistency across clips to some extent, because unlike stills, which even if presented in a series do not have to match, video is interconnected, so applying a LUT is often a decent starting place. It is not however, the end point.

The lesson starting videographers can take from stills shooters is important here.

The temptation is to apply a LUT, usually one made by someone else, to your footage as a good base line, often even the only grade applied, but it can be a lazy trap. The LUT is not the whole story, it is not the one answer and it is not necessarily your answer.

Personally I rarely see one that is close to my own interpretation of my work. If I want to look “on trend” or faux cinematic, then yeah, there are plenty. but I guess the stills photographer in me needs to start from scratch each project, to feel the growth of a project as I go and let what I see tell me what it wants.

Anything else, just seems like I give creative input to a process, and not a completely creative one.

So why and how hard do I make things for my self?

Well it turns out, there are several tools we can use that make the whole LUT thing go away painlessly.

The first (in Da Vinci) is the ability to apply the same setting to your clip as the previous one or two. This is effectively a short term memory LUT. Ideal for two camera interviews, this means you get your first two angles right, then just jump back one or two every time you want to grade the next clip.

The second is to create your own LUT, which is to say, you get your look right, then save it as a short or long term recall. The advantage here of course is, you can make a custom LUT for any project, modify it, return to it and go again, evolve it, contrast with it, but you are always working with your LUT, not one that have been piped in from another source.

These are what I will call mini or situational LUTs. You could even make one just for interviews with a certain camera, lens and lighting format.

The benefits, apart from above are the control you exert on your work and what you will learn. It is not easy, nor automatically programmed to grow evenly for all, but that is life. In a nut-shell, if it is worth doing, it is worth doing from scratch and learning the mechanics of the process.

This is apparently “correct” according to Capture 1. For my taste, I like it a little brighter and warmer, but who is to say, other than you for your work, what is right.

I am a stills shooter of over thirty years, so colour science, colour reactions and “grading” in many forms are something I am familiar with, but I will be the first to admit, I fail as often as any one else, but the more you practice……… .

Something I have noticed and I feel it is part of the process forming perceptions is the huge difference between the indie film maker and more regular Hollywood looks.

Stark, perfect reality with rich, vibrant colour is available to us, but for many, taking all this perfection and deliberately softening it is the desired outcome. Ironically, it is often film that looks cleaner than digital indie video.

Neither path is ascendant, both are relevant, only time will tell where they end up in our historical memory.

Why not go for crisp, rich and contrasty?

Like a lot of people who lived through the actual retro period and remembering we were always chasing better, cleaner and stronger results, I lean towards the richer, crisper end of rendering, something I rarely find a LUT for.

So, to sum up, LUT’s are sometimes handy, often efficient, but before you get depressed and feel the whole thing is getting too hard, maybe pulling back and looking at the problem in its simplest form holds the answer.

What do you want and how do you get there.

For me, Flat profile on my newer cameras with a mild grade “by eye” is plenty.


Shining A Light

Lots of video interviews are on the horizon.

Speed with portability, need to be balanced with quality and consistency.

To this end, I have been looking at my far too many light mods for Bowens mount, brollies and others.

I would go first to umbrellas for stills, but for video, light efficiency, direction and quality of the light with full control are more important, so soft boxes with grids are cleaner. Bowens mounts, which are the attachment point for my 5 COB lights also make sense.

The question is, are they always the best option.

For a single person interview, a large to medium soft box creates a good base often from above camera/eye height and either in front or behind depending on the look you want. You can also use a smaller one, but getting closer is the key or using some bounce or fill.

Add a “hair” or fill light (depending on where you put the key) and some background interest and you are set for this scenario.

Big and small, these are both easy to use.

Two people?

Double it basically, with the added benefit of each key light providing the edge light for the other person, assuming you are placing the key behind the subject not in front. Placing it behind has several advantages. It looks more cinematic shooting into the shadow side (more shadow, more drama), but also it cleans up the real estate in front of the subject allowing for movements and camera placement.

Another small advantage of this is the C-cam shot, light down the barrel with the subject silhouetted, which can be a strong option.

A group?

Ok, it gets harder here and probably out of my use case, but what if one light could do all of these, or add that special extra element to the above?

Lanterns have been on my radar for a while. They started innocently enough with a few popping up in top end ranges as an almost invitation only, special cinematographer secret, then the cheap rip-offs arrived in a flood and with them more awareness, but these were a little over priced and under made, so I stayed curious, but distant.

For a stills shooter also, lanterns are not a first cab off the mod ranks either.

The cinematic world has always been using this type of lighting in with all the other types it uses, but like a lot of things cinematic, it was a mystery to most of the rest of us.

Lanterns give a soft 180 degree light with the ability to control the spread using a provided curtain. Unlike soft boxes the spread allows for a natural, equally spread overhead glow, basically a replacement for a real or “practical” light, something you can drop right in over multiple subjects covering all their faces.

You could light up a card table of people evenly (or not), add fill into an existing soft box setup or push it in from the side and with even wider spread than the soft box. The curtain allows for more control, but basically it is wide and soft.

You can even use it to shift the perceived “location” of a real overhead light and change its intensity.

The lantern is the easiest way of adding soft, wide light with a relatively small footprint. It is the umbrella of the video world.

After re-viewing my options recently, the Smallrig RA-L65 appealed most. For a little more than the cheaper offerings, I will get the excellent construction values of the RA-D55 and matching light tone.

My very portable interview kit will likely consist of;

2x tripod mounted S5’s with either the matched Lumix-S or 7 Artisan 35 and 50mm lenses (they can be used in a 35/50, 50/50 or 35/75 combination with S35 format or simply shot in 4k and cropped) and the Lumix has the 85mm option.

The G9II with 24mm Sirui or Sigma 30mm are the optional third angle, mainly because this is a better movement cam and if used full throttle, it quickly outstrips the S5’s. This could and would likely also be the “floating” camera, mixing slider, static and hand held movements etc. It also has a genuine cinema wide angle lens option.

I used the G9/Sirui and S5/35mm combo recently and the Sirui was cooler than than the 7A lens, but graded easily to match.

I can mix all of these up with longer or wider lenses, but the base set is a good start.

All of this and more will fit in the Domke 217 roller.

Lighting is a mix of options and levels.

Travelling super light and without power it would be the Amaran 60d and the lantern or a small soft box and my RB9 as a hair light. I have the option of 1 or 2 Neewer LED panels, but probably not or only the 480. All this fits into the 5.11 bag.

Mods are the two Smallrigs (RA-D55 and RA-L65) or the Apurture Lightdome Se. I also carry some sheers and cloth flags in case, with clips, stands etc, but most of this is in the car in case.

If I have power, I will use my 4 wall powered COB and 2 LED lights usually with soft boxes, the lantern or sheers. This fits in a small suitcase. None of these are killer lights, but I have over 400w overall.

I would use the same mods as above and a couple of bigger ones.

The background is as found or LED augmented using a couple of Neewer short tubes.

Ed. It came today. The tube is long, about twice the length of the smaller soft box and setup it is also much bigger, but setting it up could not have been easier. You push down from the top until the internal bracket catches on the dual hooks at the top. Done. The skirt velcros on and can be rolled up on one or all of the three sides if needed. It even makes setting up the soft box look tedious.

Yes, But Can They Work As A Team?

With a small clutch of cinema lenses at hand I guess the question to be asked is “do they, or can they match each other in colour, look and style?”.

It should be a no-brainer with two as they are a “matching” set of 7 Artisan Spectrum lenses, but unfortunately, the one thing they do not match in, is colour.

The third, the IRIX, theoretically comes from a superior stable of semi-pro cinema lenses, so the question is, does the IRIX stand out, do the 7Art pair stand tall and together or is the whole thing a colour graders nightmare?

Below mostly as they were shot*, which I realised was not going to work for Bokeh etc, but colour, its all about colour, oh, and feel.

Warm, but not to an extreme level. Not ugly or even unattractive, just warm. This tends to fill in depth and is usually more attractive to most viewers, but can “muddy” up. I used the same settings for all three lenses starting with the 35mm and thanks to its warmth, the exposure for the other two looked just a hair hotter. The more pleasing Bokeh may be due to slightly stronger chromatic aberration.

Cool to magenta. To me, this is the natural look of this sensor, so the 35mm above on a warmer one like the GH6 or S5II would look. Positively “retro-organic”.

The difference between the two above is actually less than mixing a G9II with GH6 or S5 with S5II footage, so an easy adjustment away. A S5II and the cooler 50mm would probably match the S5 with the 35 almost perfectly (as would an S5 mk1 with a little WB tweak).

Neutral to cool, very close to the 50mm. Slightly contrastier, but no sharper and thanks to the extreme nature of the lens, it is usually up against it in other ways. Wide open at T3 it is sharp enough, but it hardly matters as very little is actually in focus (I had to bracket my shots to get the front half of the doll sharp as the peaking was indicating all good, but was actually getting the side and back.

T3 at minimum focus (these heads are about 1cm across). There are razor blades in there somewhere, but a lot of cotton wool to.

As shot, things are actually looking ok. The IRIX may render slightly differently, but because it is such a different lens, used for very different shots, I doubt minor differences in rendering will matter.

The 35mm basically left alone, because on this cool-ish sensor it seems pretty right. I love the background rendering of this lens, very natural.

The 50mm warmed slightly to match, looking just a hair more contrasty, or maybe it is Bokeh “snap”.

They pretty much match with a very slight bit of work and could even better with consistent practices. Bokeh seems to be in the same school of smooth-blobby, the 50 and 150 very close. As is sometimes the case, the two sharper and contrastier lenses seem to have busier Bokeh, or it might be a perspective/magnification thing.

Note; none of these are perfectly colour accurate to the scene. The book panel is clean white, the un-edited 35mm lens file coming closest in this light.

As far as other elements go, rendering, Bokeh etc, I think that used as they would be, with changing perspective, different angles etc, they are close enough to be acceptable partners.

If I had to pick a favourite overall, it would be tough, but interestingly, the IRIX is not automatically the big boss. I probably like the 50mm more for stills, the 35 for video and the IRIX for its powerful tricks and its ability to bridge the gap between my Lumix-S and 7Art lenses.

My initial fear was the 150 would stand out too much being the dearer lens (the IRIX series are roughly 250% dearer than the Spectrums), but actually the 35 is the outlier with warmer colour and smoother Bokeh.

It seems that by grabbing the Christmas sale bargains, I have accumulated a decently compatible set of cinema lenses with no standouts, no odd-balls and no real grading headaches. Not bad for about $1600au, or less than the cost of the IRIX alone at full price.

I still have to compare the 12mm 7Artisans Vision and Sirui 24 from my M43 kit, but I have time.

Ed. I did recently use the G9/Sirui and S5/35mm as a pair and they were quite different. The Sirui was cooler and contrastier.

IRIX at T5.6. Fixing that white balance issue made processing this file very natural.

*f2.8, RAW, S5 - the last two lenses had their exposure reduced by about a half of a stop in the top shots, but zeroed again for the adjusted ones.

A Couple Of Neglected Lenses And A Surprise Uncovered

The Sigma 30mm f1.4 is a great tool. I probably need to use it more.

Comparing M43 math to full frame, a 30mm f1.4 should theoretically provide shallower depth of field than the full frame 35 f1.8 Panasonic. The camera used is the EM10 Mk2.

The Bokeh is very nice and it is sharp wide open, even off centre. There is a “big-ness” to the files.

In cinema format it looks suitably…..cinematic. This is probably my main M43 video interview lens, or maybe the Sirui. Nice to have options.

A very busy scene, handled as well as any lens I have outside of my cinema glass. The colour out of the Sigma is a little cinematic, meaning a little muted and slightly flat. Handy for a lens used in strong and contrary light and for video.

The IRIX 150 and S5 produce interesting files. I struggled with this file, but more about that below.

The IRIX 150 macro is powerful, hard to use, probably impractical. It is a specialist lens.

This brings us to another issue and the fix.

The S5 overall seems very different to my M43 cameras. Shots taken the other day in bright sunlight with the 35mm Lumix were very blue compared to M43 images.

Flash filled and normally exposed, this is the worst, but many more were bluish and slightly over exposed. The green fence behind did effect some files, but nothing I would not normally deal with quickly.

They warm up ok, but all needed something.

This was what most looked like. I have the white balance shifted to blue/green to combat I think the 35mm T2 7Art lens which is much warmer than the 50mm, but these are RAW files, white balance settings should not affect them.

Warmed up to more what my eyes see.

Again, they process up ok, but there is a feeling of the file having a bias overall.

An Olympus version, untouched.

Ok, this is fixed but concerning. When you shoot RAW files, no camera processing settings outside of exposure should be applied. No white balance, sharpening, “pre-sets”, Luts (which are video based anyway) or any other settings not considered base-line are applied. In RAW, you apply these in processing.

This is the point of RAW.

Every brand and processing programme will apply its own core settings, but the camera should disengage the in-camera processing options for RAW. You should be able to see jpeg style settings applied to the preview, but not the RAW file.

The RAW is meant to be the ingredients, not the cooked dish.

Well, it seems that the S5 (and I am assuming other new Lumix cameras), do apply changes to white balance to RAW files. I had the AWB base dropped to more blue/green and that has been applied to a RAW file.

It never occurred to me, a RAW user since the Canon 10D and Lightroom 2, that one of the basic rules of digital photography would be changed. RAW is RAW, end of.

As set. Oddly murky-cold whites.

Back to zero and the whites are closer to normal (got to love the applied science here).

The biggest issue is the RAW files seem to have this applied like pre-processing, so getting rid of it is theoretically possible, but it seems some of the depth of the file has already been tapped. The IRIX files above and the earlier ones from the 35mm were relatively inflexible, thin seeming, almost jpeg like.

This is part of a worrying thread of thinking.

I have noticed a lot more people using Luts (Look Up Tables or video pre-sets) in stills processing. This is basically using a sub-RAW video file profile and applying a jpeg-like preset to it.

It is a video work around in response to true video RAW being so hard to access.

The idea of Luts is to apply consistent processing to very flat moving footage. You do not have to use them, I don’t*, but it means your pseudo-RAW Log, Flat or Cine-like profiles are mostly processed for you, then tweaks can be applied. I will not pretend colour grading video is easy and Luts can help, but when processing stills, a more tailored approach needs to be used.

Still files are all individuals, even jpegs, each needing their own exposure, processing etc. To blanket process means, more often than not, removing the effect of pre-sets, not embracing them. Personally I used to use an import pre-set in Lightroom, but since switching to C1, I find the imported files are pretty much on track, I then process to suit.

If you work in a studio with consistent manual settings, you could probably apply a pre-set to all your images, but you could (should) also look at one file and tailor it’s processing to the specific project and look you want and then apply those settings to all the matching files using batch settings. Only in very controlled situations should you use pre-sets for stills and never just stop there, or you may as well use jpegs in the first place.

I guess if you make some RAW pre-sets and call them Luts then no harm done, but terminology gets confusing and possibly you are ripping yourself off in processing.

We all want to work faster, but not at the expense of the much more important quality we are all after.

*I have found that so far, a Flat or contrast reduced Standard profile is enough for me to work with without too much issue. I guess I have a “Lut” in my head, but nothing formalised.

Big Water, Big Lens

I am off to the rowing on Saturday.

Lake Barrington is a spectacular place, but it is big.

Time to use my much neglected 1.4x Teleconverter. I bought this when I up-geared a few years ago along with the EM1x, 8-18 and 300mm. These were the sentence finishers, the bits that quietened the nagging voice, but I must admit, the tc was the last thing on the list.

Every bit of that kit has been used regularly, with the exception of the teleconverter (tc).

To be honest, it is probably more use to me on the 40-150 f2.8 giving me roughly a 100-400 f4 full frame equivalent, but I use it sparingly, not as sure of the AF or optical qualities. The AF thing is down to me, using gear with original firmware mixed with latest and greatest, but it has worked for me and been stable, with the exception of the tc.

This is also possibly due to neglect. Olympus contacts tend to go quiet if left alone or sometimes even when brand new. Regular use makes for good conversations between devices, absence, not so much.

Below are a set of hand held, 860mm equivalent shots with shutter speeds ranging from 1/4000th to 1/60th of a second. No processing apart from some colour and a little highlight recovery and no focus misses!

The AF was a little odd at first, but I do think that is twitchy contacts, because it came right after a quick dismount-remount. The thing is already 6-7 years old and I have used it probably five times.

Adding to my previous post comparing the IRIX 150 macro to the 9mm Leica, the Oly “super macro” is a powerful beast bringing 860mm equivalent focal length to 1.4m range.

With sharpness intact, I know that this lens will happily get me down to about 2000mm equivalent after cropping (which is roughly above). I just hope the air is clear.

Ed. Some samples of the actual event.

The top two are actually the 40-150 f4, showing its stuff as a serviceable 5-800mm (ff equiv), the rest are the 300mm straight, which I ended up using most of the time anyway, except the very bottom pair with the converter. In the second set down, the woman in front is slightly out of focus as I focussed on the background. I have no hesitation submitting any of these crops as full sized images for social media or even decent size prints.

Clutter, Casualties and Other Catastrophes

I have too much gear, something I am aware of, but the thing that keeps me hanging on to things is the practical realities of professional longevity.

Once, when all of this was an exercise in “theoretical mind travel”, my goal was kit perfection, whatever that was.

I did not need perfect gear, just a perfect kit. This of course never came to pass or if it did, even briefly, I tended to move on, frustrated that I did not feel “perfected”.

These days, I am more about need mixed with organisation and depth.

Every job now, not at the paper where my gear needs were focussed, maybe even funnelled, I will decide what I need and pack appropriately. No longer hindered by weight and handling issues, I tend to over sometimes under pack, but either way, I get the job done.

The big issue seems to be that having flexible bag needs and fillings, sometimes I make ergonomic blunders and stuff happens. Bad stuff.

Looking at the gear I have and the last few years, I feel it is time to look at my list of casualties, the causes and basically, how well does M43 gear stand up to professional abuse and constant use.

Cameras.

Two of my four EM5 Mk1’s have been retired as they are too bothersome for even personal work. One was bought second hand of an old work colleague and it turned out it was near terminal status, but it cost me a pittance and the battery was good.

Both of these are from the same day, same Domke bag clip many years ago and from then on, I tape the clips.

EM5 Mk1’s tend to slow up when not used often. First they lose the ability to expose high shutter speed images, then they fail to fire up, later working fine. Oddly, the most reliable is the oldest one, my original foray into “serious” Olympus cameras after a couple of Pens.

All four have the fine pressure crack in the base of the rear screen, so weather proofing is suspect, all are a little battle scarred and one, the newest one, lost a strap lug and fell to the floor, but survived.

Bit of a shock. I had also forgotten this until using the camera for the above shots.

Both of my EM10 Mk2’s have their moments. The less used one (black) has occasional card lock-in issues, so I have tended to put in a card and if it stays there happily, I download via a cable (when I remember).

The other, my silver one, has recently refused to activate the rear tilt screen when extended back. All good when used flat to the camera back, it is a no-go when pulled back beyond 45 degrees. The way I use both of these makes neither issue a non-starter, I just have to adapt. This one was dropped badly a few years ago, but to be honest, until remembering my poor abused 8-18’s torrid life, I had forgotten all about that.

I consider all the cameras above the be “shutter savers” for dearer cameras below. The more I use them, the more life they add to other bodies.

One of my original G9 Mk1’s has recently had a tough drop, a real “bouncer” on hard ground, but with the exception of some nasty scratches, a slightly wobbly strap lug and an odd moment the other day where the rear screen went “stripey” (after a few hours of heavy use on a hot day), it has been fine. This one has also done probably 90% of my video to this point.

Nasty, but not terminal.

My second G9.1 is basically pristine and hardly used, being reserved for video and now well down the cue, so likely a basic stills camera in waiting.

The two EM1.2’s have had a hell of a time. My workhorse cameras, no others apart from the original two EM5’s, have done as much work. I don’t love their layout, being the last of the pro cameras to be made without the handy “nubbin”, but I owe them my career basically.

The oldest one is cosmetically a little rough, but “touch-wood” still going and the newer one, although sporting a set of scratches on one shoulder from a single day of poorly thought out kitting, is probably one third younger. I will run them until they drop and thank them for their wonderful service.

Not sure when these happened, but they all came at the same time.

Both of these and the most used G9 have had lifting rubber issues, but I have just glued and glued until fixed.

The EM1x’s are reserved for sport, so do not need to be looked at too closely. They are rated at 400k shutter cycles, but I don’t think that counts for electronic fires, so likely they are at about 5-10% use limit.

The S5 I have got a mild drop the other day and a scar for identification, but seems happy enough. After the G9’s abuse recently, I have little need to stress over that one and its partner is on the way soon.

The Pen F and Pen Mini are also under used, so cosmetically they are fine, mechanically, they need more work to keep them happy.

Lenses.

My poor Pana 8-18 has had two serious drops on two different cameras, but apart from lots of hood scratches, shows no signs of distress. Learning to really love that lens.

The hood tells the story, but respect little one, respect.

The little 15mm’s metal hood is also shiny on the end, so the paint is thin there I guess as my cheap Ebay metal hoods have not scuffed.

The plastic hood on the relatively new 9mm is also a bit scratched, a trend forming there.

The 12-40 Olympus Pro lens is my most “damaged” glass. Sand in the zoom mechanism a few years ago made it “lumpy” and repair costs seemed out of proportion at the time. It also shared the G9’s heavy hit.

The reality is I would likely replace it with the 8-25 f4 or 12-45 f4 if it does die, but the more I use it, the less it bothers me. This lens is also now showing normal signs of wear, like the 40-150 below.

My 75, 17 and 45’s are dis-coloured in their white etchings and the metal lenses have some wear marks, but are otherwise they are fine. It occurs to me, many have had over ten years of heavy use, the 17mm carrying the bulk of the strain when travelling.

My heavily used 75mm is grubby and this recent chip is saddening, but metal takes pain (and paint) gracefully.

The 40-150 f2.8 has a lot of wear marks on its zoom ring from rubbing against things. I use a metal screw-in hood, so its clever but fragile one is still good.

Not sure which bag it was (possibly a stray lens floating around in my large Neewer backpack), but some serious rubbing wear happened to this lens over a short period.

The 75-300, a kit level lens and one I do not use enough has started to refuse the focus order when freshly zoomed over 250mm. It comes right several ways (focussing first, zooming back a little, turning the camera on and off), but I noticed this at the swimming the other day.

The rest of my lenses are either new or have had relatively little use.

Oh, and I have lost a half dozen filters, but better that than lenses!

Some cameras and lenses have minor and very occassional moments of disobedience, likely down to lack of use, dirty contacts or tired and slow cards writing. This happens with electronics, it is accepted.

Otherwise, all good.

*

So to sum up;

After over ten years of almost exclusively using M43 gear, sometimes as a professional, but always as at least a serious amateur user with over 10 trips overseas, I have two worn out cameras, two to seven are due to quit soon-ish after their working lives have been exceeded, with one physically a little worse for wear and a couple with twitchy little issues.

Most real issues are from user abuse.

I can field two near new EM1x’s, two new S5’s, a new G9II, a mostly unused G9 and Pen F, old but lightly used Pen Mini and any of the above that keep trundling along.

I am probably good for another million frames, maybe two :).

I am yet to replace a battery and all my EM5 Mk1 batteries are still going, some are over 13 years old!

Lenses are in two camps. Those that show signs of heavy use and those that do not, although some wear is better hidden. The 40-150 f4 and 75-300 are showing some signs of internal conniptions, so not sure there.

Still The Three Legged Friend?

No, not about to reveal one of my dogs has lost a limb, but something that was once my religion, my creed and my obsession needs revisiting.

Tripods precede photography, as literally the mandatory support for early cameras and have stayed relevant right up to now.

If I wrote this fifteen years ago, my advice would be “get one, get a big one, always use it” then, drop the mic……. .

The reality is, when I shot full frame Canon SLR’s I needed every trick I could think up for absolute clarity when shooting slow shutter speed landscapes. I would lock up the mirror using the self timer or live view (they lacked mirror-lock otherwise and this helped with accurate focus also), place a finger on a leg to feel for vibration, use the heaviest tripod I could carry (and often curse it all the way there and back) and weigh down the legs or use a “stamper” which is an elastic strap attached the centre column run under my foot for extra down force.

I learned the hard way all the traps and tricks, such as buying lens tripod collars or support plates, watching for strong vibrations on rocks near powerful waterfalls, creeping heads, shifting sands, poor leg locks and slippery carbon fibre legs, quick release plates with their own agenda, heads with limited movements, poor leg shapes (round and solid wins-always), the benefits and limitations of different leg materials and on and on.

These days it would probably go something like “get one, make sure it is heavy enough for your kit but not too heavy, one that won’t fall apart, has the right head for your use and use it when common sense dictates” and…… probably not drop the mic as I have a better appreciation of microphones now.

My history with tripods, like my photography and now videography has had several phases with plenty of wins, some lost opportunities and lamented sheddings. Currently I have moved on and settled on some basic but acceptable remains.

A solid, entry level Manfrotto 190 with basic three way head was my first tripod, because I actually took the advice of those who knew best. If I had known what I know now, I would probably still have it.

You could do worse as a thirty year investment.

I upgraded to the 055* for extra sturdiness through weight and more height and I think the flip-out clamps appealed over the slower twist knobs of the 190. The funny thing is, I think I paid the same for it then as I could have a few years ago, about $350au, but they have gone up a lot lately.

I then rotated through other brands from Berlebach sport ash* (332 or similar), Manfrotto 055 carbon fibre*, various smaller ones from Slik and others, then ended up decades later with…… a Manfrotto 190, saved from the throw-out bin at the camera shop I worked at.

It had been stripped of parts like a straggling wildebeest meeting a helpful pack of Hyena, but like all Manfrotto’s, most parts were easily sourced if not a perfect cosmetic fit.

Heads are a thing.

Video only needs two smooth actions (up down and side to side) although a levelling plate is handy for heavy cameras. Stills need three (for going vertical), but they do not need to be smooth.

Ball heads are popular and ok, but non ball heads are pound for pound and dollar for dollar more stable, so only go ball if you can do it well (if the neck is thinner than a pen or the ball smaller than a decent sized grape, avoid them).

Ball heads are also poor choices for video as they lack smooth panning.

The little Gitzo in front, the only bit of Gitzo I am springing for, was a bargain clearance. The Promaster, a generic head found in a dozen different ranges, is a decent size and mechanically sound (the dual tension knobs are annoying).

Quick releases are personally a pet hate, although I do use them for video (Neewer universal) as I have several different rigs and heads and multiple cameras, as well as the less fluid nature of video means I am less likely to have a handling accident. I am even putting a Neewer QR adapter on the existing QR plate I have for my ball head, meaning I have a QR plate on a QR plate, but consistency rules.

I have found a simple screw-in head is often as practical as a quick release that needs secure locking and you are still unsure of. It will not magically release on you and they are never rendered useless by a lost QR plate***.

The classic Manfrotto three-way head made way for the monster pro version (029), then I moved to ball heads, back to geared and lower profile three-ways (460 MG*), then hydraulic ball (Manfrotto MG 468*), then back to the simplest two directional (#234) and now I have a little of each, scrounged from sales, left overs, forgotten ideas etc. I think at one point I had a dozen of those ubiquitous Manfrotto hexagonal plates, now not one is to be found.

For stills, I use the lightest sturdy and decently tall tripod (4 1/2 to 5’) I can get away with like an old set of Velbon Sherpa legs, with a tiny Gitzo ball or Manfrotto 234 tilt head, maybe a Promaster (generic) large ball head I picked up cheap at the shop, but only if the rig is bigger (300mm lens). If the lot comes in anywhere near a full kg, I am doing something wrong.

This is all you need for most things and hard to find a more sturdy, or simpler head design. It only takes about five turns to secure the camera. Even the vertical orientation for stills is a matter of turning the camera on the head. If I know I am only doing stills, the little Gitzo ball works also.

With M43 mirrorless cameras, electronic shutters, touch activation and often higher shutter speeds thanks to the depth of field benefit of M43, anything else is overkill and that is if I even need it with the stabilisers available**. The ability to weigh it down with your bag using a handy carabiner fixes strong wind issues. Strong is good, but not heavy.

Video is a little different. For that I use the now relatively monstrous Manfrotto 190 legs, a Neewer fluid video head or the Promaster heavy ball head often with a set of bracketed wheels on the bottom, more for stability than movement.

I also use the heavy ball head on a video slider.

Even then, this whole setup is pretty light compared to many past ones.

“Big Bertha” is in reality what I would call a medium-light weight in the old days. At the base of the centre column is a carabiner strong enough to take most bags. 5kg tripod anyone?

My ifootage Cobra monopod came with a small tripod option, which is surprisingly handy for low angle or heavy lens use. This is good, because it has not been a win otherwise.

Super short and heavy for it, but hard to find anything more steady.

The things you want to avoid if you can are tripods so short you need to constantly crank up the centre column or smallest leg sections for sufficient height (which are the least steady bits), are fiddly and annoying, cheaply made-especially odd shaped legs, have an unsafe or quirky quick release system (if you must at all) and a non standard QR plate in case you lose one. This is the single biggest reason cheap tripods get retired.

Good features are the ability to go low, which also means independently adjustable legs, go high without extending the neck and leg clamps that are easy to apply and time tested, especially if you need to wear gloves or work near water. No more than three leg sections are best**** and buy the right head for the job.

At the shop, we used to sell several quite expensive “full of cool (stupid) ideas” generic brand tripods with angle-flexible centre columns, removable legs, reversible columns, legs with pencil thin end sections and fiddly leg locks. They just sent shivers down my common sense spine.

They were too complicated, especially for a new user, too short and when used at full height, you were extending anything up to five leg sections and the neck, which took ages and was poor form!

On top of that they were quite heavy for their size, which was “easily fixed” by buying the carbon fibre version for triple the price, but only dropping a couple of hundred grams because the over complicated joints and head were still all metal and to top that off, they were often unreliable.

The best we had I felt, the “Scout” I think it was called, was a tall three section unit, solid and simple, reliable leg clamps, was cheap, made of aluminium with a simple three way head. The boss hated me selling them over his “cash cow”, but I could not pretend it was ok.

Finally, watch the odd video on best use practices for your and other tripods. The very best tripod will fail you if you fail to face a leg down a hill, don’t secure it’s legs or use the quick release properly.

*All things I regret selling, especially the wooden one. The original 055, sold a few years ago is still going with bits from a friends own thirty year old one and with my original Domke F2 were the only two things remaining from my very first kit in the 80’s.

**Sometimes a tripod, no matter how solid is less stable than a good in camera stabiliser, especially if ground vibration is an issue.

***When I held classes at the shop, the last task was always chasing up the lost QR plates forgotten about on students cameras and I often see them at schools, not on tripods, but on cameras. It is not a coincidence that most cheaper brands have little or no consistency in plate sizes. It sells them tripods.

****Really compact tripods need more (shorter) leg sections, but that does not necessarily mean they are lighter and definitely not sturdier.

International Women, Universal Language

MRC North celebrated International Women’s Day with a uniquely Australian feel.

People from a dozen very different cultures learning Bollywood dancing on an Aussie lawn bowls green.

Followed by some Eritrean dance with a similar feel.

Lots of fun had by all, Nepalese, Afghan or Thai, dance is dance, community is all.

Only one rule….

….shoes off on the bowling green (all religions have their rules).

Namaste.

Speed Gauge

I had a fun little period in metal work yesterday and of course the two things that drew me were grinding and welding.

Speed is the main creative tool here.

“Fluid” at 1/15th of a second gives you that classic shower of sparks. Parents avert your eyes, but it is of course not as bad as it looks.

Busier and more aggressive looking 1/125th is the fine balance between blurred movement and frozen action. “Sparky”

Times it by ten and you get a droplet like look instead. Feels more “molten”.

The business end.

With high speed angle-grinding 1/1500th almost arrests the sparks. The sparks are fine and detailed.

Dropping it by half to 1/750th is more action packed.

But 1/60th gives you that stream of fire look.

Fun as usual.

Stills And Video. Can One Creator Use Both Together?

This is not a philosophical question, more of a practical expose.

I have said it out loud and so I guess it is real.

“I can shoot stills and video at the same time”.

I can, but of course it needs some planning.

Video for the paper consisted of a quick couple of minutes of audio, several short B-roll clips or “cut aways” and a quick and dirty edit.

Lay down the base track, cut it as needed, mark any remaining movement points (I would often zoom or shift the camera mid interview, making sure my sound was consistent), then cover up the nasties with (hopefully) relevantly timed cut away clips or stills.

When it worked it looked pretty pro, especially considering the time frame was 30 mins all up, when it did not, it was still better than nothing or most single dimensional phone grabs.

Stills were shot either by flicking the camera to photo before or after the interview (sometimes in the middle if there was a break, a boring bit or I knew I had enough), sometimes with a second camera if I had the luxury of a tripod, or very occasionally in my other hand which might sound like bragging, but never underestimate the power of touch-focus-and-shoot on a silent M43 camera and the excellent stabiliser on a G9 Mk1 in the other (and any wobbles could be covered up).

At the school, I have more time, can take more gear, often have more idea what is wanted and fewer time constraints. There is also little pressure on me to get video, but that also went for the paper. I made video a personal challenge at the paper, but sometimes I wondered why I bothered*.

An example of the next level the school offers is this:

Today I am covering the staff choir.

My plan is to setup a camera on a tripod (S5 with 35mm cine lens), a second hand held camera (G9II with Sirui 24 or 12mm cine lens depending on space) and a couple of stills cameras, one with a long, one with a wide lens.

If I had more time and making a movie was a direct request, there would be a second static angle (second S5-still coming or a G9). Finally I would possibly use the OSMO up high and spend less time worrying about stills.

The first cam will be tripod mounted on one side and high, allowing me to move on the front and opposite side and still obey the 180 degree rule for video, but mix it up for stills.

I will hit play on both video cams and leave the G9II running even when shooting stills, so I can overlay the synched track (not confident yet in that space), then cut out all the junk, but change angles, try focus transitions etc as I go.

I will take stills also as I go, putting the G9II to one side or resting it somewhere as I shoot (this can be fun).

Sound will be a single Lewitt LCT 240 above the static cam through an AMS-24 to the camera and the G9II’s excellent mics will allow for synching. I would sometimes also use a backup, but it is not critical today.

Superior sound for video, adequate sound even for a purist.

One tripod, one stand a top handle for the G9 anf two stills cams on straps.

To be honest, many gigs like this are tough to get enthousiasti about when photo opportunities are creatively and physically limited and you have an entire hour to kill. Get your location shots, then portraits-of basically everyone, the creatives, then…….. repeat until it ends.

Sometimes, you can get those elusive images of reluctant subjects, but often with dual duties, you have plenty to do.

Video gives me another thing to do and think about, but the balance is fine. My biggest issue is sometimes forgetting to do my stills! My video journey actually started with a third consecutive performance of a dress rehearsal at the school production a few years ago. I thought, no, I do not need more images after two times through, but maybe some video? It started something I am grateful for, but still have a long way to go.

Ed.

So, back from the event, my processes were sound, my opportunities and execution fell short. late to the gig thanks to the one before running over, I was pushed and then realised I had to shift into a poor location.

Even a 20mm failed to bet more than three quarters of the room.

The group were at an early “exploration” stage of the process, so tight form and function were replaced by relaxed apathy and no single piece was performed to any level of completion. I will keep the footage (all 50gb) as possible before-clips for a bigger project, experiments and to explore.

*Before I left we were closing in on 954k views a year and aiming for 1 million from internally made content (i.e. local and relevant).


Are We Being "Cinematic" Or Just "On Trend"?

“Cinematic” is one of those terms that is close to turning from an ideal, a goal of many, to a dirty word.

Misconceptions are partly to blame. No point in chasing a rainbow when you are not sure what one looks like or what you are hoping to find at the end.

To many, “cinematic” means shallow depth of field, lens compression, softness with a misty glow, flare, moody light ironically often with a flat grade and maybe a little unnecessary movement.

To top cinematographers, the ideal they are chasing is often sharp, contrasty, realistic, wide and clean.

Seriously, look at the big flicks of the last few years.

Barbie, Oppenheimer, 1917, The Creator etc. They hero staging and blocking, light, clarity, performance, beauty of shot and reality. Compare this to “cinematic” footage from a lot of Indie shooters and you will see a contrast of styles.

Lens choice is often the first divergence. Most emerging shooters lean towards longer and faster glass, cinematic masters will, but not as often and often not the same way.

My examples are grabs from one of the few jobs I have done recently but should suffice I hope.

A full frame 50mm at f2 is the common starting place for a DSLR style shooter chasing that perfect Bokeh and soft blurring as well as a way of hiding messy backgrounds or limited lighting.

You can work tight using details and hint at more, something the cash strapped Indie shooter may require.

A tight shot showing all the hallmarks of modern photography and videography (except it is not soft or “glowy” enough”). A longish lens (85mm) a wide aperture (f2.8) and single subject focus.

These are easy, almost a cheat to pull off especially in stills, but problems are many.

Shallow depth requires precise focus pulling (possibly promoting too much AF use), the subject is cleanly cut out, but the other people are sidelined because of it and the scene is also pushed to the back of the line.

Your eye is drawn to the few elements in the image, allowed to accept the superior optical effect of “cut out” sharpness and clarity.

They also resist movement from the shooter as too many hard to control elements are introduced such as focus, camera movement and long distances covered.

You can take plenty of these and they are easy enough, but they are all basically the same.

A semi wide 28mm on Super 35 (about a full frame 35-40mm) at f4 to f8 is more commonly used by the masters. For them, the whole scene is the key. More means more and although it comes with its difficulties requiring more attention to detail, more lighting, more props, it also comes with the promise of greater rewards.

Simply by getting closer with a wider lens (30mm), the subject becomes more dynamic, more animated and the viewer connects with their perceived closeness. The environment becomes an equal player, not a blurred-out backdrop.

Using wider lenses makes the cinematographer a presence in the scene. There is a creative dance between the subject and recorder. Intimacy becomes easy and real.

This shot was taken with a 30mm (15mm on M43) at f4 (f2 in M43) and has more cinematic elements. There is more scene, more interplay, the perspective looks more natural and the “blocking” is inclusive. It is tougher to get a decent still because of the many elements, let alone a superior moving shot, but tougher is often better when you pull it off.

This view allows for the story to evolve, the relationship of the players to shift, for blocking to take effect. There is opportunity to shift with subtle ideas and moods.

Sound is also more natural coming from the subject in a way the viewer feels is realistic. The two give-aways that things are not real are lens tricks (strong compression or unnatural expansion) and distant sound seemingly up close, are both avoided helping retain viewer immersion.

The same interaction with a long lens is static, boring, detached, a detail shot only and any attempt to move is telegraphed tenfold. Sound from the subjects if used is known to be trick of the tech, not a natural occurance.

When a master cinematographer does use a long lens, say like Kurosawa, a big fan of them, he often used deep depth of field, hovering between sharp and soft as his background was always an element of the whole.

Balance and consistency are the key here.

Like a lot of things born of expediency though, these habits of necessity can become habits of emulation. A push for a certain in fashion look is often at odds with the end result, maybe even the end desire of the maker.

Want to be the next Wes Anderson, then shoot like him*, not like your favourite Vlogger wandering through the woods with his friends, hand holding things and making focus errors look like you meant them.

Be deliberate, be precise and above all be yourself.


*I don’t mean copy him, but take a leaf out of his book and create something that says you made it, not you made something like “X”.

Some Video Profile And Filter Tests

A quick test of a few things.

The 7 Art 35mm as a 50mm in crop mode

The Neewer 1/8 mist filter (mat box one)

S5 with cropped 35 T2 Spectrum wide open, Flat 1080 with Neewer 1/8 mist filter and a very light grade.

Same, no filter. With the filter the background does look a little softer and Meg gets a bit of Netflix magic. Highlights were also nicely controlled and there is a slight warmth added. A good use would be to shoot with a slightly smaller and safer aperture (T2.8-4) and use the filter to add background softening.

A stronger grade for Flat, closer to Cine-V, but with a lot more options. I do not think I would ever use Cine-V over it as the extra headroom is worth the grading.

My grade by eye of Vlog. Lots of headroom, but I need to apply a LUT I think as it is much harder to get your base line.

Cine-V SOOC and you do not want to grade this much as it simply does not respond. It looks a little too hard for me and the lack of grading potential just feels very jpeg-y to me. Maybe a dark and gloomy projects.

I still like Flat. The loss of a stop or two of dynamic range compared to Vlog is a fair swap for good out of camera results that grade easily (-5 contrast set in camera).

Pushing a bit harder with the Vlog file.

The starting Vlog file. I will admit to needing some practice exposing Vlog and I think I need to expose for the highlights more. The Lift, Gamma and Gain sliders in DaVinci are obviously calibrated for this type of profile, because they had full range.

Flat, more contrasty grade. Yep Flat it is.

Happy with the lens wide open.

Oh and thanks to Meg for being my muse yet again.

Micro Four Thirds Depth Of Field Example.

M43 cops a lot of flack for limiting shallow depth of field benefits.

45mm f1.8 wide open. There is a hint of depth “snap”, but it is not the hero of the shot.

I use the word “benefit” specifically, because less is often seen as more in this space, but how much is too little.

The above image is a 90mm full frame equivalent (M43 45mm) with the lens used at its widest aperture of f1.8.

To my eye, it is about perfect at cutting out the foreground subject, but also showing contextual elements.

Taken a few seconds later with the same settings, the second girl is in focus and the nearer one slightly out. The focus plane is not exaggerated so the image remains harmonious, it is clear only if enlarged or inspected closely, but it is there.

Creatively, the option of even shallower depth is enticing and I have to admit, I have been drawn to it when playing with my new full frame cameras, but often in a commercial sense it is useless and too easily fallen back on to hide poor background choices or to simply take a cheap road to that “pro” look.

Interestingly, even though I have not used full frame for almost a decade, I instinctively go to f2.8 for safety. This is close to f1.7 in M43.

So, What Is My Perfect Video Kit?

After a torrid couple of years, lots of avenues explored, lots of gear bought, what would I do now if I needed to replace the lot?

Two caged G9II’s with top handles, the 10-25 and 25-50 f1.7 lenses and…………. a bag to put them in.

The reality is, this $9k + kit is still nearly as dear as the 2x S5’s, G9II and full frame lenses I have already bought (the G9 being well serviced by my other M43 glass), so I guess I am better off overall, but clean and simple does appeal.

The G9II is a video power house, the fast zooms are cinema tweaked, optically and mechanically near perfect and their high speed fixes any low light issues I would face.

Best stabiliser, best AF, sharp corner to corner and “character” can be added in other ways. I have legacy lenses anyway and the TTArt 35 f1.4 would be fine also for under $100.

If the cine bug really hit me, one of the IRIX primes (21mm = 42mm) with the loss-less tele converter option would cover that.

Clean, simple, capable and a major upgrade for stills also.

Would I miss full frame?

Never did before.

Motivation

I stumbled across a great video on motivation the other day.

https://www.youtube.com/watch?v=bH83JcnrWiQ

Not the “get off the couch you bum” type of motivation, more the “where should my light, sound and camera movements be coming from and going to”, kind of motivation.

Making a scene look good and make sense, which are two different things, can be tough. Motivating or logically enhancing these elements makes all the difference and researching the subject tends to find the usual suspects in the vlog-o-sphere.

Even without a ball, there is context, drama and focus to this image. Most things make themselves known in the real world, making the real world from scratch is another matter.

I tend to be picky with my research content, probably unfairly.

If I am confronted with a tight t-shirt stretched over too many muscles, hat backward, presenter using “insider” speak as a self promotion piece, I tend to switch off.

Literally.

The video above was a beauty and was delivered with balance.

Other Bloggers I tend to be drawn towards (in no particular order) are;

Sam Holland, Luc Forsyth, Micro Four Nerds, Josh Cameron, Pas PZ, Mark Bone, Geeky Nerdy Techy, Story Driven Thomas, Fellow Film Maker, Caleb Hoover, Studio Binder, Red Frame Tech, Red 35, Camera Geeks, Camera Conspiracies, Three Blind Men and an Elephant, In Depth Cine, Lewis Potts, Roger in Finland and some others I forget (sorry guys).

This is of course subject to relevance, so I would probably never stumble over a Sony only users sight unless they use a certain subject, lens or a mic I like, but for my needs, these are the main ones.

I am not saying that these are the only people with a relevant thing to say, but they are real enough to get my vote.

Some Light Mods I Had Forgotten About

I was watching a video about Portrait Lighting and realised with all my thoughts on work and video, I had forgotten a freebie I got recently, then remembered another that I bought for the paper, then chose to use a cheaper, lighter one instead, then I remembered a freebie of another type that I got a couple of years ago and have only used once.

Phew!

When I bought the Aperture 60D S, the cart had a free Light Dome SE worth $149au in it. I have plenty of light mods, far too many as it goes and often fall back on cheap umbrellas anyway, but hard to ignore a decent freebie.

The problems with umbrellas are wind if outside, (good for rain, but not wind), control or light spread and well, that’s about all really. They are versatile and replaceable and the light is as good as anything.

A light dome or soft box is basically a shoot through from behind, sealed brolly and has advantages over both of these issues. They are generally more focussed, although compared to a reversed and solid backed brolly, not by much, but they can have a grid on the front which really controls light.

The wind thing is still a thing, just not as bad.

Ok, back to the mods.

The SE comes in a flat bag which was of little interest to me as it usually means inserting a plethora of “spines” into a Bowens mount base to make the brolly and I have those already.

They suck.

Turns out the SE uses soft and pliable fibreglass ribs and not too many of them. They are obviously not completely bullet proof as they supply you with a couple of spares, but good either way.

I did have to watch a video, but when my suspicions were confirmed, it only took a moment.

They handily have 4 red dots that line up with 4 red spine ends (ignore the arrows). Simple right?

Problem is, there are 4 red dots inside also and they don’t line up! I found that out by putting three in using the rear spots and the last one using the inside ones. If you get these in first, making sure you have not trapped too many other spines in the wrong place, then it all goes together super quick.

The flat bag, which is well made and handy has the base plate (above) three baffles, two different strengths for the front and an inside one to tame “hotspots” (which the 60D is known for) and a substantial grid with the spare spines.

Nice.

Especially nice for free, giving me effectively a 40% discount on the overall kit.

The second is the Ra-D55 Smallrig soft box I bought for use with the paper. This is the option I went for rather than the Magmod that the other togs use, because it was half the price before you factor in the Magmod base set (that I do not use), for about the same end result. It takes twice as long to set up as the Magmod, which is no time at all and a quarter the time of the SE.

This one is pre-mounted and collapsible with spine end releases made of metal.

Solid, quick and reliable. I have a cheap Art DNA version of this that has nice light, but is falling apart already thanks to weak spine and feet.

The big difference is the end size. The SE is what I would call a medium modifier, the Ra-D55 is a small one.

The Smallrig has a better tube style bag, two baffles and the grid inside. It also allows room for a flash unit in the bag (in the mod actually) and you can leave the baffles mounted.

The last mod was a bit of a windfall.

About 18 months ago I ordered a large-medium sized (48”) cheap brand mod like the SE but less fun. It came as expected and it is good, but something I would only set up in a studio or if I had plenty of time. It has metal spines and about twice as many as the SE. My first thought was “how many uses will I get”, but from memory it was only $50 or so.

About three days later I received notification from Amazon that my mod had been despatched. It was COVID times and I assumed it was just a slow notification.

About a week later another mod arrived. This was a surprise, but not as much of a surprise as the unit itself. It was even bigger (60”) than the first one I ordered and setting it up was a revelation.

I figured Amazon could bare the cost of their mistake and I gave them a ton of business!

This one is like the Magmod. You push the centre spine down until it locks and seal the baffles. The only problem is it is so big, I need to support the front with a second stand!

Mini-me and mega-me. Odd thing is, they weigh about the same which I put down to the Smallrig’s quality. The Art DNA is well enough made for the price (very cheap, before it turned up for free!).

I find my photographic life has rhythms. I tend to drift through video, studio, sport, candid journalism, event and back, so things like this tend to be pushed aside for a while.

With video, these mods have become doubly useful because video lights need shoot-through Bowens mount mods (or basic brollies). Most of my older light boxes (4x 48”) were designed to have the flash unit inside them and the light bounce out, which is not practical or efficient for constant lights.

My fast setup will likely be the Smallrig through a sheer or feathered a bit. It is very handy, but a little small. They do a bigger one, but I am not that keen to get yet another. Probably the best example I can provide of “if you know where you want to end up, go straight there, it is quicker”, but buying blind is also not wise. What I am saying is I would have probably bought the bigger one if I knew what I was getting.

Next step is to test them in comparison to my brollies etc. I will probably do this in conjunction with a video light test I have planned.

A Unique Eye

A friend of mine has a strong personal history of travel and photography. I feel she has the balance right I feel, being more about the travel, less about the photography, but that does not mean she does not have a good eye for a photo.

The images inn this post are from her last trip and were all taken on a fairly basic Canon compact camera bought about six to eight years old, a limited measure of restoration after the Fuji XA-1 I sold her went missing a couple of trips ago.

It has not stopped her.

She does bring me her best, so I can “tweak” them a little, but often that is only limited to a little de-haze or colour boost if needed.

The camera has given her a painterly effect here, something I could add nothing to.

Some shots are obvious destination shots, but well executed.

Others are the sorts of things non-photographers tend to walk past.

Some are also technically risky, but are tackled with a photographic brain far deeper than the “gear” would suggest.

Like all of us, there is a thread that runs through her work, coming in the form of staircases.

A lesson to me and others that sometimes less gear is very much more productivity.

Reasons Not To Buy A Panasonic S5 In 2024 (But I Almost Did Anyway)

I might be mad and it may be a pattern of madness.

I bought a Pana S5 literally the day before the S5II was released and the secret was largely out that it had better AF etc. I did not care. The S5 was a far better video camera than I had, it was a bargain (still cheap at the price 15 months later) and it added a little full frame power for stills if I needed it. At the time I could afford it, the S5II was out of my range.

The reality is, second hand, ex-demo and run-out cameras are the best value you can get. New and release date inflated cameras rarely make their money back. I bought a G9II as soon as I could and accepted the hit, because that camera was such an upgrade on the older model in video specs and to be honest, I just needed to make a choice. Earlier I made a smart move getting the S5 on post S5II release pricing.

Just one year later, it has the whiff of old news, but why?

The EVF is not as good as the S5II*.

To be honest I had no complaints about the S5’s finder. I can see what I need and it is accurate, but apparently it is a pet hate of some others. I have worse and get by.

The AF sucks. It is great for static grabs, decent for static video (Vlogging), but relatively poor for tracking subjects for stills or video*.

I use manual focus for most full frame video, M43 for sport stills because that is where my best cameras and lenses are and I have found the S5 actually good enough even in single shot mode for some sport. AF with video is of limited use to me, but I have it when needed*.

Sport, S5, all good, but I knew that from the G9 mk1..

The stabiliser is good, but by Panasonic standards a generation behind*.

No in-camera stabe is perfect and perfect is relative**. The S5 with a heavy cine lens and good technique could probably be decent without any stabe. It is still better than many dearer competitors.

A hefty lump, well balanced, solid and tight. Even without the more than decent S5’s stabe it feels controlled. Put an unbalanced or plastic-fantastic lens on and it is not as confident, but this just works. Truth be told, I like the tension a little movement brings. I actually dislike the gimbal look, so if I use a camera that is too stable, I would likely turn some off anyway (looking at you G9II). If you want steady, use a tripod.

There are ways.

Some video codecs are cropped, some are time limited*.

This is one of those “if I were to make a movie……” moments, that dissolve as soon as I ponder my real world needs, that are good quality 1080/25-50p/10 bit/422***, a combination which is not cropped or time limited on the S5. If I were to make top flight work, I would out-feed the video as 12 bit RAW anyway.

Looking at in a more practical sense, the storage and computer power needed for a long continuous stream of 4k/10 bit footage is beyond my needs or means. If I had it (I do*), I would likely never use it. For under 30 min clips it has full capabilities and only crops at high frame rates.

Battery life is…….. actually better than the S5II.

One of the biggest deterrents to high bit rate, high resolution video is the tole it takes. Proportionately sized files extend battery life, save space and allow for average computers to process long clips. One of the things that drew me to the S5 was its reputation of producing high quality work without needing super fast cards or out of proportion settings.

Rolling shutter is also better*.

Rolling shutter is apparently better in the S5 (two authoritative sources) and improves more in APS-C “Super 35” mode, while image quality does not decrease, so I may often choose to crop anyway.

ISO performance, dynamic range, visual quality (at the same settings) are all effectively the same.

The S5II has a sharper looking video image, which is not as popular (The S1H actually has an anti-aliasing filter specifically to soften files for video) and according to some reviewers, produces a less sharp stills image. ISO performance is similar, but different and DR is the same.

The same excellent layout and handling Panasonic all cameras have. There is a strong thread of Panasonic love out there, even when other factors were falling short. Could be cleaner I guess.

The HDMI port is tiny*.

I have dealt with this a few ways, not the least of which is to drift away from using screens when run-n-gunning or for slow static work. For hardware, the Smallrig cable clamp 3637, a right angle cable connector, Smallrig dongle, a cage built up around the left side with a handle, only using a screen in a controlled space and having two cams that I can interchange should have this fixed. I hate cables anyway, so less is more.

If I had not read there as an issue with the small HDMI port, I would not have given it a second thought, but now of course, I have probably over compensated. Funny how it is about the same size as the C-Type and sound jacks, which get no angst.

To sum up;

The reality is I have a pair of matching high quality full frame video and stills cameras with some workable limitations, another decent kit lens and enough saved from not buying the “better” camera to pay for a Ninja V or most of a 12g BM Video Assist.

Ed. Fate stepped in and the backorder with no ETA status of the S5 kit overlapped with an even better deal on the S5II, so I jumped. Still believe everything above, but at the price, I would have been mad. The S5II is going to be the Lumix lens AF camera (stills hybrid), the S5 for true video, which may seem odd, but as above, the S5 is all I need, the S5II just adds options for the future, sitting basically perfectly between the S5 and G9II.

*The key is the G9II. The reality is I can only use one hand held camera at a time and the G9II is the best choice always and offers all the top tier features I would need, if I need them. For static shots (hand held or tripod) or when using heavy video glass, these concerns evaporate naturally.

** I like a little controlled movement, or none at all (i.e. a tripod).

***To me colour and bit depth is far more important than resolution. Few if any clients actually ask for a minimum of 4k and if they do, they are often only covering their bets and using terms they trust in an unfamiliar space. Upscaled 1080, if it is good enough to start with, is also fine. Massive files and slow computers hold little appeal.