Some More Evolutions.

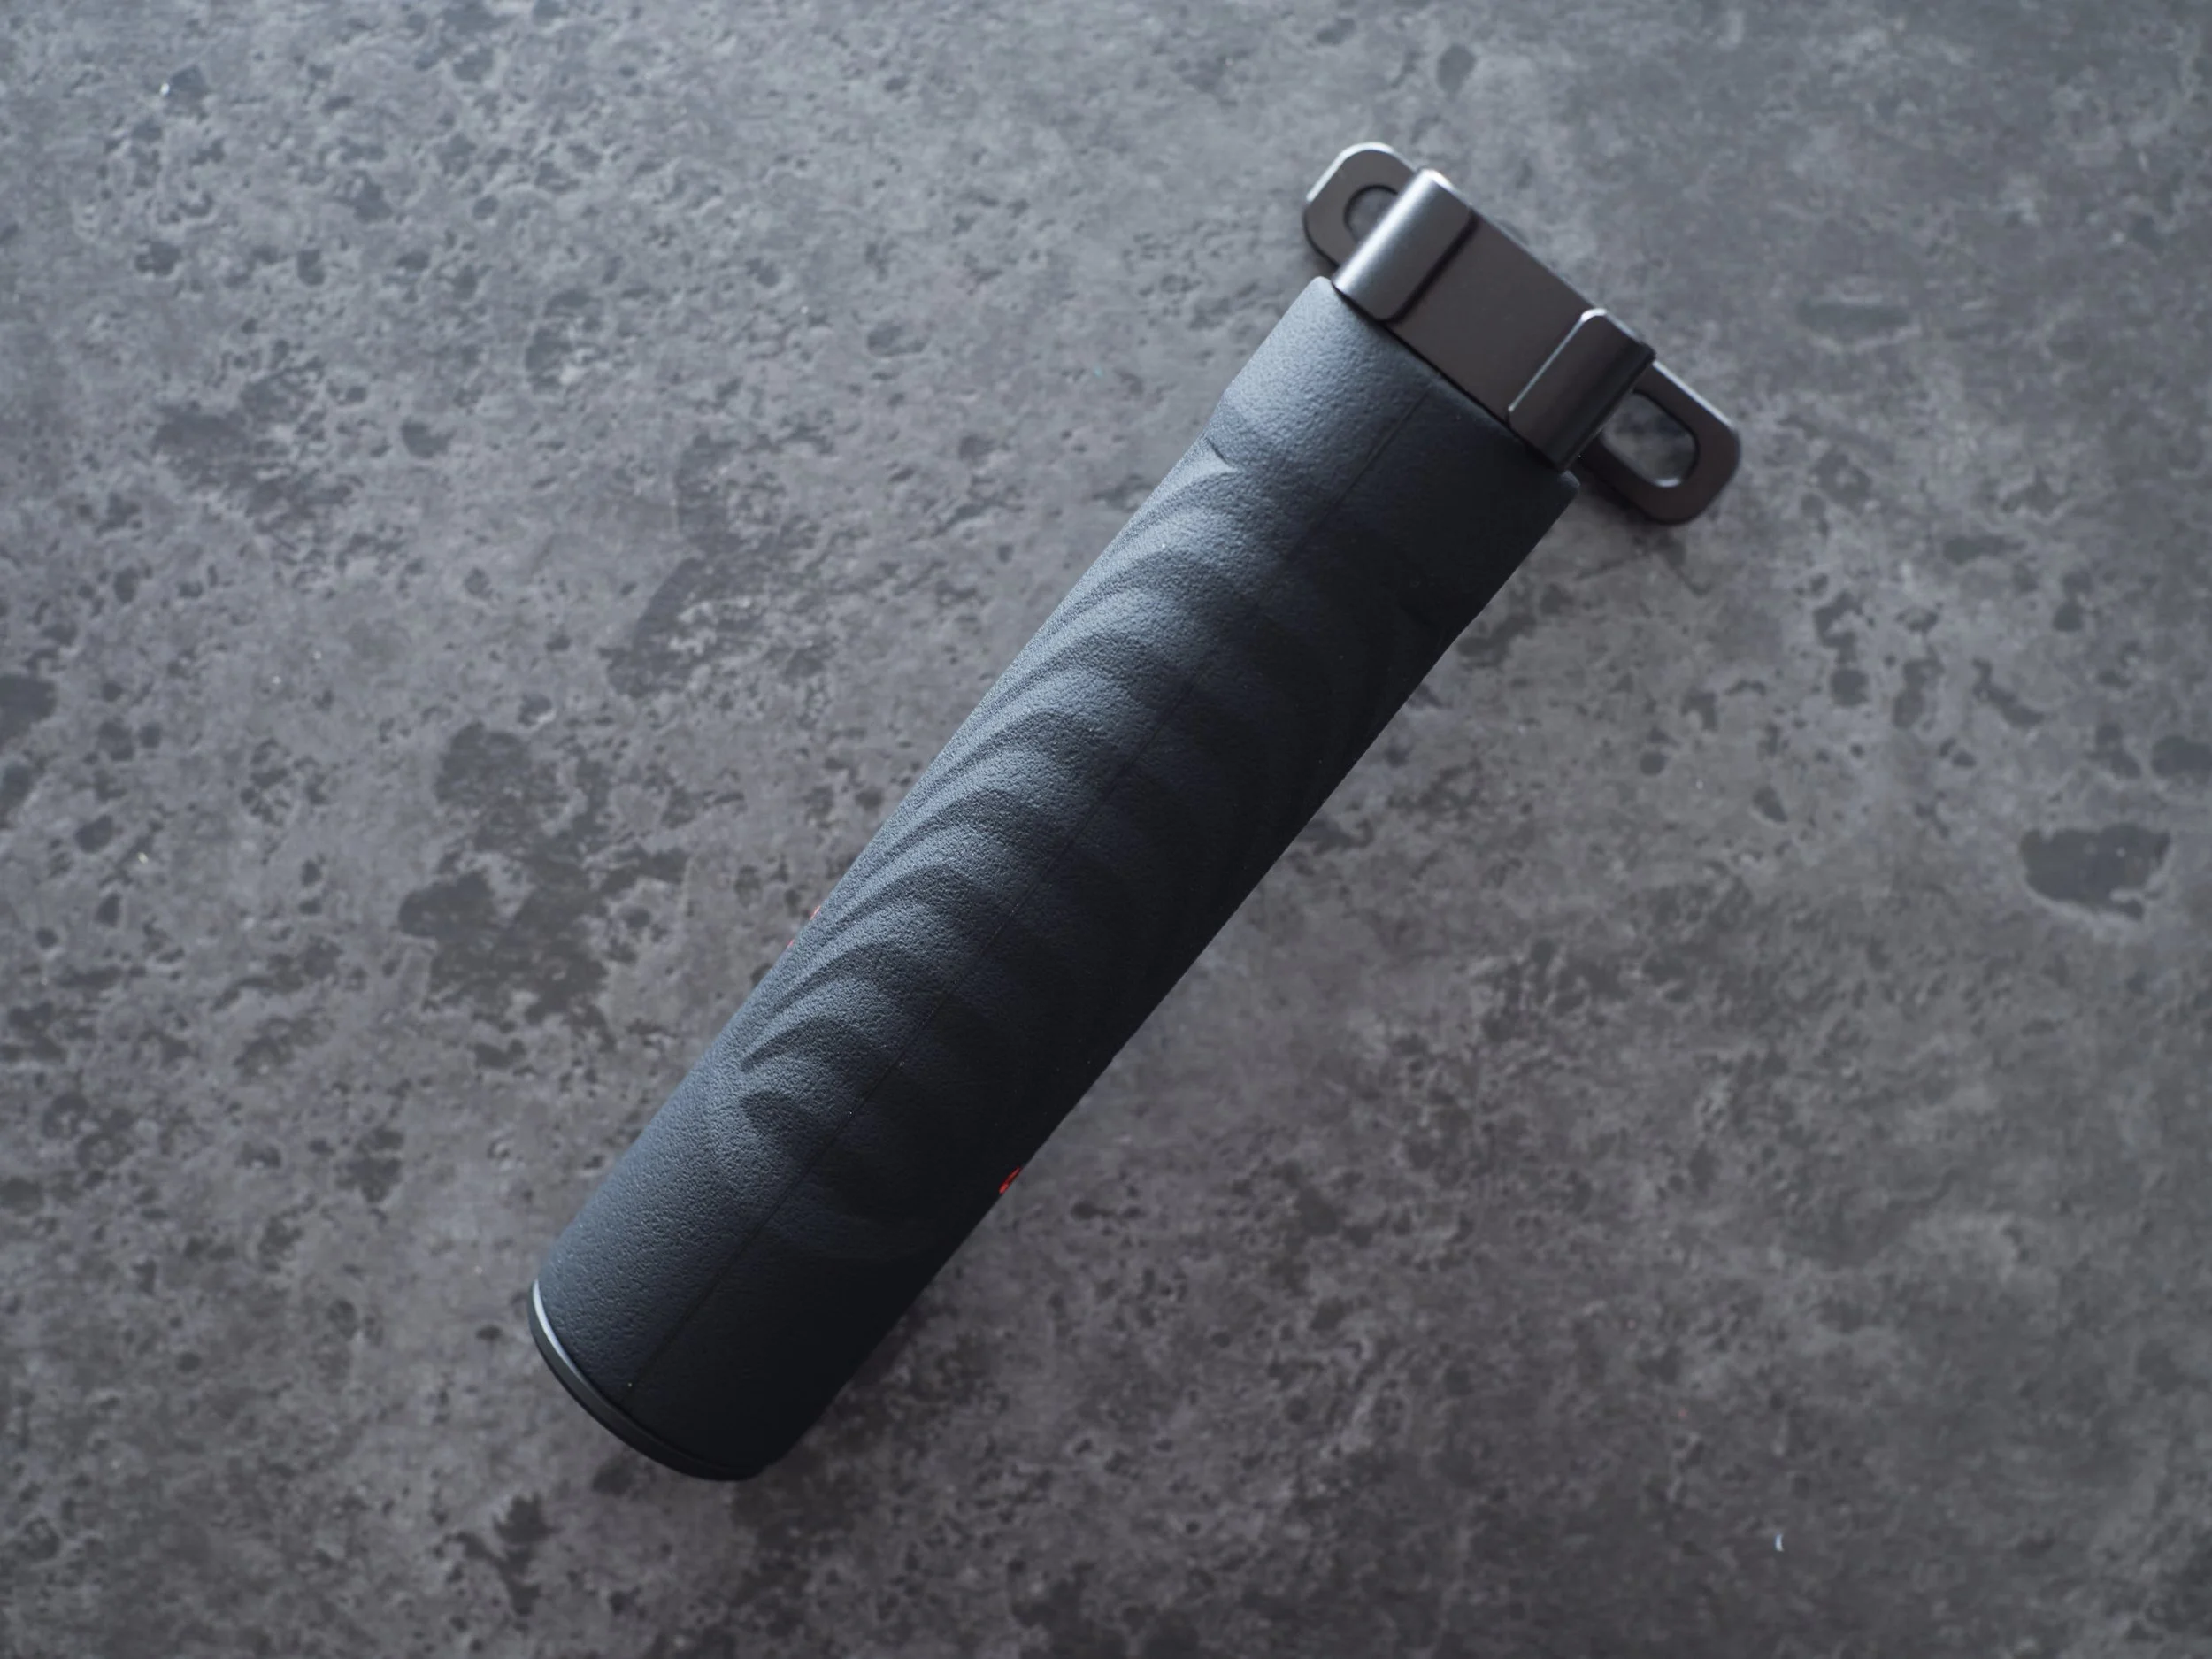
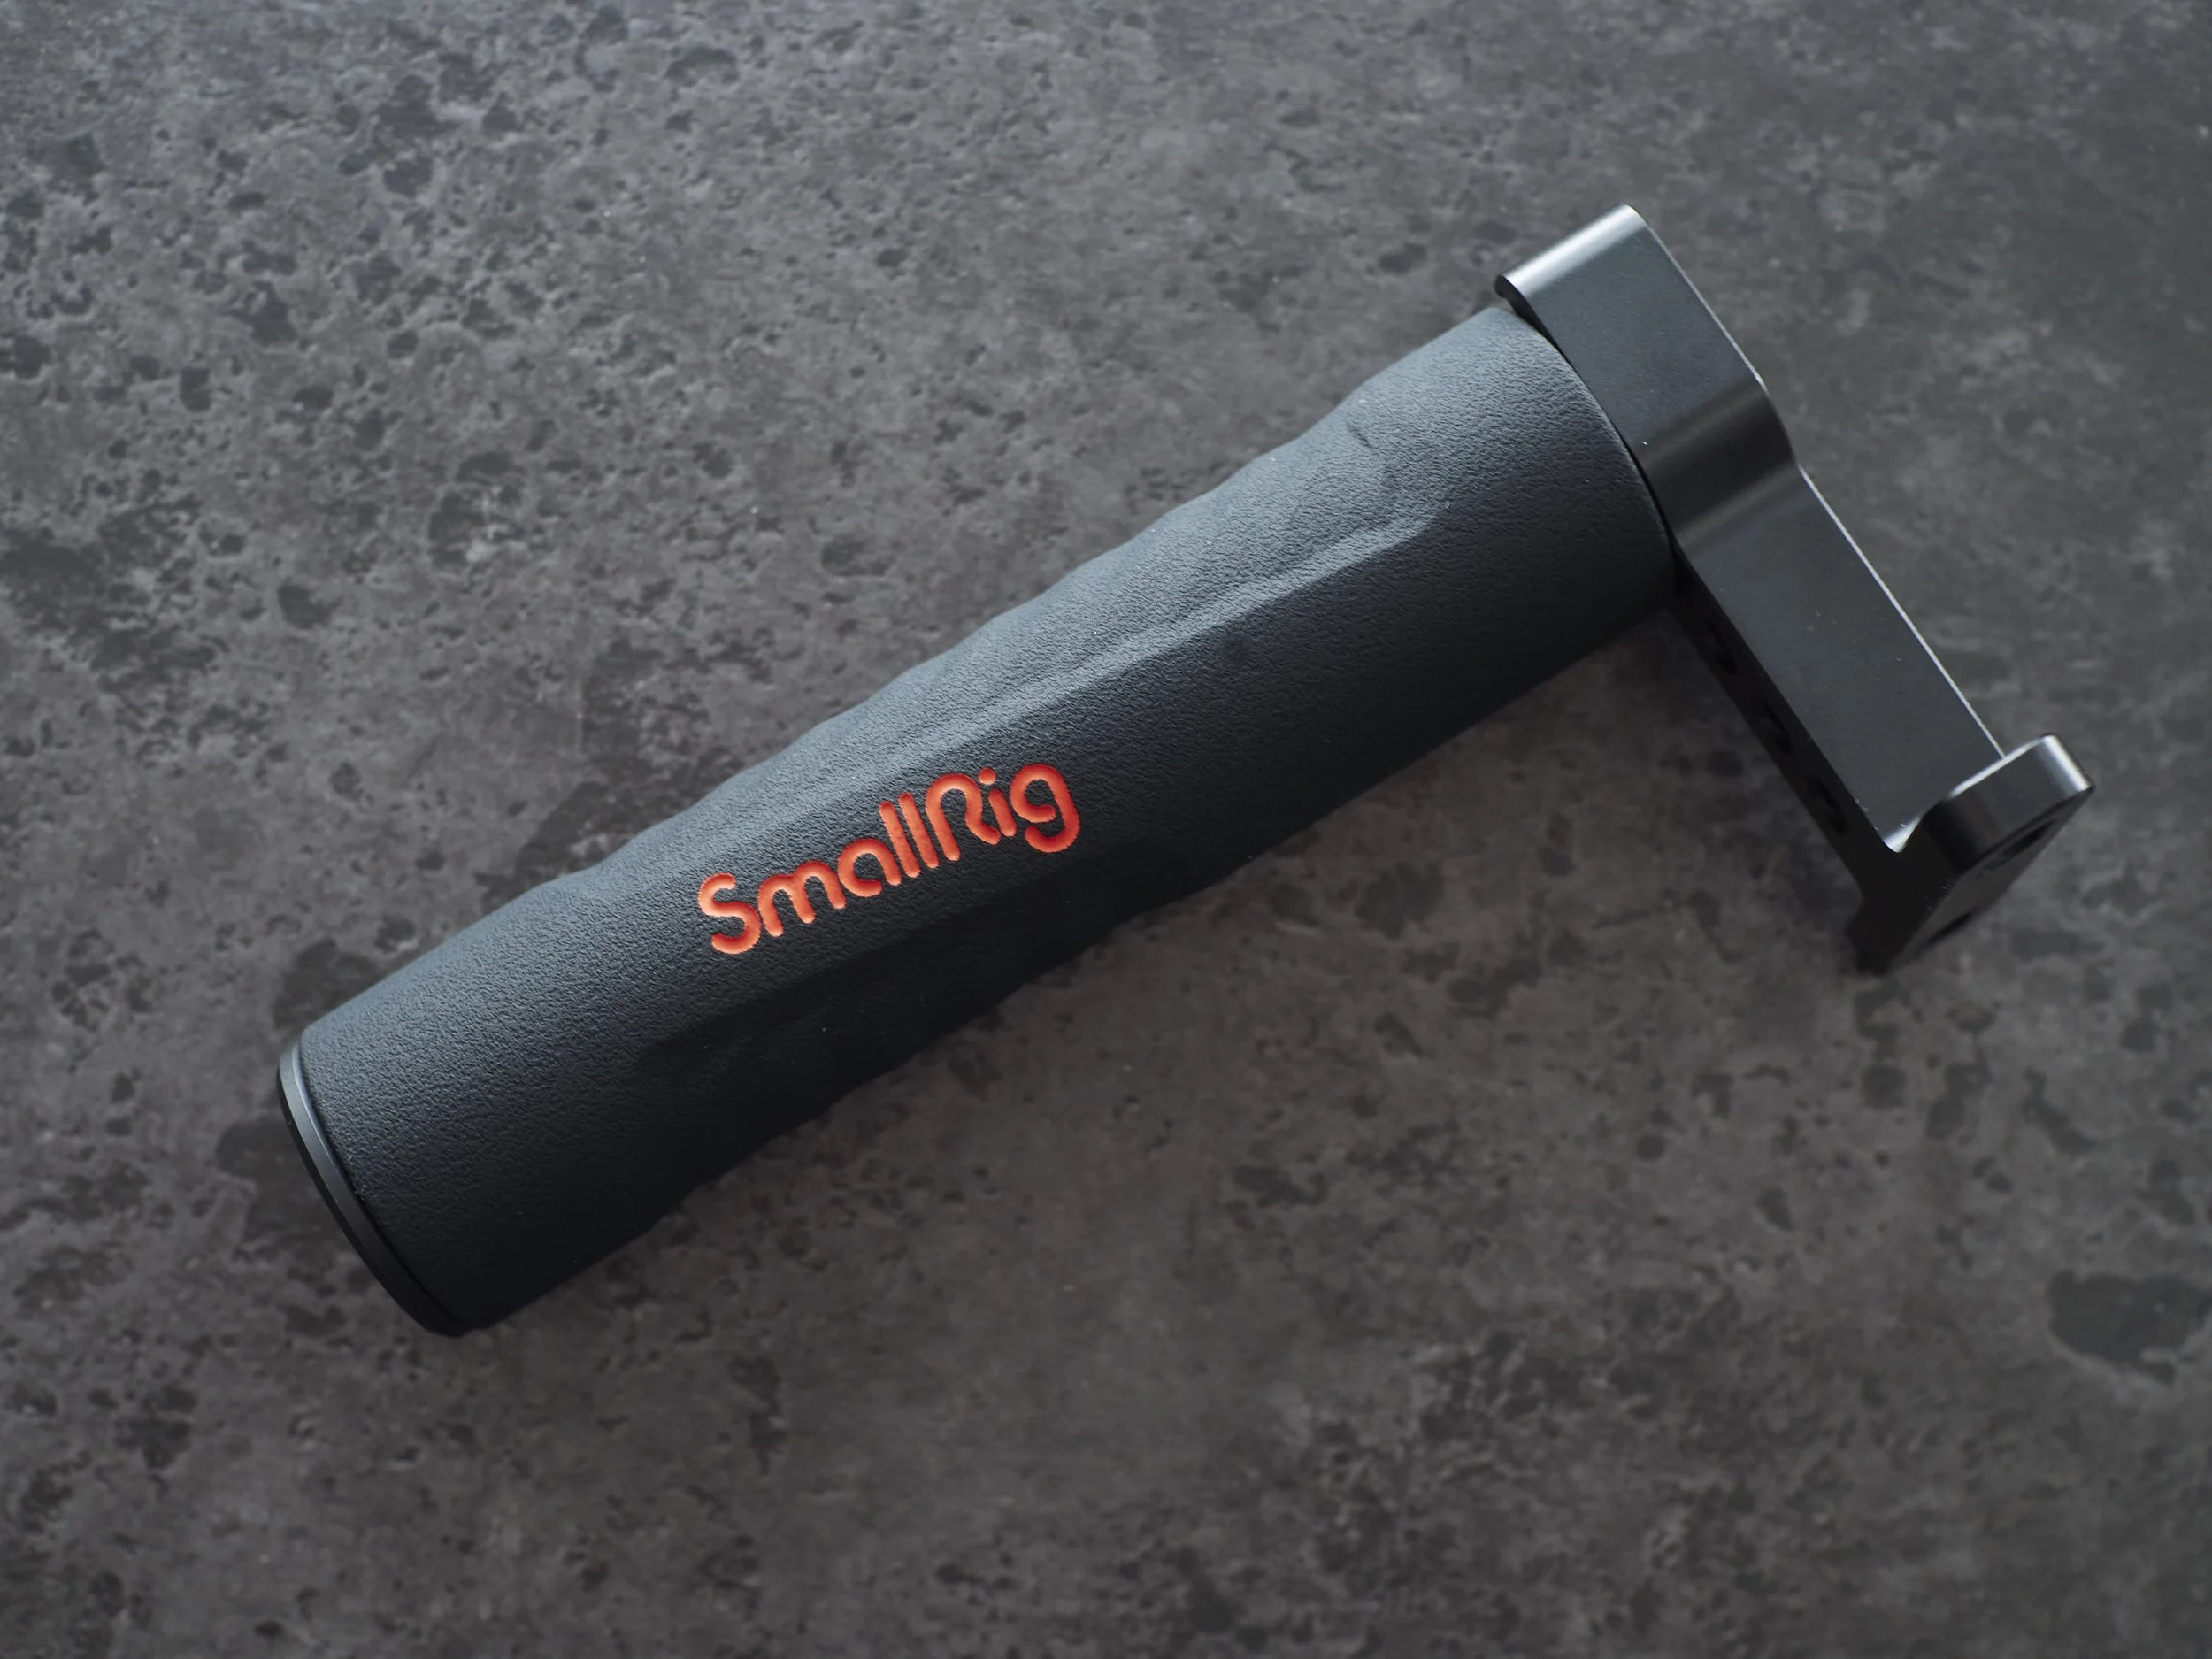
My handle of choice for my rig is the 2094c, because I need to be able to remove it quickly for transporting.The 1446b is comfortable and neat, but a little long and being a screw-in model, too hard to remove. The 2094c also has an angled Arri connection point for a cold shoe mount (ordered) or a safety cold shoe foot itself, which will in turn take my 2905 tilt monitor head (ordered).

The cold shoe mount is also being upgraded to a two screw safety lock model, just for the added sense of security (ordered). I had already ordered the two screw basic version, which I will find a use somewhere I am sure.

The mini magic arms and ball heads will be reserved for other uses. The 2905 tilt head has been ordered to do the job right (mainly it allows for one handed operation).

The other change is a proper re-assigning of the White Balance function to the toggle switch on the G9 (it was originally assigned to switching the top dial functions to WB, but that was double handling).

I cannot explain why I made this so hard, but on revisiting my settings with some more focussed purpose, I have assigned WB to the toggle as the push-in function (you need to assign Fn to the toggle first), then it instantly allows you the maximum range of WB controls.

This means;

  • WB is on the toggle (WB is critical to image look),

  • ISO is on the main rear dial (main exposure control),

  • Aperture is on the rear top dial (secondary exposure and main depth of field control),

  • Shutter is on the front top dial (rarely used, but cannot be turned off)*,

  • Peaking is on the upper front function button (set to blue and on most of the time-looks good own the bigger screen)*,

  • Stabiliser lock is on the lower front function button (toggling between active and locked is often necessary)*,

  • Tele-converter is on the upper rear Fn1 button (free zoom),

  • Record is on the main shutter button and the Fn3 button, top left rear (for left/right handed actuation),

  • Histogram is on Fn2 (my main exposure control and so much more useful on the bigger, less crowded screen).

These are all the important “on the go” settings, with all others like Zebras etc, on the less easily reached buttons or touch screen.

I used my Olympus stills cameras for a job the other day and any fears or forgetting how to use them after a longish period immersed in G9 video settings were unfounded. After a few minutes shedding my “rust”, old habits kicked in. Hopefully this will extend back again to the G9, with a “different hat” dynamic taking over when I switch.

*The cage actually makes these and the three buttons on the top harder to bump which helps a lot.

Attitudes Change With Circumstances

I am a RAW shooter. For stills shooting I have often longed for the neat simplicity of a jpeg work flow and nearly achieved one with Fuji cameras, but at the end of the day, the latitude, creative freedom and safety of RAW has always won out.

My images are processed to have a distinctive (and evolving) look, as any long term photographer will develop and that look is based on my processing work flow more than any other factor.

It is absolutely possible to get the image you want in jpeg mode, but when the subject is tricky and the end result requires some caressing, then RAW is the logical starting point and it is easily available to all of us. This image is influenced as much by Lightroom, my programme of choice at the time, as any other factor.

In video though, I intend to be the equivalent of a jpeg shooter, predominantly using the Natural colour profile, with modified settings* on my G9.

There are several reasons for this;.

Video requires more attention pre-shoot. This must be done, so control at capture becomes the mantra and is the main reason I have a dedicated video camera rig. My needs for video are so very different to my stills processes. Consistency is key, not image by image manipulation. This means that with only a little extra effort, most things can be signed off on, then processing is a matter of story creation, not applying needed fixes or aggressive creative changes.

The RAW-like options in most pro-sumer video cameras are only a shadow of the capabilities of true RAW for stills. The best I can potentially do is V-LOG-L which is still not RAW and requires a paid firmware update, otherwise I have the relatively new Cinelike-D, or twitchy and needy HLG, which are only semi Log styles. V-LOG, like many other LOG or semi Log formats is a saturation/contrast reduced look that can take aggressive processing, but also needs consideration at capture and has restrictive software needs, but it is still not RAW. It does however have RAW’s reality of needing to be processed, so shooting V-LOG, Cine-D or any other LOG like format is a liability if you are not skilled in processing them.

With RAW I predominantly fix straightening, cropping, exposure, contrast and colour in my stills, but these should all be already fairly controlled in video, so the effort required to process LOG files is mostly unwarranted for me (at this point).

I am a content creator for my employer not a movie maker. My workflow is not going to allow extended processing times. I may sometimes have to shoot and drop the SD card directly to my boss for immediate use. I need to give them something that is close to done, to reduce the need for on the go fixes while they are making the footage into something useful, often same day. I need to be consistent and predictable.

Natural or the punchier and more distinctive Cine-V on the Panas are pretty much where I want to get and they still provide a little processing room for my own projects. When researching the G9 (or any Panasonic), I was amazed how many serious shooters are more than happy with these “baked in” colour styles for their client, or even their own work. Olympus on the other hand has less of a following for anything pre-set, with only a FLAT profile to extract better results.

By comparison, Jpegs in still photography are rarely close to my ideal.

Lastly, there is something very cool and satisfying about getting the job done and “in the can” as a single process. It feels very “directory” or something.

*For most jobs, I will used -3 Contrast and Sharpness, -0 Noise Reduction and Saturation, switching to -5/-2 for more hard core work when processing will be assumed.


Rig Assembly Started

Lots of little things to come, but the main cage arrived today and I bought an HDMI cable, allowing me to test my theories.

The Cage fits! This should not be in doubt, but I had read a few reviews on the older Niceyrig GH5 cage, that said you needed to shave a little off or wiggle and force it. The newer cage says clearly G9 as well, so I assumed (hoped) they had slightly modified it and after a little gentle caressing it fits like a real one :).

You have to make sure the camera is pushed fully to the front, or the cage top depresses the WB button, but once you have it properly seated everything feels nice and secure.

Top handle.

I started with the 1446b handle as I only have one cold shoe adapter and I need that at the moment for the monitor (all to be fixed soon). Good fit, well balanced and comfortable. The only issue is it will not fit in my bag, which at the moment just takes the whole kit.

Since the images taken for the side handle examples (see photos below), I have switched to the 2094c, which gives me a quick release option for packing down quickly and centres the handle better. I did mistakenly buy the single screw cold shoe plate, which twists occasionally, but have a double coming.

What about the 1446b? It was super cheap anyway, but may still come in handy when a longer, more securely screw mounted or soft handle is needed for long jobs (or the 2094c is needed for another camera). An alternate use for the 2094c is for accessories, mounted on a side cold shoe plate, so maybe a second handle for monitor mounting in the middle would also help.

The final set-up. A quick twist and the top handle can be removed and packed away.

Side Handle.

My alternative take on side handles (2821 mini top handle) has works with only one small issue. The HDMI cable I have is a straight out one with a thick reinforced cable, so the handle blocks it from going in (without taking the handle off), but again, bits coming to fix that (angled HDMI adapters). Alternately, I could just fix it at right angles, which would likely be fine (is, but not as comfortable). Alternatively the Smallrig ultra thin HDMI cable will fix all these issues. The angled HDMI adapters may also help with fitting the cable, leaving them in as the mounting point and holding back the cantankerous rubber flap and protecting the connections from damage.

Otherwise all is good.

(Thanks to my lovely assistant); The little side handle allows for behind, below or above support while staying small enough to stay out of the way and it allows cables etc to do their thing unobstructed (when they fit that is). It also (not pictured) rests on the forearm when focusing, giving you a support point independent of the lens. This setup is especially comfortable when panning from the waist or if held from above.

Handily it also gives me a handle to grab when getting the rig out of the snug bag compartment.

Other Stuff.

I have added a gimbal weight to the left under side, next to the tripod plate, which balances the kit perfectly and gives just enough extra dead weight to help feel stable. The two also provide a balanced base for the now front heavy rig when I put it down.

There is a soft hand strap coming so the whole thing can rest better on my right hand and the HDMI phone adapter to try, meaning undoubtedly more ideas to come.

The monitor, which sits well enough now, should settle better with the little magic arms and cable adapters.

So a quick summary;

  • Monitor; Win

  • Cage; Win

  • Handles; Win with options

  • Cables etc; Work in progress.

More Good Stuff

The Monitor (Feelworld FW 759) arrived today.

Initial impressions (I do not have the right cable for it yet);

Smaller than I had imagined, which is good. In my head it was getting bigger and bigger, in reality it is only slightly bigger than my bigger than average phone.

Mini ipad, Monitor, A12 Samsung phone. It is the lightest of the three, coming in under the iPad with a 550 battery.

It feels fine. I was expecting plastic and I got it, but it is not bad feeling. The buttons are “clicky”, but seem solid enough.

The screen itself is bright and clear. For future reference, no screen shown on another screen is done any justice. On the standard setting it is fine, on vivid it is super crispy and for possibly better reference, the mild setting is semi soft.

It comes with a protector/slim hood (pictured) and a velcro on deep hood, a ball head identical to the Smallrig base model and a HDMI-C to mini HDMI cable, which unfortunately is too small for the Pana and too big for the Olympus cameras, so I am yet to see it in action.

For mounting, I have ordered a couple of the Smallrig 2163 mini magic arms. For less than $10 each, these hold 1kg or more and have good movement options. The ball head thing was ok, but worked best from a cold shoe. I think I would prefer the screen at an angle coming out from the front of my handle(s), not sticking up from the top. We will see.

Enter The Third

I arrived home today to the smallest of Smallrig handles, the 2821 mini top handle.

This one will hopefully be the side handle for my cage. The Niceyrig has a double row of off-set 1/4” holes on the left side of the Pana cage, so my plan is to mount this handle in the normal orientation, but angled slightly down on the back end to make a very handy, but small profile side handle-bar usable from any angle* and rest it on my wrist while focussing. Sans camera, it feels very nice.

I have avoided a standard side handle, because they are really only good for holding to the front, not low or high.

The whole foot is a floating 35mm long screw chamber, so finding suitable holes should not be an issue. if the angle does not work, I will mount it at right angles which will push it forward slightly.

Dwarfed by the current favourite for top handle duties the 1446b, the tiny 2821 seems almost pointless, but it comfortably fits my larger than average hands and is strong enough to take the weight of the whole rig when changing grips etc. The 1446b has one of the better ball heads mounted for screen duties.

The mounting point of this little handle is centred enough so the handle should not interfere with screen operation (ed. It does a little), but I have options on the cage, so I can be flexible here. The rear of the handle is actually closer to the centre than the front.

All just fairly pointless speculation at this point until the cage comes, but feeling good so far :).

*The idea is to have two contact points at all times.

  1. Top handle and side from above.

  2. Main and side handle/lens from behind or below.

  3. Top and main handle from above.

Two Handles Compared

I now have two Smallrig handles, but no cage to mount them on.

Even though they serve the same purpose and are made by the same company, in direct comparison, they are quite different.

First up, the new one, the 1446b.

It is much nicer than I expected. Most images made it look grey and cheap looking. The reality is a nice, true black padded rubber grip on equally black metal. The thing is long, seemingly much longer than my 2094c from its mounting point (see below) and seems lower in profile, which are both party illusion. The lack of any screw mounts apart from at the handle ends, makes for a comfortable grip, but lacks versatility. This is all about comfortable handling.

The only achilles heel I can see apart from what you know when you go in is, the cold shoe slot is very shallow, only a little over half the depth of most cold shoes, so basically useless. Not sure why or to honest why they even bothered with one.

Something I really appreciate is the flexibility offered by the two screw holes. It looks like they have enough latitude to handle any combination of 2-3, 1/4” holes presented to them.

This was cheap at $29au, so the quality is a pleasant surprise, even if the near useless cold shoe is not. If I were to use this with my monitor, I would screw a mini head into the front (or back) of the handle, so the cold shoe would not be an issue.

The polar opposite in form, design and handling dynamic is the 2094c, shown below with the mini ball head I intend to use with the Feelworld monitor.

The much dearer 2094 has a plethora of holes of all sizes, two cold shoes (one locking) and sits higher than the 1446b. It screws into a cold shoe which was my bad call, but it can now go into the dinky little cold shoe adapter.

The biggest difference though is the mounting point in relation to the handle length (see above).

The 2094c can be mounted forwards or backwards with little difference as its centre is almost over the mounting point. This helps with attachment orientation and getting the best centre of gravity.

Possible applications for them, depending on the cage and the third handle I have coming (2821 mini), is for the 2094c to go on top, using the cold shoe attachment to help with fast mounting/dismounting and the 1446b on the side as a side handle-bar*/bumper. The 2821 was also bought with this in mind, so we will see on the day. The cage may determine this anyway.

Optionally, I may just use the 1446b on top, forward or reversed, with the monitor mounted on the end and the mini handle on the side. The 2094c may be used on a lighter camera or simply dumped as a bad idea. This will give a softer feeling handle with a lower (feeling) profile on a more secure, but less flexible screw mount.

*I much prefer the idea of a side handle-bar rather than vertical side handle as it can help at any shooting angle and act as a forearm rest when focussing.

Failure Of The Unknown

Well the little Veledge tilt head failed today, the second day I had it. I tried to tighten it to sit straight on my handle, but it stripped the tip of the thread, with was a little too short anyway, so now it will screw into itself dis-assembled, but not assembled.

Plan B.

I bought two sets of Smallrig ball heads a few weeks ago and now is the time to review them.

I must admit to being surprised that, after the way they were marketed, they are essentially the same size.

For $10au you get two heavy, strong little mini ball heads, that would likely hold a small mirrorless camera body with little fear.

For $25au you can also get a pair of “heavy duty” mini ball heads from the same brand. These do feel like they will hold more, especially off angle as the slightly matt finish feels more “grippy”.

The cheaper ones feel more “glossy”, the dearer ones more rugged, but otherwise, if weight is taken into account, the cheaper ones seem to be better value at 20% the price.

The cold shoe adapter on each can come off. On the cheaper unit, it just screws off, on the dearer, you have to undo the standard 1/4” screw and it has the tightening hole on the lock, not just a knurled thread.

The two ball heads with cold shoe feet on, the heavy duty on my handle (for the 7” Feelworld screen) and the re-purposed foot from a cheap one on a weight from my gimbal-ear marked for the cage.

The main difference between the two comes down to the release mechanism.

On the cheaper one, the release only releases the stem, so once aligned, the only way to tip it sideways is in the one direction the cut-out is pointing. This can be a pain if you are using it for a monitor or the like as you have to hope the cut-out faces the way you want. If on the cold shoe mount there is some control, but really it comes down to luck.

The dearer ones rotate fully on their own base (but only in cold shoe mode, not screwed directly in), independent of the mounting alignment. This means I may be using one for my monitor, either forward pointing as above or in the cold shoe slot.

Is the cheaper one better value? I think it is for normal use, but if a deeper angle is needed, the rotating body of the dearer one is ideal.

The Ulanzi/Veledge tilt head was a good idea, but poor design and manufacture let it down.

Screen Play

To monitor or not?

Focussing is the big thing. If you cannot see it, you cannot focus on it.

The blue peaking on the flip screen of the G9 is good at smaller apertures, but what about f1.8 on the go?

My likely get is the Freeworld FW 759 (aka Neewer 759 and others).

Look, a generic, but effective monitor mount, snuggly attached to my handle. Just sayin’.

This is an old monitor, lacking some sex appeal, features and niceties like rotation switching, touch screen menus, power sharing or internal recording, but it is big, reasonably bright and sharp and importantly, there are a library of reviews out there. Latency, which is an issue with most monitors seems to be ok (for the money) and I will learn to cope, or use the camera screen for very fast moving scenes.

After reading a lot of the good “for the money” reviews, it keeps coming up as a good, not just budget, but good option. One reviewer, (who was golden), compared the screen to his Atomos Ninja V, allowing me to actually compare apples to apples and the Freeworld was a bigger, slightly less crisp, but acceptably crunchy apple.

The most important features, the things I actually need are;

  • accurate and clear focus peaking (old school B&W with red fringe) and general clarity,

  • a histogram display, which unlike a screen, cannot be fooled,

  • NP Battery and 12v compatibility (have heaps for my video lights),

  • a sun shade, which fixes most brightness issues (the 759 has a shallow and deep one)

This has them all with a 7” screen for $129au.

This will allow me to use the camera screen for general info and comparison, the monitor for composition, focus and importantly, to let me get the cameras flip screen out of the way.

My other option is a hack suggested by Neon Airship on DIY Photography. This only needs a few cables and a cheap adapter (ordered) to re-purpose my A12 Samsung as a monitor, but when the adapter comes, I am expecting to have something not go as planned, so a real monitor is still seriously being looked at.

Little Big Rig

Video has some cool stuff.

Stills shooters use cameras (boooooring-just joking), videographers use very cool “Rigs”.

My “rig” has a few considerations that I think may be able to be balanced, at least I hope so.

  • It needs to be small enough to be on most of the time (not keen to be assembling-disassembling it constantly),

  • it needs to handle a non-rig feel, as well as the benefits of a rig when needed,

  • it has to be versatile enough to take a variety of accessories.

The Cage

Smallrig makes a dedicated G9 cage, but for half the price and I think a more versatile option, I have gone with the Niceyrig. It takes any Panasonic (possibly even an Oly at a pinch), has a second cold-shoe and more real estate on the top and side bars. I may even employ this as a C-type cage using the right hand handle obstruction free, but that depends on cage stability.

Top Handle

You really need one. These add several angle options and centre the camera when shooting one handed. They also usually add cold shoe slots with some depth, which for me will help accommodate a bulky Zoom mic.

They are useless for high shots and make a rig quite tall, which may limit bag options, but otherwise, they tend to stay out of the way. I have the 2094c for hot-shoe mounting, but will now be cold-shoe adapter mounted on the cage (or used straight on a smaller camera). At first this was a pain, but on second thoughts, it provides a quicker mounting-dismounting dynamic than the usual screw in handle.

I also have the 1446 screw-in handle on the way (which was super cheap). This will give me the option of a lower profile, rubberised and securely screw mounted handle. I think this will feel safer for shooting from vehicles etc.

Side Handle

I do not see the point of a right hand handle, as the camera, designed by experts, comes with an excellent one and it is properly placed to reach all the buttons and dials!

The left hand gave me some trouble at first. The natural way to hold a camera when focussing on the actual lens is to cradle it underneath or reach down from above. The former is prone to becoming uncomfortable with a big, blocky side handle sticking out.

This type of handle is really only designed for forward holding at waist to chest height unless you get an adjustable Arri-rosette style (bulky and not instantly changeable). What if you want the camera lower or higher than that?

I may have a solution with the Smallrig 2821 mini handle, attached to the left side of the cage (which has 2 rows of off-set screw holes). This may be set at a 30-45 degree angle down and back or up and forward or just at 90 degrees straight on. I will experiment depending on the screens movements and how it feels on.

This should offer several benefits;

  • a protective bumper for the left side and screen,

  • a contact point on my left arm for passive stabilising while cradling the lens and focussing,

  • something to hold when changing hands or using the right hand for other duties,

  • a handle that can be held straight on, from above (stabilising the top handle) or from underneath for high shooting, providing something a little substantial.

This is a relatively small, smoothly rounded handle, not even providing a cold-shoe slot or a solid grip with a big camera, but for this application, it will hopefully be ideal.

Bottom Handle?

Bit out there, but I will explore the benefits, if there are any, of a long handle o n the bottom of the camera (1446). I have a spare and the bottom bumper-bar idea appeals, as does the hand rest while focussing, but it really just may not work and I have never seen it done!

Cold Shoes And Accessories

These are always handy. The rig has two, the 2094c has one up front and one back, the 1446 has one and the cheap Ulanzi T-Bar can make one into three. Depth can be an issue, so the slightly front of body top handle and rig ones are good to have.

My possible needs are;

  • a Zoom H5 or H1n with their own mic capsules (one is a long shotgun),

  • a Zoom H5 or H1n as pre-amp for a 3.5 mic (boomed or LAV),

  • a Zoom H5 as XLR interface to up to 2 studio condensers and possibly a capsule or 3.5 (mics run out to stands or boomed),

  • a small shotgun mic for run and gun (and backup sound),

  • a light or two,

  • a monitor (???).

The Zooms are mostly static options, so the Ulanzi will be fit on somewhere and handle what ever combination is needed, even mounting them sideways or reversed depending on the application.

The monitor thing is vexing.

Not sure I need one just for me. They impress clients, help with large production framing and give valuable breathing room for large stand-off or shoulder rigs, but the entire dynamic of my kit would change. This is one of those things that will have to earn its place in a minimalist kit and my gut thinks it will not. I have addressed the bright day issue with a soft hood for the existing screen and screen size does not bother me.

A camera mounted light would be a desperation move, but I may be desperate, and I have one at hand.

Part of the ever growing collection. The Neewer XLR cables are brilliant! All 6 are fine. I only need 2, but 6 give me potentially 21 meters a side. The little Lewitts are even smaller than I thought, weighing in at a little less than a mini shotgun mic and about the same length.

I figure two cold shoes will handle most needs (cage and top handle offer four), three to four when mounted on a tripod with more comprehensive sound needed (T-bar brings it up to six with three”up-front”).

Next week the bulk should be here, so a single image will answer my question, which is;

How big a rig is big enough, but not too big?

Getting A Grip

Looking at rig building for a video camera can be a hobby in itself.

Stills shooters have really only one choice. Add a battery grip or not? After that, straps, hand grips etc are a minor consideration, that seem to sort themselves out.

Video on the other hand is a whole different matter.

Handling

I started with an ill-advised hot shoe top handle. This looked to be the best basic addition and for some things it is, but after one serious use I discovered it was a sword with two edges and a dark secret.

My camera is not overly heavy (G9 with 12-40), but extended use of a hot shoe handle is likely problematic (read horrific when viewing some peoples 2kg+ kits). The reality is, hot shoes are not designed to take the weight of a camera and lens, only the weight of a flash on top, and that is with downward pressure on the joint, not from the joint down.

After using the top handle, I also found the whole thing a bit disorientating. If you use your left hand, then your right has to focus. If you use your right, the left has to start/stop shooting and control the bulk of features, which is not where the buttons sit. A third hand maybe?

Looking at the process I decided a left side handle could work.

Both hands holding the camera, both hands able to run functions as needed, both hands individually able to take the kits wait and the whole thing seems more stable especially when not moving.

The issues here are low angle shooting (handle), focus ring access (un-obstructed left side) and run-and-gun shooting (handle).

For run-and-gun and low angles the handle makes more sense and is an acceptable compromise when the shot is set up and only a movement needs to be controlled.

For focussing, a big left side handle becomes a handling inconvenience so I need a decent compromise (see below*).

A cage?

A cage allows for both the above as well as other options and some protection. The whole thing starts to get pretty full-on from here, but you can remove the bits you do not need.

For top handles, I have the existing Smallrig cold shoe 2165c with a $7 cold shoe foot adapter (handle easily removed) and a lower profile/more secure 1446 rubberised screw-in coming (very cheap for a Smallrig).

The cage is a Niceyrig. This is half the price of the G9 dedicated Smallrig, takes any Panasonic and has a slightly better design for the rig I am building.

Humble beginnings and plenty for tripod operation, but limited (unwise) for hand held work.

Focus

It struck me after ordering a Smallrig Gimbal handle “L” bracket as a flexible generic left side handle, that the handle may make focussing difficult, so I cancelled it. I like the current feel, so adding in a long and large side only handle might be a retrograde move.

Not feeling the need for a full blown follow focus control on a 15mm rail solves a lot of problems. The 12-40, 25 old Pen and 17mm lenses all have true linear manual focus and good throw (the 45 does not, but is a little long for subject chasing anyway). M43 gives the shooter a DOF edge also, so wide open focussing is not as hard.

This means reaching the lens barrel with my left hand and that hand acting as a camera cradle is still favoured, but how do I do a left side handle if needed?

I am going to try a Smallrig mini top handle 2821, set at an angle (exact angle to be decided when I actually get the gear, but I am thinking slightly forward at the top or bottom like a medium format camera handle), screwed into the side of the Niceyrig cage. This handle has two moveable screws allowing me to use the two rows of off-set 1/4” threads on the cage as I need. The handle is smooth, relatively small and quite tall for a top handle, hopefully allowing for a decent angle and enough clearance to be out of the way.

It will be strong enough to hold the camera left hand only and project out far enough to provide a little protection for the screen, while cradling the wrist, then act as the left hand stabiliser.

Bit random, but the only offering outside or a rosette handle for angled options.

Viewing

This needs addressing after my field trip the other day. The sub-3” screen on the camera is fine for most things except in strong light. I was tempted to get a decent monitor (Neewer or Freeworld 7”), but to be honest, it may be a misguided purchase. I am aware of my habit of going fully “belt and suspenders” (other wise known as “over the top”) with most things and I just don’t want to be that guy who “looks the business”, while not being able to actually “do the business” by overcomplicating things.

If I am using the camera in a fluid environment with a large screen, the dynamics of viewing, holding and focussing all change and not for the better. Suddenly you are talking unwieldy shoulder or monster hand rigs. There is also the issue of introducing a different screen to the one on the camera, so a new set of “interpretation parameters” would be required.

The camera eye piece is still most viable for bright light shooting, especially on a tripod, but only if the kit is kept to sensible dimensions. I may chase up a large, soft eye cup for the eye piece if used often, but they do get in the way of the the screen.

The only real issues I have with the small screen is viewing distance (top handles effectively push it away) and bright light. I have ordered a Niceyrig sun shade for the screen, which may fix the light issue for $13au and the distance thing is more a potential and avoidable problem than a real one. I would also prefer a flip back screen, but you get what you get.

Hoods

My lenses all have efficient hoods. The whole mat box thing would look fully lush, but is not practical for me (see monitors above) and my kit only just fits in my biggest bag as it is.

If my filters included more than the odd ND, I would likely go into a full mat box and filter holder rig, but that is unlikely at this point.

Lighting

I have a single on camera light, the Neewer 176 and it is fine. The T-Bar or rear cold shoe on the cage can do this. My slowest lens is f2.8, my fastest 1.8. This is plenty for most subjects.

All other lighting is self standing.

Sound

This gets more complicated.

The Zoom H1n and H5 are both cumbersome on a rig, but do-able.

The H5 will likely be mounted separately if XLR mics are fitted and these are always going to be used in a static setup.

The smaller H1n will be used for boomed/on camera mini shotgun and LAV mics or on its own.

If I use the H5 with its own shotgun, it will likely be on a tripod and any of the cage, unused handle or T-Bar cold shoes can take it. If I use it with the X/Y capsule on the move, than I will have the same options as above as needed.

*

So, where do we stand at this point, taking into account this is all mostly untried (most still coming);

  • The Cage with mini top handle angled on the side provides two handed operation without blocking other functionality.

  • The side handle may also add stability to focus handling and protection for the flip screen.

  • The cold shoe or screw in top handles provide either a more secure, or easier to dis-assemble option or can be skipped all together.

  • The handles, cage and T-Bar offer up to 6 cold shoes for accessory mounting while removing any strain on the camera.

  • Most work with the G9 will be static, using the OSMO for Gimbal moves, so more than enough options, I hope.


It Will All Be Ok

Relevance is a driving factor for many.

Is my work/perspective/process/career choice relevant?

Photography has changed a lot over the years and I have had a tendency to assume that it is leaving me behind each time, but you know what? I think it as relevant today as it ever was and the true practitioner is also just as important as ever.

This is a fresh perspective for me. I will admit to reconciling myself to photography becoming an over saturated and therefore under appreciated art form, but I am willing to admit I am wrong here and happily so.

Many years ago, in one of my favourite magazines (Photo and Darkroom Techniques maybe?), a pro photographer attempted manfully to explaining the different processes involved in using 35mm, medium and large format cameras (at that time running more than one was serious business).

One image called “Redneck Rodeo” showed a young sunburned boy standing up in the bleachers at a rodeo with the action beyond him in the semi-blurred background. It was an image that worked because the photographer saw and balanced several elements in the blink of an eye, not because any element had merit beyond the expected.

“Nothing” photos with meaning only to those intent on interpreting it and only in context. In 2022 it is a snap, but taken with meaning and intent, in 2000 it may have been a fresh perspective on image making capability, in 1980 it may have graced a magazine if relevant to the story told.

That image was captured at a time and place with a 35mm Leica camera, nobly defining each element including the camera and lens. The photographer explained that the image would not have been possible with a larger format camera, so the argument was basically that the camera created the opportunity that he grabbed with both creative hands.

This was true to an extent as long as we assume that the person using the camera also had intent, skill and the right gear.

Today, it would be easy to argue that every person in those bleachers, sitting with or near the photographer could also take an image of similar quality using their phone. The reality is though, most will not.

The equipment has changed, but the driving forces needed to make a relevant and harmonious photograph have not. The gear is irrelevant, the intent and application are key.

What has changed is the process and subject matter in regards to the non-photographer. These are the majority of people taking images who are not and do not confess to be driven to create art, to document their world or capture newsworthy subjects beyond their own very defined universe. This majority have been empowered by entirely different forces over the last hundred or so years, constantly being better serviced and are now at their most powerful. The reality is though, the common image maker is not interested in much outside of what directly effects them (family, pets, places, food, events).

Where does this leave the professional image maker or artist?

Basically in the same place as always.

If you or I choose to go out and craft a series of black and white long exposure landscape images, something that has been done since photography started, then you have as much chance as ever of making an impact. Our work will not be judged for its relevance against the images taken by the masses or even those of the past. You still have a chance to impress. The only thing that matters is the quality of the work, not its attention to following “fashion” or technological limitations.

If you decide to do a series of food selfies, then sure, the competition will crush you by sheer weight of numbers, but if your intent is more artistically “noble” than that, then with some determined effort you stand more than a fair chance.

Never before has it been easier to reach strangers with your work, or cheaper. The restrictions of old, which were for many so constricting*, have effectively been removed. If you are disheartened that thousands do not follow you, be happy that dozens do, because in direct comparison to the work of many gifted, but obscure image makers of the past, you are socially wealthy.

What we have to be aware of is perception of scale. You can potentially reach millions, but be happy with thousands. There is a lot of work out there, so don’t expect to own this space. Just be grateful for your share, it may well be bigger than those that came before you.

The message buried in this verbose post is;

If you feel it, do it to the best of your ability.

Passion and focus are always worth more than the current technologies or fashions dictate, enable, or even attempt to overpower.


*For a long time I had to limit myself to 2 rolls of film per week, one slide, one black and white.

Naturally My Dear

Looking at some test footage and the work of others, I think in the short term m I will be concentrating on Natural and Cine-V for my film making.

If I use a LOG style, then post processing becomes the norm. This exposes my newbie frailties and makes my work flow slower than I need just for socials. Sure, if I am making a project film for myself, then a LOG format (Cine-D) is probably safer/smarter, but for run and gun stuff, Natural looks more than adequate. Cine-V offers a cinematic variant.

Natural is very popular with plenty of serious shooters. Undoubtedly more can be extracted from more LOG like styles (Cine-D, HLG, V-Log L), but for my modest needs, I will take a still shooters “jpegs are fine if you do them well” pathway. Video is much more methodical and hands on for me anyway so white balance, focus, exposure etc need to be far more pre-meditated, reducing the habit of shooting fast and loose and rely on RAW to fix misses.

The most common setting used is Sharpness at -5. This seems pretty universal except with a few younger shooters, who keep sharpness up, some to +0 on occasion. I am going to shoot my basic 1080p You-tube stock settings set at -3, so there is a slightly “poppy” post processed feel to my footage, but drop it to -5 for my more serious 4k stuff (it can apparently take a dialled down LUT).

Contrast is less cut and dried. Opinions range from -5 to +0, so for my stock work -3 and my 4k, -5.

Noise Reduction is a tough one. Most shooters leave it alone, but some reduce it for an even further un-sharpened, organic look. I will go +0 for my base, -3 for most 4k, but back to +0 for one 4k custom setting, used specifically for low light work. Natural apparently handles low better than most LOG styles.

Saturation will be treated like Contrast. For stock shooting +0, for my 4k reduced by -2.

So;

  • C-0 or Creative Movie and C-1 x3 VFR 50/150. -3/-3/+0/+0 for basic 1080p stock . A little extra pop can be added painlessly, but this will suit shoot and drop jobs.

  • C-2 25p, C3/1 50p. -5/-5/-3/-2 for my own or better work 4k. More processing room and even LUT’s can be used.

  • C-3/2 -5/-5/+0/+0 as a special low light setting in 4k.

Finally Cine-V.

Cine-V appeals simply as a place to dump all of my moody cinematographer vibes.

  • C-3/3. 4K/25p with -5 Sharpness, -5 Contrast, -3 NR and -2 Saturation.

If I had a GH5, I would also likely reduce Hue to -2 cooler. This is just for me and will likely be used exclusively with the ancient “cool” accented 25mm Pen half frame lens, and in winter….on gloomy days…at dusk…in a bleak mood ;). Character, character, character.

Nature and being natural. Both fit this low stress work flow.

Uncaged Creativity?

So, the other day I learned that hand held video is a bad idea if maximum quality is important.

Hand held has its uses, mostly linked to accepting the hand held look.

A proper Gimbal is needed (or a dedicated device like the OSMO Pocket) unless you are willing to accept the semi shaky ‘steady cam” look.

The down side of setting a camera up as a video device only, is when requested to quickly grab a still, you take what you get with all the wrong settings. This is the first stills shot taken with the G9 (over exposed jpeg, on auto). I won’t judge its performance based on this.

If you feel you have hand held covered, moving quickly undoes that. Big heavy cameras have an advantage, but again a handle and some weight is still an acceptance of a certain look, just for that looks sake. The reality is, documentary and street level shooters hand hold most often, most others do not.

I have come to realise this by doing it and it is not for me.

The useless handle and less useless T-Bar have come back into the fold as accessory supports when the camera is loaded down, usually on a tripod. It is actually ideal for this, packing away flat when not needed.

A bit unwieldy, but far better than the four inches of mic hanging out the back.

The handle is long enough to take the Zoom H5’s length, the T-Bar at the back (which being used as a handle prohibited) then adds three shoe mounts and allows for enough room for easy handling. I guess it will also be useful to mount and dismount the camera, but that will be short term, so no real danger of hot-shoe damage.

For most gimbal moves, limited as they will be, I have the Pocket.

*

If I should decide to go down the cage road again (I did*), the Niceyrig looks good. It has much the same utility as the dedicated Smallrig for half the price, but also fits the GH series (you never know) and with an extra cold shoe mount. It may also have better HDMI cord protection.

I have ordered a Smallrig handle for a Ronin Gimbal that will give me a left hand handle option with or without a cage. On the cage, it can be set wide enough to protect the flipped out screen. This may also be useful for the OSMO pocket, adding some rigidity to the phone/camera option.

I also have a Smallrig screw in handle coming, which is lower profile than the cold shoe one I have and can be fitted to the side of the cage. This may seem odd, but fitting this handle along the side of the cage instead of a side only handle may allow for wrist rest-stabilising while focussing. It can also be fitted as an up-down side handle if needed, maybe at an angle to.

ed. I have since ordered the Niceyrig cage for my kit, simply to have the option. With a cold shoe adapter it will take the existing handle properly. I can now also add a side handle to that or any number of other accessories.


First Field Test And Things Learned (Or Not Getting "A Handle" On Things)

After a day in the field, chasing my spider mad father in law around, I have learned a few things.

I have had to assign a left side button to Record (Fn3), because with the top handle on and used with the right hand, getting to the shutter button can be problematic.

I am now happy that all of my immediate* features are on physical buttons and the first layer of control interface. The touch screen is fine, but too small and fiddly, so best left for tripod work.

The fact is, the handle centralises and effectively puts one hand out of action. If you have one hand on the handle, one cradling the camera and focussing, you do not have a third hand free to do anything else. Without the handle, both hands are at control level, the right doing the bulk of the stabilising and dial/button functions, the left handling focus and screen functions.

Thinking on this I Googled “problems using hot-shoe handles” and several came up warning of hot-shoe breakages and the poor judgement used by the people employing them! I must admit, I was a little tentative at first, but there are so many out there, I just assumed it would be fine.

A G9 with decent lens on the front supported by 4 small screws, likely going into plastic, is a little worrying, especially as I immediately got myself into the habit of using the handle as standard, and this is a comparatively light rig compared to some (Canon SLR with Sigma Art?!).

It seemed like a good idea, but maybe in hindsight………

Looking at my results also, I have to admit, the camera needs to be well held to provide decently still footage, something that the handle alone, with this relatively light load, did not seem to provide. I do have the OSMO, bought just for hand held work!

Holding the camera still enough seems to come down to hugging the body when not moving, which the handle actually makes harder and switching to the OSMO when moving. It looks like a twin handle rig is better for movement.

A better option? This gives me my three cold shoes, without clutter and the top plate and main control dial are obstructed, which is good as they will not get changed by mistake. The rig also fits into more bags.

Viewing is also an issue in bright light, which is not helped by the handle at it pushes the camera further away.

Several times I needed to switch to the eye piece and needing a hat for the day (30 degrees C), the handle got in the way (hat off=burned nose). I could add a screen, which fixes some things, but exacerbates others.

A final point is the “lag” I personally seemed to experience getting myself organised with the handle taking priority. ISO, WB, Aperture, Focus and more need to be addressed immediately and the handle seemed to make holding the camera and operating the camera, two different processes.

Dropping the handle (saved for specific jobs-maybe on an Olympus), I placed the triple cold shoe bracket straight on the camera.

This seems to work.

The extra height, obstructive nature and left/right handedness of the handle is gone and I am just holding the camera, not the “rig”.

If I use the Zoom’s there will be overhang issues, but this will be mostly tripod work and I have ball heads for angling, adding height etc. The H1n/5 can be mounted sideways or reversed when acting as interfaces.

As cool as the handle seemed at the time (Mark Bone insisted!), the reality is, I need to either gimbal or tripod the camera for the standard I am aiming for, or switch to the camera specifically bought for gimbal work. Weight helps with hand holding, but puts more strain on the hot-shoe mount. Hand holding while still with IS lock seems to be ok, but the handle did not help much here.

An option is a full C-Grip (and O-grip, when 2 are used together), which allows me to hold the camera several ways, switch hands while filming, use 2 hands, and load up the rig with no camera strain. They are bulky, but look to work.

Another option, but one I decided early on not to do, is a cage. Smallrig makes a specific one, Niceyrig has one for the GH5’s that apparently just fits the G9. The Smallrig is nicely done and has an Arca plate base (but my video head does not). I actually prefer the Niceyrig as it has 2 cold-shoe mounts (the Smallrig has one only and it is angled) and a larger cheese plate over the camera top-centre, allowing me to get a cold shoe adapter for the handle I have (if needed).

I could then add my triple cold shoe plate (making 5 with the cameras), my existing handle (making 6!) and have added protection around the camera. With this it would also allow me to add weight to the camera a little to help with hand holding.

On another note, the footage captured in 4k Cine-V (-5/-5/+0/+0) was scrumptious, with brilliant fine detail and cinema like colour. I have a ways to go, but it will come.

*ISO (2), Aperture, Peaking, Record (2), Ex tele converter, Histogram, Lock IS, WB (2) and focus (2).

Lens Tests, Video And Moving On

I used to love a good lens test. At first the chart and graph type made the most sense, then I moved on to more “real world use” tests. Now I tend to ignore them in favour of actually getting to know it.

I once thought that the very statement “use it and get to know it” was a bit of a cop-out. It did not address the realities of good, better, best or even the simpler good or bad, but I was wrong.

All modern lenses are pretty good and so were most older ones. Any major manufacturer from the 1960’s on made decent glass. Really crappy Chinese rip-off stuff was poor, later stuff, surprisingly good. Good and bad really needs to be reserved for new and functioning or old/damaged/mould ravaged or simple too old to include design parameters that are needed, such as lens coatings.

It stuck me that over 30+ years of photography, the only lenses I have had that were short of “professionally useable” were either broken (one or two and clearly so), very poorly calibrated and not identified as such (only one I am sure of and it was fine as a wide on film) or designed to be poor (plastic “toy” lenses).

We are talking about 100’s of good, useable lenses (to my shame).

Taken with a $100 40-150 kit lens. The sharpness defies scrutiny even at pixel level, the Bokeh is distinctive (subjective) and the colours punchy after a little post. Did I get the image I was after? Yup.

Have I stressed in the past over the merits of sample “A” to sample “B” of the same glass? More times than I care to admit to. I actually decided to never again buy a lens when I was not working at a shop, so I could try multiple samples and pick the best. You know, every time I did that, I came away fishing for a clear message. I often just ended up taking the one with tighter build, better mount fit or a perceived advantage in one single image over others, when in reality, I was likely to blame for any variance. I even remember picking one simple because the serial number had a coincidentally harmonious value! Talk about looking for signs and portents.

Deep seated suspicions about new lenses have always, with almost no exceptions, had no foundation of valid complaint. My 300 and 8-18 were bought with the mind set of a “it only has to please clients” buyer, both proving themselves superior samples after only a few uses.

A lens is as good as the best image it takes” and “the fool who looks for trouble invariably finds it” are two mantras that work in opposite directions, but are both valid.

Video has re-invigorated my lust for knowledge, which has highlighted for me how little I have cared about lens test sites and opinions since working. In video especially I am more interested in character and handling.

My own glass is good and that is all I need to know.

This is where the “get to know your lens” bit comes in though and I have a much better handle on it than before.

If you use a lens for a while, you will get to know its strengths and ignore or avoid its weaknesses. Does an Olympic sprinter sit around wistfully lamenting their lack of Shot-put or climbing strength? No they don’t. They use what they do well, to do the best they can at their best event.

This means for me a different way of “ranking” my lenses.

For example;

17mm f1.8 has great contrast for tough light, excellent long transition Bokeh and handles well. This is the seat of your pants street lens. My EF 28mm 1.8 was a clone of this, with very similar characteristics and just as many detractors. This lens also shares the same palette as the kit 40-150.

Bit of a lighting nightmare. The 25 would have added glow, the 17 tamed it.

25mm f1.8 is slightly wider than a 50mm equivalent (about 45mm), has gorgeous “modern” Bokeh and lush, glowacious* highlights. It positively sparkles and feels the most “stable” of the four primes. There was a time I did not like or overly trust it. How times change. In Canon, this is like my 35 f1.4L performed on a crop frame camera. This lens has similar characteristics to my 75-300 zoom.

45mm f1.8 is reliably stable, but with added character. It is more serious than the 25mm, less forgiving than the 17, with Bokeh that intrigues, but never jangles. My Canon EF 200 f2.8 L shared these qualities, although the bokeh was even a little more playful.

75mm f1.8 is “Mr Perfecto”. Too good to be true, it adds in the glow of the 25mm to the richness of the 17 and 45mm’s for an all too pleased with itself ability to impress. Of the four, it is the most predictable and “same-ish”, so a sharp, but very specific tool. The lens I most appreciated in Canon was my 135 f2L. This is same-same, but lighter, cheaper, faster and effectively longer.

Which has the best quality?

Don’t care. I did once and far too much, but I can honestly say now, I pick them up as tools for a job, based only on their strengths, with little to no thought about their supposed weaknesses.

Hero portrait of an individual, low light candids or indoor sports lens = 75mm

Fast moving groups indoors, street or video on the move = 17mm

Small groups at a busy event, a “one lens” day, low light shots = 25mm

Edgy portraits or abstracts, street grabs in close, gritty portraits = 45mm


*A term coined by one of the Western brothers.

.

G9 Settings Already Fluid

The G9 is starting to feel like an extension of myself, well, maybe a well adjusted prosthetic, but things are already changing slightly.

The big change is Cine-V in place of Cine-D high speed as C3-3. High speed Cine-D is where the OSMO comes in. Cine-D will be used more for low light, where 50p is less relevant.

Random image inserted.

Cine-V on the other hand intrigues me. More cinematic and opinionated than Natural, but less flexible than Cine-D, this is for my projects.

I see my choices, as a new comer to video, like this;

Natural, which is used by many serious Videographers using Pana cameras, is ideal for semi-flat, semi cinematic shooting for the bulk of my work jobs. School shoots do not need to be “edgy”, just pleasant and smooth looking. This will have a standard 25p (PAL) and slo-mo 50p option in 1080 and 4k.

Cine-V is as limited as Natural, effectively being a jpeg equivalent, but brings out my inner cinematographer. It is “bigger” looking. With so far un-developed grading skills, this will get me there in the short term and as few are using it, gives me a different look to others using the same gear. This will only have a standard cinematic 25p (PAL) option.

Cine-D, the easiest to handle of the semi “LOG” styles has a good rep for handling difficult light, so I will use that when things are harder. This will only have a standard cinematic 25p (PAL) option, but will tie in well with my OSMO at in Cine-D, 50p for movement and slo-mo.

Other minor changes are to the F6-10 group, including the electronic stabiliser and grid on/off option, dropping mic volume (handled on mic) and Peaking (set to a primary button). These soft touch controls are more for tripod or set-up use, so no point is duplicating already assigned features.

How Did I Set Up My G9 For Video?

It has been an interesting couple of weeks.

The G9 has a lot more options for video than the EM1 and some of the terminology is new or different, so assigning the 20+ custom and function buttons has been a trick.

First up the hardware. The Ulanzi cheese plate on the Smallrig handle provides perfect balance and utility. I have 4 cold shoes and several screw mounts to choose from. I have several small ball and tilt head options and an extra handle coming also, so lots to choose from. The perfectly matching red on the Ulanzi and G9 dials was purely coincidence :).

Here is where I am at (in brackets will be the accessibility of the control from good/fair/poor).

The camera is set to Manual Exposure and the lens to Manual Focus unless specifically changed.

Shutter Button (good). This is set to Record. The little red button is off as redundant (and an issue for stray fingers). I have also enabled the “red frame” when recording which is awesome.

Top Dial Front (fair, but clicky). This has 2 functions (see “Nubbin” settings). The first is Shutter Speed that will never be touched, the second is ISO. Neither are important on this dial so it will mostly be ignored and unfortunately that is the best I can do.

WB/ISO/Exp Comp buttons (fair). These are basically redundant, but may come in handy occasionally. The way I will hold the camera (left hand on handle, right cradling the camera), means they are inconvenient to reach so no real bother.

Top Dial Rear (good, but clicky). This one is also a double feature (see “Nubbin”). The first feature is Aperture, the second White Balance. Unlike the front dial, these two will be used a lot, but not often during shooting.

AF/AE Lock button and Toggle (good to fair). The AE/AF button is set to AF only for quick one touch AF when the toggle is set to C-AF. Three of my four lenses have on lens MF over-ride or MF only, so that will be my master AF/MF control, but if I am using a different lens or want to do a smooth focus transition, I will switch to AF and touch screen selection focus.

The Nubbin (good to fair). The Nubbin is used primarily to switch the two top dial feature sets and to shift WB when selected. This seems to be a reasonable good double click to manual WB control, except it does require I touch the top rear dial to activate.

Fn1 (good-fair). This one is set to Ex Tele Converter. I will use this a lot, but not during a capture so it needs to be close, but not in a primary spot.

Main rear dial (good). This is the only near silent dial, so it gets ISO control. ISO is the main “while shooting” exposure control. Shutter speed is set, Aperture is also likely limited in available or desired choices, so ISO has to carry the load as the most granular and flexible exposure “lung”.

Fn2 (fair). This one is for the Histogram. I am not satisfied yet with Zebras. The theory is fine, but the actual values are far from comfortable for me. So many opinions, so many variables. I will stick with histograms for now.

Fn3 Top left rear button (poor) is left for EVF/Screen switching as marked.

Fn4 Front button top (good). Peaking here. Like Zebras, I find magnification a taste I have yet to acquire, so I will stick to eye balling and peaking (blue) for confirmation.

Fn5 Front button lower (good). This one is set to IS lock. I have not used this yet, but is something you will use mid shot, so it needs to be naturally under a finger.

This next set are on the touch screen Menu (fair, but silent) and low priority (also subject to change). These are likely going to be used more for tripod work.

Fn6. Microphone volume (although volume will usually be handled by the input mic).

Fn7. Zebras

Fn8. Peaking

Fn9. Stabiliser

Fn10. Q Menu

The touch screen Movie Menu is set.

The Custom settings are all set with the above, then have their own Colour style/Log and quality setting.

C-0 (Movie M without a Custom setting assigned) is; 10 bit 1080p, Natural*, 25 frames/SS 50 (PAL) MOV as my every day social media quality.

C-1; 10 bit 1080p, Natural*, 50 frames/SS 100 (PAL) MOV is the same as above, but for movement and slo-mo.

C-2; 10 bit 4k, Natural*, 25 frames/SS 50 (PAL) MOV. This is my better setting for my more serious projects.

C-3/1; 8 bit 4K Natural*, 50 frames/SS 100 (PAL) MOV is the same as above, but for movement and slo-mo.

C-3/2; 10 bit 422 4K Cine-D*, 25 frames/SS 50 (Pal) MOV. This is for poor light and outside editing. It also matches the OSMO’s better settings.

C-3/3; 8 bit 420 4K Cine-D*, 50 frames/SS 100 (Pal) MOV. This is as above for movement and slo-mo. It also matches the OSMO’s better settings.

If I need to shoot HLG or Cine-V, I will change the C-0 settings as the job requires, but the above allow me to quickly transition from 1080P Natural to 4K Cine-D in three stages with two shutter speeds for each.

*

*Natural is a commonly used setting in Pana cameras with Contrast reduced by -2 to -5 so I went -3, Sharpness almost always reduced to -5, NR left alone and Saturation at -2.

**Cinelike-D is Contrast -5, Sharpness -5, NR +0 and Saturation -2. This is a semi LOG style, so can take a lot more Sharpening etc. and has a reputation for handling low light and extended dynamic range well. Unlike HLG, or V-LOG, it does not need any special allowances for viewing etc.

The Big Surprise.

(Letterkenny opening) So I was dropping my wife off at the airport the other day…….

At least 20ft long and 6ft high and a heavy crop! Go M43.

Not being a true staff member, just a contractor, I am sometimes out of the loop. This was taken early in the year, processed poorly in C1 (still finding my way back then), but was still blown up to bigger than I would have imagined.

At the intended viewing distance, it stands up more than fine. Imagine if I had used high res mode!

In Praise Of "Also-ran" Lenses

Two lenses I have the greatest of respect for, respect that has been earned, not assumed due to reputation or price, are my 17mm F1.8 and 40-150 kit lenses.

They both went on one of our last trips to Japan (insert sad face) doing the lions share of the work.

The kit lens was a real find. Purchased in a 3 lens starter pack, sold for the price of the included 45mm, but bought for the kit EZ 14-42 (replacement of an ailing 14-42 on my wife’s camera), the 40-150 was the last consideration of the three. Really just a bonus trash lens.

It has proven to be a real sleeper.

40mm on the zoom. Sharp, with good transition. What more could you want.

Its strengths are strong micro contrast, decent, but very malleable colour and good Bokeh. It’s weaknesses are known, basically coming down to crummy build quality.

I never get tired of being blown away by this lens. For all realistic uses, it matches the Pro lens, as long as the sun is out. To be fair, I recently used it at an indoor school event and it came through showing very mature contrast and detail, ideal for higher ISO work.

It can be gentle and delicate or punchy as needed (all of the files in the “Things I Love About C1'“ post were taken with it).

For me, any lens longer than the 17mm is a details lens. The 40-150 performs as needed up to fine art levels.

Bokeh is a nice surprise. Often sharing the load with the 17mm, its nice to have a dinky little kit tele on when things get tight. Both lenses share a “Fred Herzog” colour palette.

*

The 17mm f1.8 had a strange beginning.

Grudging chosen as the best mechanical option over the Pana 20mm (poor AF & MF) and the slightly dearer, but slightly sharper and more brilliant 15mm Leica, the 17mm has gone on to great things and I would not swap it for either of the above. It even holds it’s own against the ground breaking 17mm f1.2, although the two seem to be designed to do different things (he 1.8 for deep transition street, the 1.2 for wide portrait).

There is something very efficient and pleasing about its rendering and its ability to just get the shot.

Even with a fairly old fashioned rendering, it still packs plenty of brilliance, taming tough highlights well.

I believe strongly that this lens was made for street shooters. It has excellent contrast and highlight control, practical, long transition Bokeh and is sharp even at wider apertures. AF is instantaneous and MF is a pull-back ring away. I regularly shoot it wide open at night in AF and everything just works.

I truly love the way it handles contrasty light. I have many images that seem to work fine with this lens, that may run a little too hot for others such as my more “lush” rendering 25mm.

The focal length and other attributes promote “in your face” imaging. The lens in combination with a small camera like the EPM-2 is too small to be taken seriously. I shoot quickly, from the hip and with focus set at either 2m at f2.8-5.6 or I use AF wide open at night and just expect to get my shot.

The very long transition Bokeh allows misses to be tolerable, sometimes even better than hitting the intended target.

Wide open the transition from sharp to out of focus is quite invisible. The doorway is out of focus, the busses fully, but are still coherent and harmonious. The modern trend of fast transition sharp to soft Bokeh has been bucked here in favour of a less aggressive, more forgiving approach.

These two, a backup 45mm f1.8 for night/portrait and two small cameras (EM10 or EPM) and you have a very capable and responsive travel kit that comes in at a little over 1kg.

Ed. The Panasonic 9mm now adds a super wide element, for a little over 100g.

Things I Love About Capture 1

There are a couple of sliders in C1 that have become my go-to.

When I first started using C1, I used it like Lightroom.

Big mistake.

Not only are the features different, but their capabilities and application combinations also differ. I remember being disappointed with my efforts processing a set of bright light, midday images for a new set of signs. Controlling the highlights made the whites muddy and reducing overall exposure, then lifting the shadows tends to give an artificial “HDR” look.

I missed the “Brilliance” slider.

The top four sliders, that is the four found in the assumed primary processing panel (Exposure, Contrast, Brilliance and Saturation) are powerful enough for a large number of global fixes. My Lightroom habits had been quite different.

Brilliance allows you to add brightness and separation to a flat image or drop a very contrasty one back to a workable range and in both situations, the image stays natural looking. Contrast in C1 is more dynamic, so I tend to use it a lot less. Brilliance effects the “punch” of an image in a gentler way.

The first image below is the base, the second is lightened using the Exposure slider, the last is lightened using the Brilliance slider. The last file gains shadow detail, but holds contrast and unlike the Shadows slider, it does not take on the “HDR” look.

Early on, I felt Lightroom naturally added more vibrance and “Hollywood” to a file, but the more I use it, the more I realise that C1 has this and more, but starts from a more realistic base. Brilliance is one of the tools that empowers the user to enhance, or tame as needed. I have come a long way from Canon files through Adobe, both capable of mesmerising saturation and glow, but often at the expense of accuracy.

The second slider is the De-Haze control, which gets its own panel.

Lightroom has this one also named the same, but hidden in a panel with various other controls (I forget which), but I found it to be very clumsy by comparison. It worked when the situation clearly needed it, but as a more generalised tool, it was far too punchy.

The De-haze slider can be applied to any file that lacks the clarity and crispness you need. It does its job very well, but I am also amazed how often it brings out the punchy quality in a file that just looks a little flat.

De-haze has replaced Clarity (I liked this in LR, but less so in C1) and often Sharpness, Saturation and Contrast.

Again, the first file is the base, the second is lightened using Exposure, the third is re-envigorated with some De-haze.

If you over push it, it can be a little harsh and over saturated looking, but then those files probably did not need any De-hazing. Unlike Contrast, it is not terminal when pushed too far, just pointless.

A very good use for De-haze, is when some shadow or highlight recovery is used. Both tend to flatten out mid tone separation and De-haze firms it back up again.

Both of these work well with jpegs also.

The easily re-arranged panels in C1 have allowed me to try various layouts and this is where I have settled.

At the very top is Library, minimised until needed.

Below that is the Layers panel, used only if I activate a layers based feature, so minimised until needed.

The Dynamic Range panel is next. This one is the fine control after the one below, but due to lack of room I like to have it above the primary panel, just out of sight, but there if needed.

The primary Exposure panel (Exposure, Contrast, Brilliance, Saturation) is at the active top of the pile.

Below that is White Balance. I find it best to fix this after Exposure/Brilliance have been set and with added Saturation so I can better identify the issue. Then the Sat. gets dropped back again.

Below that De-haze. De-haze is the punch replacer if any of the above have sucked the life out of an image.

So, original, Exposure lightened and Brightness reduced to control the highlights, then finally De-haze added.

From here there is a revolving door of panels depending on the job, consisting of Spot Removal, Vignetting, Colour Control, Sharpness (rarely used globally, but often applied to soft areas with the brush) and Clarity/Structure (all added with the brush).

There are others, some of which I am yet to come to grips with, but as is, this layout does the job.

No programme is perfect. C1 has a several controls that I find lack subtlety in favour of strength, but the ones above seem* to be the most natural looking and have more than enough grunt to do the job. Lightroom failed my needs by being weaker overall at its base line. The sharpness/noise dynamic in particular fell way short of C1 for an M43 user. The acid test will be re-processing my Japan files with C1, as some were processed to Lightrooms strengths, which as not the same with any other programme.


*With a Mac, Olympus and me in combination.