Still Feeling The Power Of M43

Like any camera format, Micro Four Thirds format has its strengths and weaknesses.

To me the strengths outweigh the weaknesses by more than a little bit, but some things have to be taken into account when looking seriously at the format*.

1) Visible Image Noise is mathematically more likely.

Simply put, a smaller sensor, all things being equal, will produce more noise at the same pixel count (same number of pixels on each sensor, not density per inch). This is physics, undisputable and on record. The answer to me comes in software advancements balanced with real world needs. There are already phones out there doing the near impossible, so bigger sensor cameras of all types will benefit here a bit like Formula One technology trickle down, but backwards.

For me, using ON1 combined with C1, I now consider ISO 12800 my upper limit for good quality images and do not think twice about using ISO 32-6400 files mixed in with better quality ones.

Is it the best noise performnace around? No, of course not, because all sensors are playing on the same field, but it is good enough to take my images, even those taken at ISO’s beyond my wildest dreams (and needs), into the “good enough for fine-art sized prints” category. Something I have noticed when given the chance to try a bigger format again, is that the difference is not as big as you might believe.

Being able to use a very long, f4 lens hand held for action subjects in poor light is my “stretch point” and ths format, with all its performance enhancers is well and truly enough.

Tight portraits from well outside of the subjects awareness range, using a 600mm equivalent lens in less than ideal light is now an expectation and this was before ON1 came into my life.

The reality is, arguments over small differences in sensor size have been less and less supportable for a while now and hypocracy in this space is rife, as it has been since the film era. For a time when the EM5 mk1 first came out, these little cameras were even kicking the big guys around the block, forcing them to lift their game in most areas (I had FF Canon and changed to MFT to follow the quality and performance).

2) The other full frame feature often cited as “superior” to MFT is depth of field control, namely shallow depth without the advantages inherent in the other direction compared.

The “you cannot get good Bokeh with MFT lenses” gripe is uneducated, innacurate and often ignores the practical application of depth of field (and what “Bokeh” really means). A full frame shooter with a super wide aperture portrait lens can produce the softest and most incoherent blur in the same situation at the same distance, but so can the MFT user with exactly the same lens, the lens just has twice the reach, which when you think about it, is actually a bigger benefit. When shooting Canon, my Bokeh king was the 85mm f1.8 used wide open. Never a fan of even faster apertures, this was enough and totally practical when that exact look was wanted. The Olympus 75mm f1.8 is effectively the same lens, but gives me the added benefit of greater reach and is by most measures, a better lens.

Now re-visiting this statement, what practical use is this super soft Bokeh? If you have a background that needs to be blurred out or the actual point of the image is to demonstrate Bokeh in all its (often miss-understood**) glory, then fine, but this can also be done with lots of software after the fact (again phone and compact camera tech). Now ask yourself how many images you want to take like this before it grows tired? The only area FF users can win without much effort is wide angle-shallow depth portraiture, an odd sub-genre really and one that MFT can still do with some effort applied.

The reality is, most FF users use f2.8 zooms for good reason. They offer versatility, good light gathering and a practical aperture range, which is why they are often the most popular flag-ship lenses in a range. A practical amount of DOF is shallow enough to softly bur out backgrounds, while keeping some context, but also guarantees enough depth to get the whole subject sharp.

In my own kit my 75 f1.8 is my Bokeh king (150 f2.8 equiv). It does not get a heap of use, the 40-150 Pro (F2.8 at 40-150 actual focal length-see below) being the work-horse. When I need it, it does the job as well as any lens out there.

Often the equivalency cited when describing an MFT lens, with terms like the 40-150 Pro being an 80-300 f5.6 equivalent, is missleading. The lens is still an actual F2.8 lens at 40-150, but it has double the magnification, so when multiplied out, the DOF is also magnified, but it is still actually an f2.8 150mm any day of the week. It is also a 300 f5.6. Sometimes when using my slow 4.8-6.7, 75-300 (truly horrifying/impressive FF specs), I do not get enough DOF!

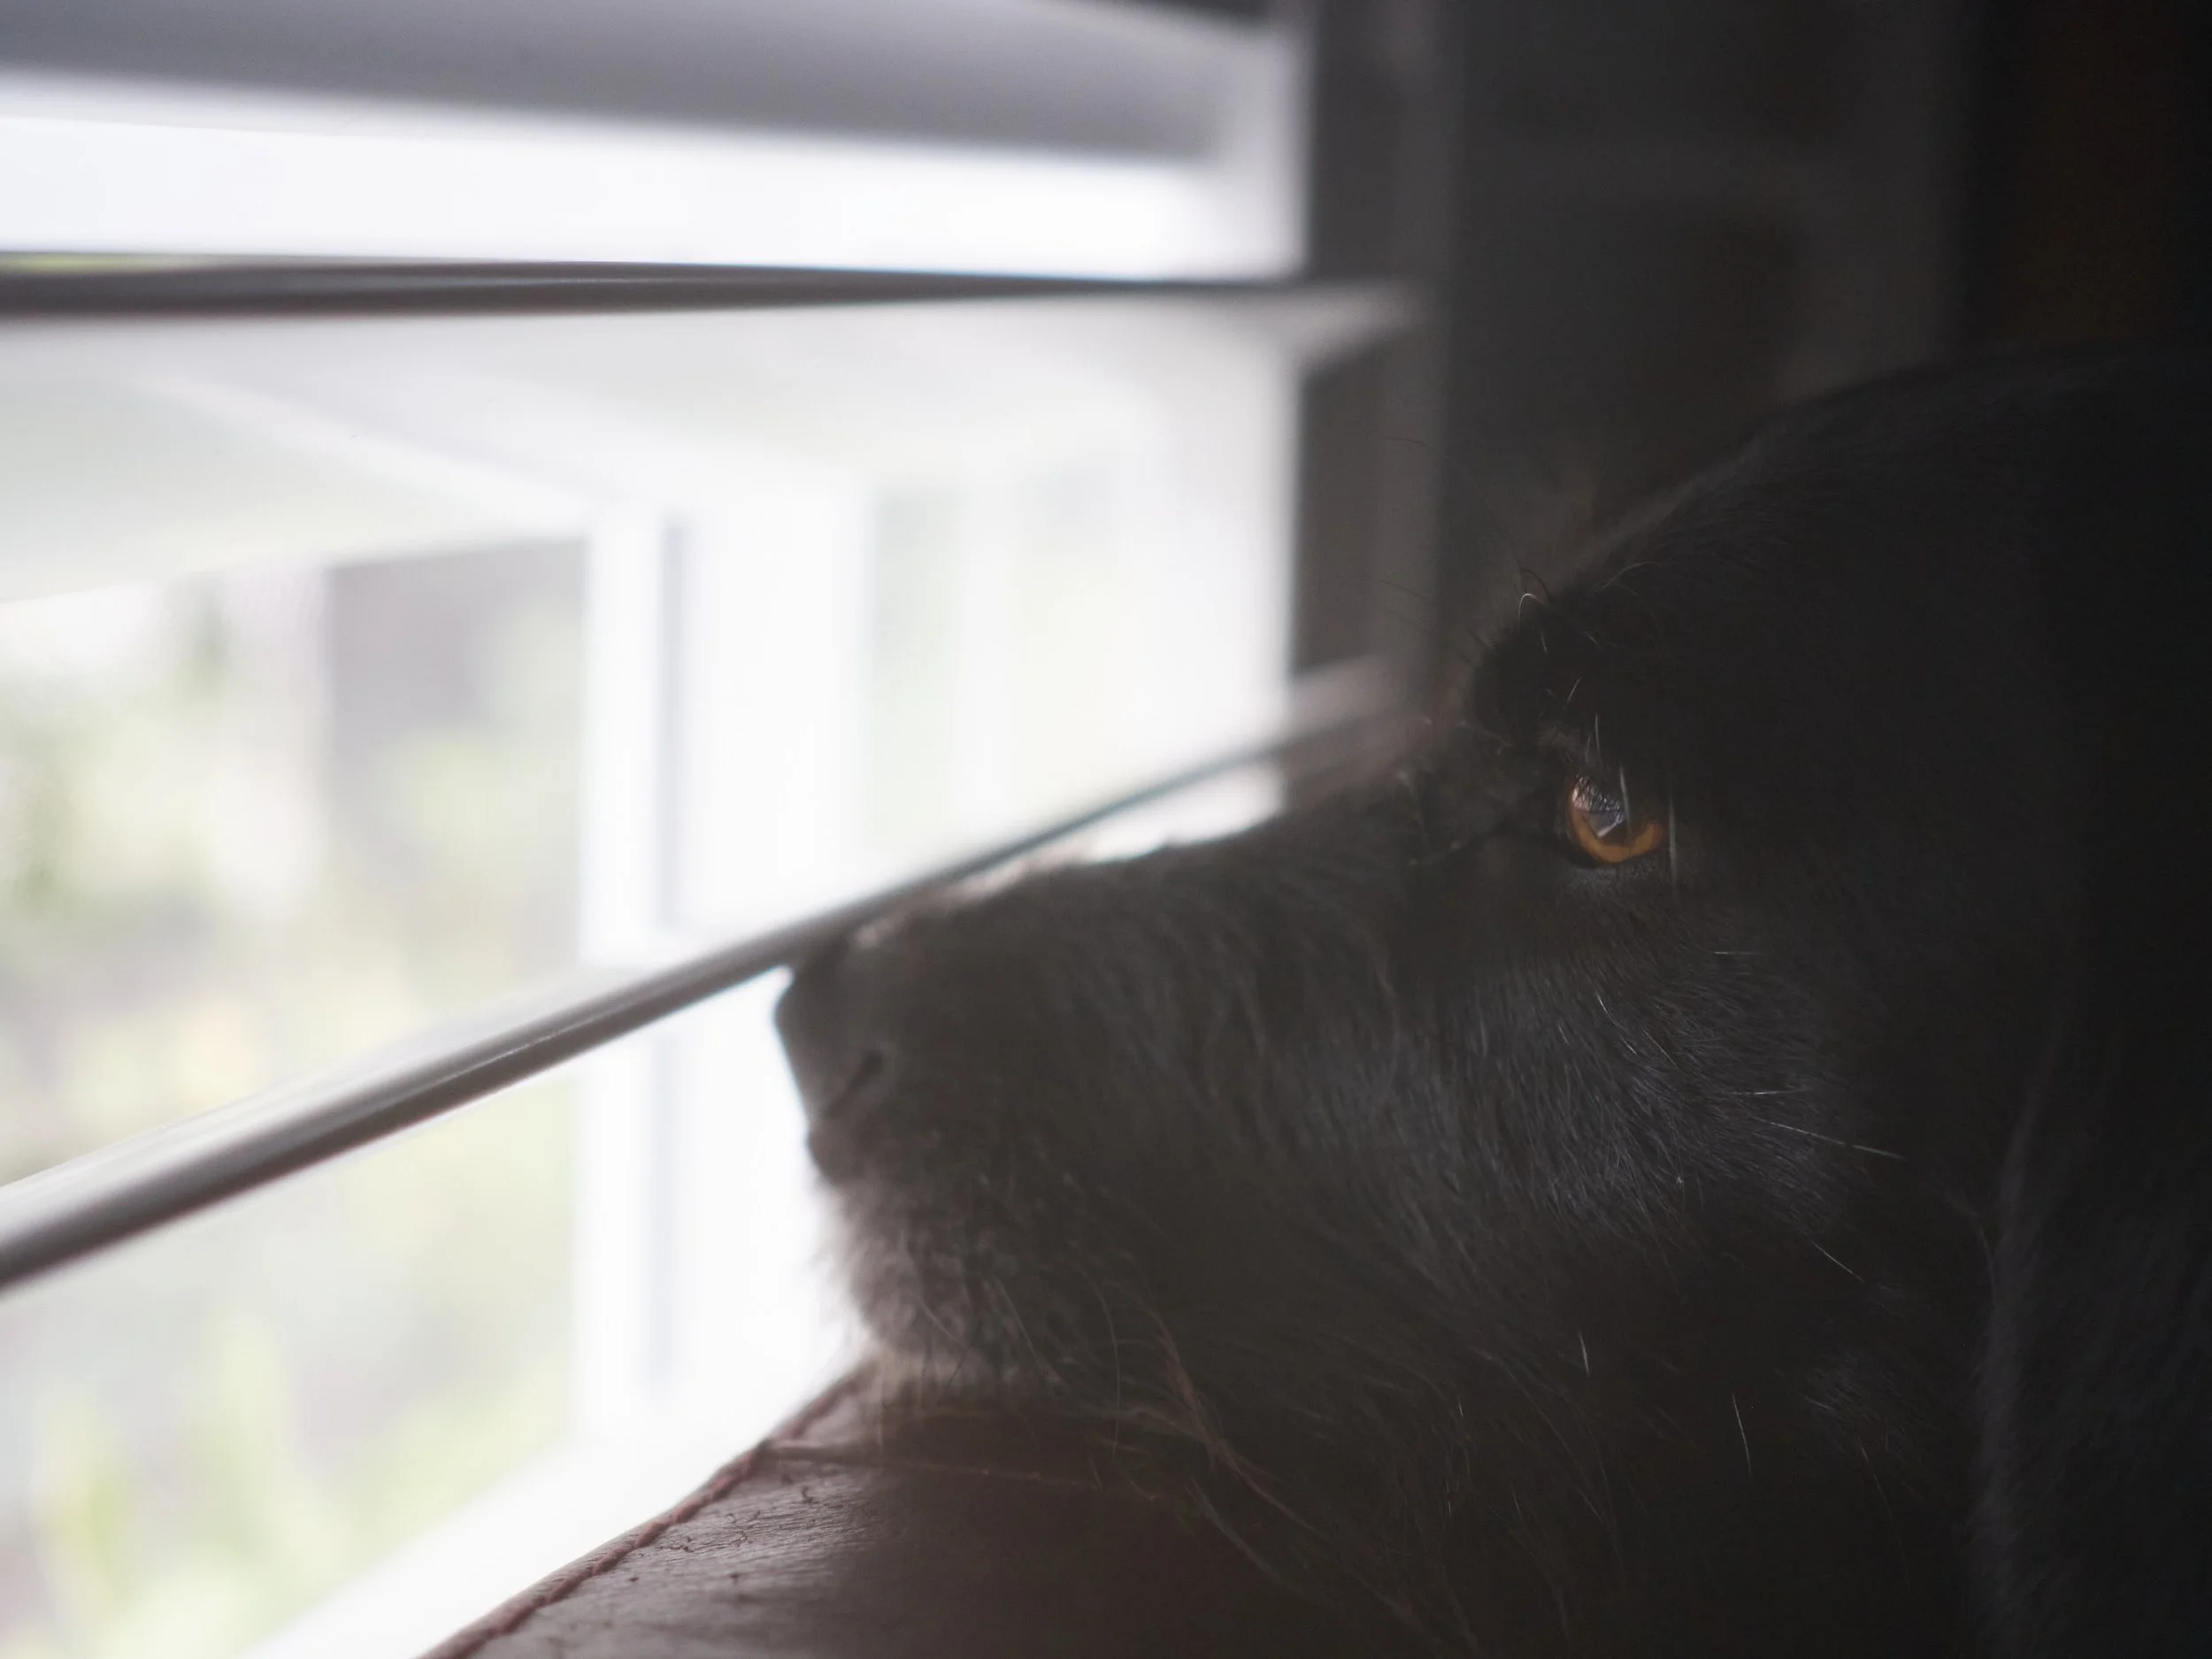
How much less DOF would have been desirable? This was taken with the equivalent of a 150mm lens, quickly, quietly and accurately with an old EM5 at f1.8.

Conversely, I have the ability to use any lens in my kit at any aperture on offer without fear of over or under doing it. Basically, my working range is f1.8 for portrait style to F8 for landscapes style and f2.8 does most jobs perfectly. When I shot full frame, my range was f1.8, but only for showing off Bokeh, rarely used for serious work, with f2.8 to f16 for most subjects.

If I need more DOF, then I can get it at a setting 2 shutter speeds faster (or 2 ISO settings lower) than FF. In other words, depending on who you talk to, I have a DOF and/or light gathering advantage.

Ok, what else?

That’s really it.

The benefits of extra reach, smaller form factor and a fully developed system, including one of the more respected video systems now come to the fore. I can have a fast super wide that goes into a pocket, a top tier 600mm equivalent for the price of a mid range tele in FF and regularly have a speed advantage at the same cost/size ratio. My favourite Canon lens, the 135 f2L, was replaced by a 75mm Olympus that is at least its equal in quality, 15mm longer in actual reach, a little cheaper and half the size and weight.

Equivalent of 600mm f13+ and the wing and tip of the beak are a little out.

Looking at MFT from a brand to brand perspective, Panasonic and Olympus have been putting out one excellent lens after another, in a format that actually makes edge to edge sharpness easier to achieve. The big boys on the block have recently overhauled their systems, not once, but twice. First they lifted their game in their SLR stables, then, after tasting the winds of change, re-hashes them all again in mirrorless.

My issues with this system come in the form petty annoyances like having to buy smaller adapter sets to attach a Smallrig Mat Box, difficulty buying rarer super small filters, loosing lenses in the bottom of my bag, carrying too many options because I can etc. A friend was complaining yesterday about the limits of his bag with a FF body and two f4 FF lenses. I had four cameras (2 stills, 2 video), 3 pro zooms, a long tele and room for lunch.

What does the future hold?

Logically, smaller sensors should be on the rise, but the perceptions reinforced over the last couple of decades, cheaper sensor manufacture and the fear of losing ground to an opponent (especially a phone brand) has pushed the ever declining top tier of the industry in the other direction. Nikon is the only brand with a direction that to me makes sense. By using a larger lens mount than standard FF, they actually reduce DOF by another stop compared to FF, meaning you can buy cheaper and lighter f4 lenses with f2.8 depth characteristics.

I just hope MFT and 1” can hold on long enough to ascend to their rightful place as the true workhorse formats of the industry, not the perceived whipping boys.


*

*I have not looked into the new OM-1, so there may be even more to look forward to. We will see.

**Bokeh is a measure of the quality of focus transition at any aperture, focal length or lens to subject distance, not just f1.2 on a long lens.

Two Guns Pete (Or Using Olympus Again For Video)

The Panasonic has been a revelation.

The G9 with firmware 2.4 is a real video camera, not just a hybrid as it was on release.

As soon as I got it, everything video, just seemed to make sense.

So Olympus.

Dead duck?

Actually no.

The EM1 mk2 (latest firmware), is not at all a useless video camera in a Panasonic world.

What? Olympus for video….lets check that out.

First up, what does it do badly in comparison to the Pana?

The layout is not user friendly on the whole. No scrap that. The layout of clearly for stills shooters, by stills shooters, videographers be damned.

I am used to them as stills cameras, but for video, the whole thing seems to be a decent quality square peg rammed into a round hole. With a few exceptions* every button and dial control is less video oriented than on the Pana and you cannot set a video custom setting (you can set stills settings to jump from video to these, but some settings still don’t transfer well and going backwards is a nightmare).

An example among many is the ability to change the view finder/screen switch button to Record, but only in photo modes, not movie mode. basically you get only one option, shutter button or other. WTF?!. That smacks of a stills shooter constantly being afraid of hitting the record button by mistake. Very compact camera, very anti-video thinking. A choice of record on/off buttons would be nice in video mode guys especially when the retained functions are useless in that mode. On the Pana I have a left and right hand record button set up, because sometimes you need that.

*If you set up an Olympus for video, there are some shining lights such as useful function choice fot the two main dials and the option to switch functions with a lever. I have mine set to ISO and F-stop in lever position 1 and the less urgent Shutter and WB in lever position 2.

Peaking cannot be set and held, only coming on when you focus, so no passive confirmation. Magnification is the same. This is handy if distraction free stills framing is important, but for twitchy moving subjects in video, it means risking constantly un-focussing to check focus. I had this very issue with a spider on a gently wind blown web just today.

No Auto ISO in manual video, but you can set it in stills. Again WTF?!. What is good enough for one format should be equally relevant with the other.

All dials are “clicky”. The ISO control on the Pana (main rear dial) is gentle enough to use while filming and the nubbin control (also on the EM1x) is silent.

The screen is less helpful for manual focus than it could be, but it is less cluttered than the Pana. I can run the Pana without the big monitor, just preffer not to. The Oly really needs something for manual focussing or another solution (see below).

The colour is cooler and greener than the Pana. This is not a problem I guess, but not matching them is far from ideal and the controls for colour, contrast and sharpness are limited. Apart from a Flat profile (not OM-Log as it apparently has some grading issues), Natural or Muted profiles with the green turned down, there is precious little else on offer. The curve can also be changed and you have +/-2 control, but not very precice. It may be that I will have to accept a difference in colour and contrast unless I grade more professionally, so no shoot and drop. I am preferring Muted mode at -1 sharpness.

Really bad pre-amps. Just bad. ‘Nuff said.

What does it do better?

Some function buttons are similarly placed to the Pana, such as the twin front buttons, making some operations seamless.

The stabiliser is smoother and more natural feeling. It is also a smaller and lighter camera, meaning I can put my cold shoe handle on it without fear.

The AF is respectable, good even. Touch screen control is accurate and smooth. Ths means the poor MF screen is circumvented by using the superior touch AF option. Focus transitions, tracking and interviews may be better done with this camera.

Tell me more.

Auto exposure and white balance functionality is well supported (accurate). Shutter priority with auto ISO, and Aperture selection and then exposure comp applied, would likely work well enough for the fast moving situations I will task it for. If I use the EM1x, the nubbin control may be a silent option for exp comp (have to check).

It can shoot 200 mbs All-i* FHD. This is the highest bit rate to file type ratio in the EM1 and possibly the clincher. All-i is better for fast moving or constantly changing subjects, especially with high levels of contrast, changing lights (flash/strobe) and busy colours. Long-GOP, used by the G9 looks to be nearly indestinguishable from All-i for normal use (looking at several direct comparisons made by GH5 users), but All-i is still technically better in some circumstances as proven by its inclusion in the GH5.

*All-i creates a fresh, complete frame every frame. IPB (Long-GOP), that the G9 uses, creates a reference frame and only changes to capture what changes within that for the following few frames (a bit like animation, drawing a moving subject over a set background), so it is a much smaller file size overall and ideal for most applications. It looks like Pana has some pretty advanced algarythums for their Long-GOP IPB, only including All-i on the next level GH5.

The quality is more organic looking, less “perfect” than the Pana. The need to reduce sharpness and contrast in the Pana profiles seems less urgent with the Oly, which is good as there are fewer controls. I like the cooler palette for some situations and have found myself leaning towards the harder looking Cine-V with the Pana, which is closer to the Oly than the Pana Natural profile is.

So, what does this all add up to?

The Olympus may be a better run and gun camera with its excellent touch focus and stabilisers. Sound would likely be only used for synching with the Pana or Zooms.

It can also be better for fast movement in contrasty outdoors and for stage or event work when flash or strobes are in use. IPB can loose 10-15 frames in a row if the first catches a bust of flash, common with slow-mo.

The files will be big, but not ridiculously so if I stick to FHD and the camera will be the optional one, not the primary.

The colour and other controls are limited, but this is not insurmountable and I now have two different looks if wanted (especially if lenses are mixed).

I have extra cage options. No wastage and the fun of building 2 rigs :).

Summing up;

My G9 is still the video king. It has the best out of camera quality, the best maximum quality output and is vastly superior as a video-centric camera. This will do the bulk of my static or semi-static work.

The OSMO pocket comes in as the movement and “special angle” specialist. It can go into water, over head, handle fast movement and adds a super smooth gimbal dynamic.

The EM1 mk2 is going to be the moving B-cam, specialising in busier subjects and tougher light,smooth focus transitions and looser hand held work. I will use touch AF, which reduces the screens short comings, full IS with slight crop, with my 17mm which has both great AF and good Bokeh transition for that type of work. Basically, if the G9 is struggling for any reason (focus, stabiliser, format), the EM1 comes in.

Rigging the two up will be fun. The Camvate rig I have coming will likely go on the EM1 as it lacks a dedicated option, with an emphasis on hand held work only, no sound, no monitor. I may switch this up to the EM1x, as that camera only gets used for sport and big events at the moment and has the best stabiliser and focus, so my standard daily routine is untouched.

It will leave me a little short in stills gear, but I can always replace one or the other EM1 at a later date. Probably by the end of this year, an EM5 mk3 or EM1 2/3 will be an option, or I could just use the EM1x a bit more.

The Video Rig And Things I Would Do Again

My video rig has taken a little while and is not settled yet, but I have seen enough to know what I would do again differently.

The Niceyrig cage is great. The fit is very good considering it fits most Panasonic MFT cameras. Smallrig made a dedicated one for the G9, but it lacked the same real estate and could not be re-purposed if I went into a GH5/5s later and it still cost twice as much.

The top handles have forced much re-thinking. If I went again, I would have just gone for the 1446b or a wooden Camvate, and the direct screw-in type.

A side handle is still in the air also. I am torn between no handle (left hand is focussing most of the time anyway), the mini top handle I have employed partly as a protective bumper bar for my HDMI input, a proper side handle (coming), or something I have not yet discovered. The mini top handle is functional, but I keep adjusting it since mounting the monitor. That may also be because the monitor is in the wrong place.

The 759 monitor is a real surprise. I am equally impressed by its clarity and contrast and its usefulness. The thing really does make a difference. Latency has not been an issue and battery life is good. I don’t even know what half the features do yet, so it is more advanced than I. Perfect.

The biggect issues I have had with the onitor have been cabling. It is hard to find locally the right angled fittings and cable length/gauge. Several misses on line have resulted in a cupboard full of left overs, but at least I have spares. The Smallrig ultra thin 55mm HDMI cable and a single right angle adapter eventually did the job.

Mounting mics has been problematic, mostly because of my choice of mics. The Zoom H series require some real estate and a lot of vibration dampening, especially for run and gun mounting. I am sorely tempted to get a Diety D3 (not pro), simply to up my on board shotgun performance, but have not found a lot of comparison reviews that indicate it will make a huge difference to my existing mini shotguns (the Neewer reigns supreme at the moment).

I may need to go an NTG or MKE 600 to make any real difference and then I am competing directly with my SSH6 Zoom capsule. I do not regret the H5 for its versatility, but the shotgun, bought for static interviews and productions, is not probably a realistic on camera option for movement.

The reality is with mics, any that are close enough will do a decent job. Asking more of them than that leads to problems only a lot of money can solve.

This brings up the role of sound though. Much of the on the go footage I will be capturing is going to be sound track or voiced over. I may never need a shotgun mic for that type of shooting. Maybe an area cover or no mic at all is better and maybe a mini shotgun will be near enough if needed? Still might grab the D3, just in case.

A Hunch

I preffer the look of the over 10 year old EM5 mk1’s at higher ISO’s

The tight and even black grain is workable in colour and quite film like in mono, so it is no surprise to me that I use one as my third, high ISO-prime lens camera.

So, what happens when I abuse a file from one and hit it with ON1 No Noise?

All the files in this post were taken at ISO 12800. The befores are C1 with no extra processing, the processed ones are in-out through ON1 with it applying its automatic settings. Lightroom would be interesting. I gained at least one full stop of useful exposure switching over and early tests showed that ON1 managed to “fix” LR files nearly as well as the C1 files.

Not bad before and after. Quite useable actually. The trick is to avoid under exposure.

In early tests, the little EM5’s managed to hold together better than a lot of bigger sensor cameras, gaining quite a reputation for good low light and dynamic range performance. Time moves ever onward, but there is still life there. The tell is the washed out colour, but compared to other cameras of the time, this was far nicer than the “fruit tingles” colour blotching most had in truck loads.

This file was a litle under exposed. Ideal fodder.

Although the left file, C1 processed only and with no noise reduction used is actually not a totally lost cause, the right hand file is clearly cleaner and sharper. The difference however is not as dramtic as files I have processed from other cameras.

Without doing direct comparisons, I feel the newer cameras are actually better after the ON1 treatment, but the EM5’s hold together better without extra processing at meduim high ISO’s such as 1600-6400.

It may simply be that the EM5 does its own thing and ON1 has little more to add. In the early days of the super sharp sensors that the EM5 came in at the start of, designers had an open book to work with and performed minor miracles (mine put my 5D mk2 to shame).

Rigged Up Or.....?

My video needs at this point are not as great as my accumulated gear would indicate. The camera was a bargain, the lenses were already in my kit, but surplus to my needs and most other accessories were either reasnably cheap or already party done. The main issue to date has been with ironing out all of the little things.

So today my slightly longer Smallrig HDMI cable came (55cm as the 35cm was about a bees-d&%k too short).

Rig done as concieved after what seems like a never ending wait (6+ weeks from start to arrival of the last, finally right things).

On paper and in hand, this rig works as designed. I have seen worse, but I have also seen better.

Balance is the selling point here, both in capabilities and manual handling.

A finger placed under the front end of the handle, depending on the screen angle and battery weight, is the balanced middle point with left to right swing minimised, but the screen sits a little high for my liking making the camera a little low if held naturally by the handle or only chest high if held from behind (I can still put it to my eye though). I need it to be this high with this configuration to allow my mics (various) to be able to see under it.

In my mind I am picturing an “L” shaped dynamic, rather than a fighting wedge.

The whole thing feels a little spread out. It lacks immersion or immediacy.

Cabling is neat, the layout generally harmonious and the wrist strap a win for under $10. The strap lets me shift from the top to the side handle without any hassle and is easily thick enough to take the whole rigs’ weight if needed, an easy solution, that I thought was likely out of the question.

So, what would I like?

Needy me, would like a slightly lower profile, a more intimate setup and one with more top plate options than a single cold shoe. The coldshoe mount is an issue as it adds unwanted height and clutter rather than solutions for some of my mics.

My preferred 1446b handle is languishing unused. It is to me more comfortable and more secure, being a screw-in not cold shoe mount (I can also then use the cold shoe handle on an EM1, where the 1446b is useless without a cage). This handle sits lower meaning my base working height is higher-a good thing.

Last time I tried this handle the problems were many.

  • The top cheese plate on the Niceyrig cage was completely hogged by its mounting foot, meaning nothing else could go on with it.

  • It does take the monitor well, efficiently even, with a front mounted cold shoe foot, but cannot take it on the top (the top cold shoe is half depth, i.e useless).

  • It sticks out too far behind to allow for eye-piece viewing,

  • I stuggled to fit into my bag without dis-assembly, something the cold shoe handle did well. I found it could just fit and added rigidity to the bag, but it was tight.

I went looking for ideas.

As usual, searching for specifically what I wanted coughed up the same sponsored items over and over again. Looking for something else all together (side handles), I came across a couple of extension cheese plates. The winner was an 11cm long Camvate one. It has 4 securing rows, which may also take cables for protection and give me several places to mount it.

I think if I secure the third securing row back to the far left row of the Niceyrig top plate, the last securing row will hang off the right end and a cable can run through it after coming up through the left securing row and across the front.

The potential is for lower and more secure, direct-to-plate mic mounting, some neat cable looping and even more monitor options, at the same time as taking the low profile handle. I will aim to replace the cage top plate, fit the handle, then hopefully there will be enough room left to give me several top plate options, especially if the H5 is wanted. I can also still add the Smallrig mini cold shoe extension to this, which may take it out past the left side handle.

Just after ordering this, I found a bargain.

Camvate makes one of the universal cage options I looked at for the EM1’s. Compared to camera specific ones, they can be square and clumsy looking. They are far from a perfect, but work. I was also looking on and off for a wooden side handle. The two were prohibitively expensive for fringe ideas. I like my mini top handle as a jury-rigged side handle, but as the rig gets heavier, this is proving to be a little under-done.

I found a Camvate universal C-Cage (3 sides only) with a removable wooden handle for $80 au, which is only $30 dearer than the handle on its own and cheaper than some of their C-cage only offers. If I bought the 6 parts (2 side bar lengths are supplied) on their own, it would be at least twice the price.

By my rough measurements, the handle will fit my current rig perfectly as long as the 18mm hole spacings are standard (I measured and they look to be), if not the handle can stay on this cage, so nothing lost. Lots of ideas for the other bits. The EM1x will not fit, but anything else I have in mind will.

This gives me several options.

A second buildable cage (maybe a heavy follow-me one), somewhere to use all the left overs and maybe some other ideas. I am looking at picking up a cheap G7 or G85 at some point as a B angle camera (the OSMO as the movement specialist), maybe even an upgrade to a Black Magic Compact Cinema or just re-purpose a left over Olympus.

This handle is not as versatile as some, but I like it more than many. If nothing else, I have bits to add to my primary rig if needed.

In all likelihood the whole thing will lack balance and have catches I have not seen coming, but I want to try it and feel at least something will come of it, even if it is only the addition of a top plate to the existing rig.

Meanwhile, I finally do have a useable rig.

Some Advantages Of Skipping 4k Video (For Now)

Deciding to limit my 4k shooting to personal projects and very occassional pro use, I am relishing the many advantages of sticking to 1080p.

The obvious ones do not need to be gone into in great depth. Tons more space, less heat, more battery life, easier processing, are all well discussed, but still real.

The real benefits for me are the creative options that have opened up.

Some cameras shoot 4k well (my G9 for one and the EM1 mk2’s for that matter), some are stretched. Regardless, cameras generally have more options avaialble at lower quality settings*.

The G9 offers VFR or Variable Frame Rate at some settings. I have set three of my custom settings (C3/1-3) to 33% and 20% slow motion and 1250% time lapse. I can access these instantly, giving me direct camera to output control.

The lossless teleconverter is longer, basically twice as long. In 4k it is a handy 1.4x, but in 1080 it becomes a genuinely powerful 2.7x converter. This means that my 75mm f1.8, aready a 150mm equivalent with MFT converting, becomes something close to a 400mm f1.8! I can walk out the door with a single standard zoom and have effectively a 24-200+ f2.8 (FF 5.6)** equivalent. This means buying a prime lens is basically a double buy. For example, if I get the Meike 12mm (24), I also get a 32 (65mm) focal length or the 16mm (32) becomes roughly a 43 (85). This is no small thing, effectively doubling your lens kit and adding versatility at the touch of a button.

Bit rate is deep and all the best things about 4k are accessible in 1080, except crop-able resolution. 1080 ticks along with a ton of quality in reserve. 60 frame 1080 at 100-150 mbs with 10 bit 422 colour depth is better than many cameras 4k output. This is not always guaranteed, but with a Panasonic, there is as much attention paid to 1080 as 4k (Olympus on the other hand does very good 4k, but mediocre 1080).

*This does not mean lower visual quality, just lower potential quantity of that quality.

**2x focal length, but 2 stops deeper depth for the same light gathering.

Yin and Yang

If I had to choose just two lenses, my “desert island” lenses, then the 75mm f1.8 and 17mm f1.8 Olympus primes would be the two.

One is a no brainer, being likely the most technically perfect lens I have ever owned (from a cast of hundreds). The other was a reluctant purchase, made at a time when choice was not huge, so practicality ruled.

What they have in common; the same aperture range, metal build (but not weather sealed), fast AF (the 75 varies from ok to one of my best depending on camera, the 17 is always snappy), harmonious colour palette (but very different contrast and look) and nice manual focus.

Where they differ is the key. Each is a near perfect implementation of a no compromise, specialised tool.

Yin

The 17mm was purchased as my core standard/wide when options were limited and I intended to upgrade as able. On paper it is not without flaws and early reviews bare this out, but few users ever complain about it. Better lenses have been produced (20mm f1.4, 17 f1.2, Sigma 16 1.4 and Pana 15 f1.7), but I am happy to the point where I would keep it with any of those as well.

If the true measure of a lens is in good images taken, then this lens has become my bedrock.

The unique character comes out when the lens is applied to its intended environment, such as on the go street and environmental portraits, where the main subject is captured in environmental context.

Instant grabs are the name of the game.

Colour is a little old fashioned, almost film like and the lens handles hard or bright light very well. It is not perfect and when abused it will likely bite you, but use it well (as you should any lens) and you have a reliable tool that gives and gives.

Wide open in poor light and good detail.

The elongated transition Bokeh, which this lens has in spades is ideal allowing you to use near, or even not so near misses in focus and rely on zone focus shooting. I tend to set it at f2.8/5ft set with the clearly etched lens barrel markings and just shoot or in very poor light, f1.8 and let AF do its thing. Very little is unuseable, even with more extreme settings.

Manual focus is clearly emphasised with the click back ring, good throw and barrel markings.

This shot was taken wide open, pre-focussed at about 2m for the crowded corridor we were negotiating, the shot grabbed as we passed this side corridor. Even with a clear miss, the transition from in-to-out of focus is harmonious and acceptable detail is held all the way to the back of the tunnel. If my old 20mm Pana, newer 12-40 or 25mm lenses were used here, the more modern sharp/soft Bokeh would have made the file useless.

So, this lens provides good depth of field control, micro contrast, handling and responsiveness, all good traits for a wide standard.

Sometimes the sharpness can feel three dimensional.

An unlikely use, considering it is not a “perfect” lens, is for landscapes. It just does a really good job of bringing out details and tonal separation.

An added bonus is its video performance. It offers the same benefits as above with the G9’s 2.7x loss-less teleconverter making it a nice wide and portrait lens in one.

Yang

Its partner, as much for their differences as the things they share, is the 75mm f1.8.

This is a special lens in an entirely different way.

It manages to have smooth grace, brilliance and fine/hard micro contrast, which makes it a rarity in the Olympus stable. The rest of my lenses tend towards either strong micro contrast and busy Bokeh, or a smooth lushness and creamy smooth Bokeh, but rarely all of these in one lens.

It is hard to get across how sharp this image is. My A3+ printer is maxed out with tons to spare. EM5 mk1 and 75mm near wide open.

Its colour is similar to the 17’s, but the contrast more snappy and lush. I especially like the contrast and compression for cutting subjects out from the background.

A 150mm f1.8 is an odd focal length, but also a bit of a gift. I like its candid reach and feel it is the right lens to go with the 17 (35). There is enough of a point of difference in distance and feel to warrant changing.

Here is the best of it. Colour, sharpness, Bokeh and compression all with lightning fast and accurate AF.

Weaknesses?

Very slight, rare but fixable CA wide open and an image flattening, compressed look that can be over used.

As a video lens it also brings something. In 1080 with the Panasonic and the loss-less tele converter, it provides a 400 f1.8 to the kit and even in 4k you get a 200 f1.8. Seriously powerful.

I can honestly say, if I lost all of the images taken with just these two lenses, my portfolio would be halved.

Contenders?

The 25mm shares the same lush, brilliant colour and contrast as the 75, but without the benefit of the focal length or its biting but natural sharpness (it is very good, just not as good). They pair well, but share too much in common.

The 75-300 come surprisingly close at the short end, especially in colour and Bokeh, but at f4.8, it can never match the look.

The 40-150 pro is similar to the 75, but lacks the sublime Bokeh and I have found the AF on the 75 to be better in low light, which surprises me considering the 75 is the older lens. Bokeh is the big differentiator here. The 40-150 can be gorgeous or a little busy. The 75 is always sweet.

The 45 f1.8 has a similar look to the 17, making it a good partner, with much of the utility of the 75, but I can always tell the difference in the files.

Hidden Gem

Since adopting video, the 12-40 has been glued onto my G9, waitng (impatiently) for the cables and adapters needed to get my monitor going, finishing my cage-rig. Lots of minutes of test footage later, I feel I have the measure of the lens and its many strengths, but looking at Meike cine lenses (maybe later, not yet), it occurred to me, that if I went primes only, I would be stumped choosing just one at the moment (the G9’s built in tele helps making 1 into 2).

For stills it is easy, so theoretically it should be as easy for video, but creatively, there is more than a small chance my needs may be different.

I switched to the 17mm f1.8 today, a lens I love for street shooting in the past and close in action with kids in poor light more recently. It has gone from my first grab, to a seldom take, so re-purposing it for video felt very right, as long as it had a use.

Oh boy, what a find!

Wide open, focus is on the nearest mans hair and it is sharp, but the whole tale is told. This coherent whole with snappy sharp hero is very old school Leica like.

Turns out the long throw Bokeh the lens exhibits, something I have always appreciated for street shooting, is equally useful for video. The 12-40 has the fast drop off, creamy Bokeh so desired at the moment. The 17mm is often derided for its “poor” Bokeh performance, but I believe that is simply misidentification of a deliberate design strength.

The 17mm was designed for on the fly street shooting. Misses are a pain in this format of shooting and wholly unnecessary. The 17mm allows things not quite in focus to be easily retrieved if needed, transitioning slowly and naturally. Secondly it holds coherent shape in things well out of focus-hence “long throw” Bokeh.

In short, it is a story telling lens.

Shot wide open in late evening light, the focus fell on the mans back, but everything back to the umbrella is seemlessly rendered with no clear point of sharp-to-soft transition. The girl in the foreground is technically quite out of focus and a lens like my old 20mm Panasonic, the Olympus 25mm or the 12-40, would have likely lost her completely to blur, but the 17mm makes the image workable. As an added benefit, the man is snappy sharp also, giving the image two strong elements and a slight 3d effect.

Another benefit of this lens, one that goes well with its Bokeh characteristics, is the focus throw. A true cine lens has very long and smooth throw, but for a stills lens, when in true linear manual focus mode (ring pulled back), the 17mm has a reasonably forgiving throw, especially compared to the 12-40.

The AF is also lightning fast, again supported by the forgiving Bokeh, but MF is very useable.

Something I need to explore also is the loss-less tele converter option (roughly 40mm in 1080 or an 80mm equivalent). Retaining the f1.8 aperture and FHD quality, I have a “both ends of the zoom” range or more accurately, a story telling and genuine portrait lens in one. Add the 75mm and you also have a 150+400 f1.8 equivalent.

Softly Does It

Well, I went and bought a “misty” filter.

My criteria was pretty tight. Tight to the point I doubted I could get anything worth while.

Softness can come in many forms. I used to hate the sharp/soft look of earlier Canon cameras, but in hind sight, maybe they were after something more than just……. more.

I wanted the most invisible look I could find. One that did just enough to make the exercise relevant.

There are some good filters out there seemingly designed for my needs exactly. The Tiffen Black Glimmerglass 1/8 and Black Satin 1/8, manage to retain contrast and sharpness, while adding glow and very mild softening, just enough for the infamous “cinematic” look to start to show (aka softened enough to not look digitally sharp).

Scratch these as they are hard to get in Australia for a reasonable price ($130+ for a 62mm).

K & F has a 1/8 strength Black Mist that is noticeably weaker/more natural looking than the industry standard Tiffen Black ProMist 1/8, but after a deeper dive, it is still a little strong for my tastes.

Just before I pushed the button on one as the “least worst” option, I remembered a review from a week or two ago, that I watched just before I grew tired of the whole process. The Kenko Black Mist 0.5, which seems to be a fringe runner, limited to Japanese reviews or maybe it’s just a new contender. It seems to be obviously less “Netflix”* than the Tiffen, and even noticeably weaker/smoother than the K & F Concepts. It does however still add blooming to highlights and just takes the edge off digitally oversharp footage.

A reviewer compared it to the K & F 1/8 which he personally prefferred, as he felt the Kenko was “too clean” for his needs.

Music to my ears, Kenko it is. It also comes from a company I have delt with previously who are red hot on service (expect it tomorrow, with free freight).

Shooting 1080p in Natural, with sharpness at -5 and contrast at -3, I have a strong base for cinema friendly capture. With light, lens and aperture selection and other factors to draw from, the Kenko will just give me that extra emphasis on film-like gentleness and allow me to handle light sources with more controlled creativity. It looks like it blooms lights well, but is otherwise pretty controlled.

I honestly do not see myself using it for many shoots, but when I do, I want to have a little something to rely on.

*I rate these filters as NCIS (waaaay too strong), Netflix (a look that is what it is), Cinematic (which is nearly invisible, but you notice it when its not there) and Hard Documentary (none).


Changing Priorities Of The Exposure Triangle

The exposure triangle is the corner stone of still photography and differently, but no less importantly in videography.

If you get this knocked, then all the other stuff comes as needed, but if you cannot control these three in tandem, then the rest falls apart really quickly.

The basic concepts for those still learning are;

The three settings, Aperture, Shutter Speed and ISO all have dual roles.

They work together (or against each other) to get exposure right for the shooters needs, and contribute something creative into the mix, more or less. We will look at these with two criteria in mind. The first is creative control and creative potential, the second is damage mitigation or in other words, how the setting impacts quality if mis-used or improves it if used correctly.

Aperture gets a 5 for creative control and a 1 for damage mitigation.

Controlling the Aperture controls depth of field, which is for most photographers their first creative consideration. The landscape specialist uses deep depth, the portraitist shallow, but regardless, an uncontrolled aperture setting can force seemingly random and contrary results in your imaging. As for damage mitigation, if one of the other two settings is needed more for creative control, then the Aperture may be used for exposure balance.

Shallow depth of field, the main tool of the portraitist. Really brings out the character of the subject!.

Shutter Speed gets a 3 for creatively and 3 for damage mitigation.

Controlling the shutter usually takes the form of making sure it is fast enough to avoid motion blur, or conversely, to convey blurring deliberately in an often exaggerated form. In the past, film choices with fixed ISO’s and limited in workable range, forced an acceptance of some blurring in images, but as ISO tolerances become higher, perfectly still in almost any light is becoming more achievable.

ISO gets a 1 for creativity, and a 5 for damage mitigation.

ISO is the safety valve of the three. It determines the potential technical quality of an image and the sensitivity of the film or sensor to light, with the two extremes being directly opposed. If Aperture or Shutter speed are the primary creative controls, then ISO is often left holding the bag. ISO has always tended to be the limiting factor in the math that is photography. If you are using film, then the ISO is set, so film choice is a really big one to make, but in digital, ISO is flexible making life a lot easier. Very occassionally, a shooter will allow film grain or digital noise to become part of their creative process, more so with film or even video, but with so many processing options available now, noise is a poor substitute for a true film grain look.

*

My standard working technique from the dawn of time (seems like) is to use Aperture Priority, or Manual with Aperture as the primary setting. This is because more often than not, I am using depth of field as my main consideration, or even if Shutter Speed is more important in a perticular image, the Aperture setting is still controlled to some extent.

With Micro Four Thirds, ISO is the enemy, much as it has always been in photography, but many larger sensor cameras are starting to make it effectively an irrelevance. This means that using Aperture priority usually results in just settting the Aperture wide open as f2.8 on MFT which is f5.6 (at the same effective lens length) on a full frame. A good, safe working aperture with decent light gathering power.

Sometimes the balance between ISO, Shutter speed and Aperture can be vexing, but mastering it allows you full creative control.

I also tend to control the ISO, by either limiting its range in auto ISO or set it speficically to what works in a specific situation.

Very occasionally, I get caught with a slower shutter speed than I would like as I have allowed the camera to use it as its safety valve.

The solution, is to set the Shutter to what ever I feel is the minimum a lens would need, usually doubling the lens focal length at least (in MFT), or 1/250th is a good all rounder.

If the Aperture is effectively irrelevant, as wide open will never cause undue harm, and ISO is less of a problem now with better processing options, with the Shutter is locked in, I will never have a blurry image at least. This may not work with fast primes as f1.8, even in MFT format may be too shallow in focus depth to work, but with an f2.8 zoom, I think it would work well.

Of course the biggest issue is getting into habits that are contrary to my SOP for the last two decades or more.


Lines In The Sand

First up, I need to share with you where I am.

Today is a perfect Tasmanian day. I am currently sitting on my front steps in dappled sun light, with a pleasant temperature of about 22 decrees C. The day will get up to about 30 degrees, but Tasmanian summers can bless you with cool nights and warm days, which is just about perfect for comfortable living.

The cafe next door is a-buzz, people making the most of the last days before school goes back (our summer holidays are over Christmas). Even my boistrous dogs (a pair of three year old hunting/cattle dogs) are content to just sit in the sun and watch.

Sorry to all you northern hemisphere readers, but I am going to soak this up today and count my blessing, as the looming flip side is, although mild by the standards of some temperate climates, still cold and dark.

Anyway, lets look at some slight changes to my video shooting processes and thinking.

Camera Settings

I have been looking into the real benefits of 4k for my work shooting and have to admit, I see little or no reason to bother. There are a lot of things at work here, many hard to pin down without the years of experience shooting video I would love to have, but at the end of the day, the only times I can see myself using 4k are;

  • Shooting for maximum post-processing potential (Log styles and 4k).

  • Shooting for maximum play back resolution on UHD screens.

Otherwise, I see no benefit in 2.7 or 4k over 1080p for general use. I do understand that the resolution is measurably higher, but actually seeig that is dependent on a lot of other factors. Playback format, screen, viewer pay in, expectations and education, size of screen to viewing distance, along with other factors all play a part. Just like stills resolution, you need the benefit of direct and close comparison to actually see any differnece and even then it is relative and not the determining factor for “quality” of the image or footage.

Approximately a 12mp crop off an M43 sensor. Its all relative, oh and the shot of the shot was taken with a cheap phone at night.

I have a theory also that 1080, with sharpness reduced may also reduce the need for diffusion filters.

If there is a perceived resolution difference between UHD and FHD, then it is only going to make the footage more digitally “perfect,” something that, ironically, needs to be softened out with filtering to look more natural.

My custom settings now reflect this;

  • C-0 or creative movie is left open to play with.

The next three are for use as is no post, but with room forpost as an option.

  • C-1 1080, Natural -3/-5/-0/-1, 10 bit 422, 150mbs, 25 frames as my standard.

  • C-2 1080, Natural -3/-5/-0/-1, 8 bit 420, 100 mbs, VFR, 50/150 (33%) for out of the camera slo-mo.

  • C-3/1 1080, Natural -3/-5/-0/-1, 10 bit 422, 150mbs, 50 frames for movement andthe option of post slo-mo with sound.

My OSMO footage is still sharper looking, but I can fix that.

These two settings are a concession to post for projects and personal work.

  • C-3/2 4K, Cine-V -5/-5/-2/-2, 10 bit 422, 25 frames for grading, but a soft touch.

  • C-3/3 4k, Cine-D -5/-5/-2/-2, 10 bit 422, 25 frames for deeper grading (probably supplied unprocessed to an outside source).

There is a possibility aso that these may end up 1080, set for portait or low light etc.

The more important specs here are bit rates and colour depth (mostly 10 bit, 422 and 100-150mbs). This means more information, even in 1080, so better actual quality in real terms, not just more res. This also explains why cameras that only just enter the 4k world, usually by being stretched, often shoot way better 1080 than higher. The EM1’s are an anomaly here. They shoot very nice Cine 4k, but quite poor 1080, something that helped me decide to switch to Panas for video.

A final element to my thinking is apparently, exporting 1080 to 4k still shows some benefit for U-tube etc., but to be confirmed.

*

Camera Rig

Secondly, and it is still glorious here by the way, I have relented and switched back to the less sexy but more practical 2094c handle.

An older shot showing the Ulanzi triple plate. I will take another when the whole thing is together, using the cage and with the handle to right way around.

With the arrival of the secure cold shoe adapter, I tried it and found it just made more sense for a variety of reasons;

  1. The handle sits higher and (for balance) off to the right of the top cheese plate (Niceyrig model for all Panas), allowing me to mount a variety of other attachments to the camera top. There are six top holes left (and four across the front), on which I intend to mount a forward mounted cold shoe extension arm. This will allow me to mount the H5 well centred and forward enough so there is nothing hanging out the back (its shock mount will be about where the 12-40’s zoom ring is). The H5 can still be easily read and reached for levels and even the long shotgun capsule only protrudes a little past the lens (I may get a base plate and rails, or just a rail to protect it). This is the only option I like for an on-the-go rig with the H5, but also gives me options with the H1 and mini shotguns. The weight of the H5 is not an issue, but bulk and length are. The 1446 really stifles mic options, blocking low mounting options and providing none of its own.

  2. The whole thing is better balanced with a variety of lenses, allowing me to ditch my weights. The 1446 is really front heavy with the 12-40, but well balanced with light primes. I have used weights to fix this but they get in the way of tripod mounting, sometimes need to be added to the back handle and the added weight (which can be good), is also provided by other things.

  3. It can be removed or reversed quickly if desired for packing down and added versatility. The locking pinon the new cold shoe adapter just adds peace of mind. The 1446 is a screw mount, which is secure, but not easily removed.

  4. It has three monitor mounting options, front, front top and rear top. If the rear shoe is used when on a tripod for example, then I can mount a mic or light up front. The 1446 only has one real option, low front.

  5. The front shoe is lockable, so I can confidently mount my Ulanzi triple cold shoe plate on it and attach my monitor off centre with the H5 opposite, or a set of mics and a light etc. The single front top cold shoe on the 1446b is terrible. It’s not even full depth, which means you have to mount a cold shoe on the front as option…..only.

  6. I can hold the camera up to my eye, without taking the handle off. This gives me the option of using the camera without a monitor if needed. The 1446b forces me to use the monitor or rear screen only as it sticks out a couple of inches above the eye piece, basically mid forehead.

  7. The handle comes with an allen key also, so I can lock/unlock most fittings without reaching for my tool case. This is especially handy for adjusting the monitor tilt head tension.

I still prefer the 1446b for low angle hand held when more stability or a lower profile are preferred, but at the expense of the Zoom and some other mics, so nothing wasted.

*

Diffusion just got complicated (or easier?).

Tiffen it seems makes a whole variety of Pearl, Satin, Glimmer, Mist, Net and Fog filters with and without a black base and each has at least 5 levels. They have an excellent, but confusing (way too many options) video on the subject and after watching it twice I am leaning towards weak end of Black Satin or Glimmerglass, but still too many. To be honest there are also so many variables involved it is hard to find concrete impressions (impressions in concrete?). One reviewer managed to make a 1/2 strength filter look stronger than a #2, just by having their model a few inches to the left, revealing more light.

The good news is, they are not all mist filters, the bad news is they are sometimes hard to split and expensive if you do not like what you get.

Sticking to 1080, using my known lens characteristics, lighting and my optional real-net filtering, I am still not convinced I need one.


And Now For Something Completely Different

Still photography, how I have neglected you!

Be careful in the woods, you might get tagged.

My wife and I went for a little walk the other day and I cursed my new found habit of thinking about video, but not stills. No camera! Today, given similar glorious light, we retraced our steps.

The local skate park is quite a thing. The council, deciding not to fight the taggers, but rather give them a place of their own, has allocated a 500 meter long flood wall for their use and included the skate park attached. Quite the palette.

Generally respected by low brow taggers, most of the art stays intact for a decent period of time. The layering is intense.

The little 14-42 EZ lens is sharp, but with some curvature or de-centering. Funny how that does not matter in the field.

$2 Filter Solution

So, not letting this diffusion thing go, even though I am reconciled with a life without it, I made an impulse purchase at the local K-mart today.

After parting with a massive $2, I can make a few attempts at making my own black net cover (filter).

The purchase was; 1 mesh food cover, black.

A strong effect, but repeatable and easy to use. The “glass” could not be clearer, being absent, and the mesh is tight, even and clean.

Aperture choice does not seem to effect it greatly, except for slightly more specular out of focus highlights.

Below; f2 and f8 respectively.

A very 1980’s softness.

Sharpness is still good, but contrast drops dramatically.

Below; unfiltered left, then filtered right. Detail is high.

Can it be recovered f too much or not wanted later?

Mostly. The character of the image has changed, but most of the “snap” can be put back in.

Below; Filtered, de-hazed (+30) and unfiltered. Oddly, when de-hazed, saturation seems to increase, but I have been suspicious of this in the past.

How do I intend to make it (picture coming)?

I think a well sized piece of mesh, cut out and pulled over the lens front, then held in place by an elastic hair band that I already use for flash flagging. Hi tech huh.

For stronger effects, I could add more layers. If rushed, I can just hold it across the lens front.

If this works, I will also look out for the same stuff in a wider gauge for a more subtle effect.

The mesh has the benefit of being non stretch, so I can rely on its consistency. Actual fish net stockings do allow for more or less diffusion by tension, but repeatability is tougher.

Where does it fit in the world of filter diffusion?

It looks to me more like an old school, true black net filter, less “misty”, more “glowy”. The contrast is higher than say a K & F 1/8 Black Mist, so maybe a 1/16 equivalent, the more subtle look I was after. Of course it is hard to be sure without direct comparison, but trust me, I have looked at a lot of footage and dozens of stills taken with these, so I am getting an educated eye.

I particularly like the kitchen utensil shot above. The crisp glow and brilliant smoothness, but not crazily blown out highlights are right where I wanted it to be if this is the look I am after. To be honest, for something that has few measurable controls, it is as good as any other option.

There is a down side and one that popped up just once. The net can be visible in small aperture, wide angle shots. This can be avoided too some extent if the net is hard against the lens glass, but if placed over a filter, the problem appears consistently in those circumstances.

Time to cut up some mesh!


Long Day For No Result (Which Is Fine)

So lots of research, lots of examples and opinions and you know what?

I think I will give this diffusion thing a miss.

Several reasons have surfaced, so I will tackle each in turn.

Availability.

The ones I really want to try are the Tiffen Black Glimmmmerglass and Black Satin in the weaker 1/8 or 1/4 strengths. The problem is high price and patchy availability in Australia making it a risky investment sight unseen.

Camera sharpening.

For my needs, I have reduced sharpening to -5 and contrast of my 1080 to -3, my 4k to -5 for both. The lower res of 1080 and its unprocessed use (immediate social media) means that dropping it a little looks smoother, but without post, dropping it all the way down is a little much. I also have to consider the B-roll camera, the OSMO, that does not give me the same controls (although Freewell does make mist filters for it!).

The look.

Photographically, I was a child of the ‘80’s and back then you had to chose a side, misty of not. I went not. The work of Greg Gorman appealed for a while, but it was glamour, well executed, black and white and very on-trend. When that faded over time, so did my interest. After a day of comparisons, I can honestly say, I did not like most of what I was shown as opposed to a week researching cinema colour, that was transformative.

Tools at hand.

I have already had some mild success making my own filters and there have been some really good ideas on line to try. Add this to the antique 25mm’s “Hazy” wide open performance and the as yet untried Helios 44-2 I found down stairs and you have the makings of a workable “Hollywood” look if requested.

If I were to go for a filter and that would be a big “if” at this point, it would likely be the K&F Black mist 1/8 strength, because it looks to be the most invisible and gentlest of the lot, but if they made a 1/16….. . Second would be the Kenko 0.5 for the same reasons, but smoother (ed. I went for the Kenko).

The wide open madness that is the ancient 25mm. At F4 the thing really cleans up its act, but at 2.8 it is “special”.

Me (and my needs).

My tastes and needs are found far from here. Do I need to go all “Netflix” to get the job done? I feel not. My favourite films are generally hard-real, suitably lit, using colour for mood*. If softening is needed beyond what I have managed with lighting etc, then a little post maybe. I need to remind myself where my needs lie. For now that is small time video and the occassional TV grade shoot.

Interestingly, one reviewer who clearly knew his stuff, tried a genuine fish-net stocking and that came close to the money. That is actually what the old shooters mean by “black net,”, not a sheer silk number. I was always led to believe in the early days that black nets were used to soften, but keep contrast up, while white based filters softened and reduced contrast. The Gorman work bares this out.

Softness can take many forms.

Smoke and mirrors.

There are other tools. Smoke or haze (actual mist), or reducing sharpness further in camera, looking into the character of lenses new and old, softening in post, soft lighting (always), exposure and depth of field all have a role to play. The filter is the most obvious and I feel the least natural looking. It is a look, not a natural effect.

The look is described as “cinematic” and it is I guess, but it also depends on what cinema you watch.

*

One thing I was reminded of here is the rabbit hole that online research can be.

Most reviewers, depending on the question you ask, are advocates of these filters generally or one type over others, so a day of saturation can lead to a “must have” mindset.

The reality is, most major productions do use filtering, but they also use multi thousand dollar lenses and cameras, sometimes film, sometimes massive amounts of post, light rigs etc., so filters are just a small part of a very large whole (hole!). Apparently, there are whole rafts of people out there who do not use them. Go figure ;).

Monitors, filters, lighting, cages and rigs, sliders etc all have their role to play, but let the need determine the purchase, not internet fuelled impulse.

I need to constantly remind myself to drop out of this cycle mid stream and look at the overall picture before committing.

Obsessive much?

Yes, but aware of it.

*Putting this to the test, Meg and I recently watched the 11th series of Vera and straight away noticed the heavy “glow” added. Apparently they had a lot of issues with COVID, so maybe it was a technical necessity, but both my wife and I find the look less appealing.

More Experiments In Softness

Following on from the recent post, I tried some thicker and tighter black lines on an old polariser filter.

Filtered on the right. All taken with my 75mm at f1.8, my sharpest lens and shallowest depth (short of macro). The bigger files seemed to be obviously different, but at this size, it is hard to be sure. If anything, the Bokeh drop-off seems more aggressive and smoother, but the unfiltered images have more "brilliance..

Filtered images right side and this time more obvious. Again, softer, lower contrast, less brilliant. There is a slight exposure difference that I did not properly balance out.

First image above is filtered, the second is filtered, but de-hazed, the third un-filtered.

Maybe something half way.

Searching For Soft

Video has rekindled some old techniques, both generally and with me specifically.

One that I feel is important, but not one I want to necessarily follow the current trends with, is diffusion or softening at capture using filters.

In the early days of film, a wide mesh black stocking was often stretched across a lens to create a sharp/soft, semi glow. This was called a “black net” filter and became the standard for film and stills portraiture for half a century.

Black was chosen for its slightly stronger and more precise nature, white generally avoided as being too “glowy” until the ‘60’s and 70’s when it became the filter “dreams” were made of.

With video, specifically digital video, one of the worst kept secrets is the use of filtering to de-sharpen, reduce contrast and create gentle (or not so gentle) blooming in highlights. Bad is good all of a sudden. The all too perfect didgital look is going so far the other way, it is touching on what we would have once called rubbish (technical term there).

Video is good, but has its weaknesses and dynamic range is one of them. Under exposure, exposing for the highlights and generally avoiding too wide a range of lighting are all modern realities, and filtering it seems is one of them.

My issue is the over use or use of over strength filters on trend at the moment. If you look at the portraiture of the masters over the last 50 odd years, you will see (if you look) a gentleness and slight glow to their work. A favourite is a portrait of Michelle Pfeiffer taken by Joe McNally in 1995 among many, but generally, going against the trend in almost any other style of photography, soft was worshipped. Good soft that is.

Having pretty much turned my back on the idea of buying an expensive Pro-Mist filter or similar, as nothing I have seen has been anything other than heavy handed, I have turned to DIY.

Trials 1 through - well, lots came up empty with mesh bags, half my wife’s stocking drawer and a few other, often goofy ideas tried. One of my favourites was a dense mesh bag from my Lowe Pro backpack, but it was soo thick you could “feel” the lines in the image.

Below are a set using a white fine mesh fruit and veg shopping bag. Far too obvious, but the best so far. Maybe something black and 2/3rds the gauge would be fine.

Next I went back to an old (old) friend, the 25mm antique Pen 25mm at f2.8. This lens is pleasantly sharp at all apertures, but suffers from very strong veiling flare wide open. Below; a comparison at f4 then 2.8 then 2.8 slightly de-hazed. A great tool and probably the only soft filter I have seen that is actually reversible (the veiling haze cleans up well), so this very easy and natural technique will be included in my tool kit.

My next idea was to make my own black net, not with hair spray or paint etc, but an actual black grid drawn on a filter! Note; draw on the back so it does not smear.

The ink did not take, but for experimental purposes, it will do (maybe two filters with the ink between?). This looks like a few older black net filters we used to sell back in the day and I can add more lines if needed. Cokin did a nice set of very mild to quite strong ones (and could stack) and I remember at the time, against all my usual habits, quite liking the generous and subtle effect of the milder ones. To me the look of medium format was soft/smooth but clear and relatively grainless. These filters added that to 35mm.

First look and subtle (good), but there, as is maybe a little extra CA.

It really is subtle (un-filtered on the left), but I am after a filter that does a little when conditions suit and is otherwise effectively invisible. Really just something that changes lens character to gentler, more film like, not forces a specific “Netflix” look on the footage. The Bokeh and slight drop in contrast (right) are signs maybe something is happening, but hardly scientific processes.

I may go looking for the old Cokin style filters or make something more permanent (maybe some reinforced dooor mesh?). Maybe even a pen that writes on anything.

The other option is to go lens hunting. There are lots out there old and new, even ancient Helios 58mm’s found in the basement, just the other day!

Sound Choices

So far, and I am a long way from being an expert, I am happy with my sound choices.

Starting with the little Zoom H1n and Neewer and Boya mini shotgun mics, I found three, mighty for the money performers (the mistakenly purchased Rode Videomic micro helped bare this out, so I guess not all perfect choices).

I guess I could have stopped there with decent options for candid interviews and general shooting. Directionality is covered, as is wide area coverage and as these little dynamos have shown, they can within reason, get the job done.

The Zoom H5 lifted my interfacing options and added a bit of grunt, but as was, the H1n probably was enough.

The true strength of the H5 was opened with the purchase of the SSH-6 mid/side shotgun capsule, which, as long as you own an H5/6/8 is a great value, mid-pro shotgun with controllable left/right pickup.

So far each purchase, researched as they were, have been based only on reviews and heresay, but have been good choices and are relevant to my needs. A few top end sound techs recommend lower noise amps for genuine field recording (Zoom F6), but there are plenty of serious pros from many fields, who are more than happy with the H5 or similar, especially with the XY5 and SSH-6 capsules.

The next step, possibly one too far, but I am sure I will use them, are a pair of Lewitt 040 Match pencil condenser mics, which again, seem to be class leaders. Budget but well liked XLR cables have not let them down and the H5 offers good control for them from up to 20 metres away, so balance and relevance are well intact.

I have options, probably too many, but options.

Some repetition, but also depth, several problem solving paths and apart from XLR cables, it all fits in two small cases, brackets and all.

To fix possible issues I have not covered yet, I grabbed an excellent Boya LAV. These are good, cheap and reliable, but 20mtr cable connected. The H1n can be used as a separate recorder, making it effectively cordless.

So, what could be around the corner that may trip up a new recordist, especially when they are also trying to get the video side right?

Big choirs, bands, school concerts can hopefully all be handled by the H5 with SSH-6 and the condensers placed to suit. There is also the possibilty of interfacing with the schools sound gear. This is all a bit speculative, but I have no bar to reach, just turn up and don’t mess up. I am aiming to surprise, but should probably just be aiming to succeed, so having several otions and backups gives me confidence.

Group discussions, debates and team talks will be either handled by the H5 X/Y or the condensers used as left right side overheads/desk tops. I guess a pro outfit would run a mass of LAV’s, but that is above my pay grade and for my level of output, totally over the top (we have people).

Musical recitals, are surely the province of the condensers and SSH-6 or X/Y alone depending on instrument or ensemble. The Lewitts rate very highly for drum overhead and acoustic guitar mics, so why fight it.

Running around stuff will be either the H1n for area sound or as pre-amp for a mini shotgun. I have toyed with a better shotgun, but the SSH-6 is that unless size is an issue, then the minis are prefferred anyway. The reality is, distance to subject is the main quality consideration and plenty of good reviews have the little Neewer and the Boya/Movo neck and neck with many dearer mics if used well. It seems to be more of a matter of taste than of sheer quality.

The Boya and its dead kitten are great in the wind, the Neewer not as much, but the Neewer has argue-ably nicer, more open sound and better range for booming.

If I need better reach, I have options.


Whats In The Bag (Video)

Starting a new year, I am going to look at and share my kits (various), just to “think out loud”, but also to help others with ideas etc. When I was younger I used to love these, feverishly buying magazines or books just to get a glimpse, not only of someone else’s gear, but a little look into their life as a pro shooter.

Video first, just because it is the new shiny.

My video kit goes into a back pack so I can take a stills shoulder or heavy kit bag as well.

The big Neewer backpack I bought for sports has turned out to be oversized, so it has become my video kit bag and in a way my kit limiter. If it does not fit in here (unless lighting or stands etc), then it is not needed. It only just fits!

In the bag above are the 4 semi hard XCD brand cases, which have been invaluable. The camera fits minus monitor, but with all other rig attachments on. There are 3 prime lenses (17, 25 old, 45) and 3/5/7/10 stop ND filters for my 12-40 only (the primes are for low light or alternative looks).

The 2 smaller cases on the right go in the large outside pocket along with any other bits that fit.

Each case serves a task, so I can grab just what I need.

Clockwise from top left;

The Zoom H1n, Boya LAV and shotgun, Neewer shotgun, 10/3/1’ cables, shock mounts, mini phones, dead animals (various) and batteries etc.

Zoom H5 with XY and SSH-6 mics, dead cat, XLR to H1n cable, mounts batteries etc.

The Feelworld 759 7” monitor and mounts, hood, cables, batteries and counter weight.

The OSMO Pocket, various brackets, waterproof cover and 10’ phone connection cable. There is more to come here including a full body go-pro mount case.

The back pocket bags and XLR cables.

The top 2 small cases (originally for a game console), seen in the first image, hold my 2 Lewitt 040 match condenser mics and 176 LED light. Both are optional as one is my pointy end for sound solutions, the other a nice background light (or desperation measure). These fit with a third full case of tools etc in the back pocket of the backpack. A laptop and hard drive can also fit there, but will rarely be taken.

The cables go in my kit bag with light panels, stands etc, but are relevant to the Lewitts so I added them here. The cables are only needed with the H5 and Lewitts or other mics, so full on stuff.

The phones fit in as needed. I am happy I have good “cans”, but to be honest, the little sound blocking corded ones I started with are pretty good, so I will likely leave these for H5 and Lewitt use.

Not shown, because it varies and is a bit boring to shoot are the two LED panels (Neewer 660 bi-colour and 480 rgb), the stands I may need, tripod, slider and the boom pole and bracket.

Miracle Find

Scrounging around down in the basement, I came across something that made my day.

Lamenting selling off all my old glass before discovering the joys of video, including a mint Zenit with Helios 58mm f2, I consoled myself with a new found usefulness for my 1960’s 25mm half frame Pen lens.

In an old box of bits, not sure where or when I got it, I found among other things a nice condition Praktica camera with a screw mount Helios 58 f2. It is very old, like first series, but the aperture works, both with the clicky ring and the handy step-less one and it looks quite clear of haze.

$8.00 adapter ordered and away I go. Of course it is quite a long lens on M43 (120mm), but I have the shorter 25 and the character filled Oly 17 for wider again.

Bit of fun.

Final Control Layout For G9 Video

This is the final layout for the G9 for video (he says).

I am not going to go into the exhaustive touch screen or quality setting, just the “working” buttons that will be used always and during shooting.

Starting with the front buttons.

The top one is Peaking, the bottom switches Stabiliser mode from moving to lock.

The top panel.

The shutter button is the master Record.

The main wheel does Shutter (rarely touched).

The three buttons behind it, which cannot be changed, are as marked, but will rarely be used.

The record button is nearly impossible to reach which is good as it stops accidental recording.

The all important rear panel.

The top thumb dial is Aperture, which will be used regularly. I like how the cage covers it to reduce bumping.

AF/AE lock button is set to fast C-AF acquire when in MF on camera (not lens) for rare occasions I will use AF.

The nubbin below is for activating and controlling manual White Balance. This is one of the two key exposure controls and my favourite use for it.

Fn1 is the lossless digital Tele Converter.

The big master wheel around the menu button changes ISO, the other master exposure control.

Fn2 turns the Histogram on/off, something I like more with the big screen as it takes up so little space.

Display is left as that.

The Fn3 button assigned as a second Record button has been a revelation. With four contact points for the camera, being able to use either hand for recording is a real plus.

The main control dial is left on creative movie. I like to call that Custom-0. This is Natural colour, 1080p 25 frames 1/50th for my basic dump and run work needs. My standard Natural settings are -2 contrast, -5 sharpness, +0 NR and -2 colour.

C1 is Variable Frame Rate 160/50 frame for 33% slow-mo out of camera, again for work.

C2 is the same as C-0, but 4k. In 4k I shift my Natural settings to NR -2 and contrast -5 for grading.

C-3/1 is 4k 60/120 for slo-mo and movement.

C-3/2 is a slightly different set of 4k night shooting settings (more NR, less contrast)

C-3/3 is Cine-V 4k for creative projects and always subject to change.

It is important tome to get the important controls close to hand, single action and tactile. The touch screen is too small and poorly placed on my rig for fast use, so it’s a button or nothing. I reserve the touch screen for pre-shoot set-up controls, not on-the-go’s.