Why I Always Compare M43 to Full Frame?

I often compare M43 to Full Frame, not APS-C, something I am not alone in.

Why?

There are a few of reasons I guess.

First up, it is the only consistent format to compare to. The “ugly” 3:2 compromise format, it has become the base line all are measured against.

The second is that the difference between M43 and APS-C is one of degrees, in other words, there is no upgrade to be had that way. Both have a smaller sensor than Full Frame, Both therefore have advantges and disadvantages when compared to that format, but APS-C is in the middle ground, closer to M43 than the bigger format (especially Canon at 1.6x crop).

Much of what is said about M43 can also be applied to APS-C, and equally the differences to FF are similar. The M43 to FF comparison though is a fair comparison of the two extremes.

The thing should be the priority, not the thing that captures it.

A last factor though is no other maker other than Fuji treats their smaller formats as their “end game”. Fuji and Panasonic/Leica do offer bigger formats, but their smaller format offerings are taken seriously. Their best glass and cameras are available in the smaller formats, their larger format versions are often the same but different, sometimes less refined or more specialised.

Canon, Nikon and Sony are all guilty of under-attending their smaller formats. Canon refuses to make “L” glass for theirs, although of course these can be used with APS-C at different focal lengths and oddly, many of their plastic, non “L” APS-C options are optically identical to their professional siblings, some even better at their launch than their aging full frame predecessors.

One of their best SLR lenses that got very little attention was the 17-55 F2.8. It was big, sharp, fast, but also over priced for a plastic lens and had no red ring of “specialness”. The 10-22 was also a more stable lens than the first 16-35L it was modelled on, possibly being the reason it was upgraded. I owned the 15-85 USM and it ran rings around the 24-105L mk1 (just not red rings).

They were basically saying you need FF to be a pro, and stubbornly feed smaller formats with “scraps”. My biggest bugbear was the lack of decent dedicated primes, something they started to address just after I left the system.

Most rely on the trickle down effect from their larger format options, paying little attention to holes in their range. Ironically, I actually got used to this with Canon. No decent options for years in dedicted primes, wide angles, specialist lenses like tilt/shifts and macros, often forced on me a longer full frame focal length, that it turned out I actually preferred.

I did though have to buy a longer, heavier and dearer lens than I wanted, but that often got around the soft corner issue that plagued early Canon glass (check out any test of the 17-40L wide open at 17mm just for a laugh).

I realised at some point that about 28mm was actually as wide as I personally wanted and 40mm was my perfect standard, so my 24 and 28mm lenses became standards and got a lot more use and the less than perfect 17-40 became a very useful 28-65. Even to this day, I only own wide angles for other peoples needs, not my own.

One of my favourites was the sublime 24 T/S L mk2, that became a perfect 40mm. It allowed three shifts to match a 16mm’s coverage, but it was more natural, better corrected and a much bigger file. Others were the 50mm Macro (80mm), 35 f1.4L ( 55mm), 400mm (640) and 85 f1.8 (135mm).

Olympus has all its eggs in the M43 basket, Panasonic comes close to matching them, before adding FF and that, up till now, has been mostly for video. The two brands combined with a few off brand makers make anything you need.

When comparing M43 to FF you have the natural math of x2, and with M43 being a finished format, it makes sense to compare. It is as much a comparison of formats as brand philosophies.

For me the advantages in depth of field (that’s right, advantages) which increase flash power and light gathering and the size, weight, reach and affordability of premium lens designs all add up in the real world to more than the disadvantages of theoretically more noise and reduced enlarge-ability that the top full frame cameras can provide, because I know what is actually important to my clients.

I have never, ever had a client complain about the subjective quality of my images, quite to opposite usually, with the sometimes embarassingly out dated and under muscled gear I occasionally employ* making me, the weakest link, look good.

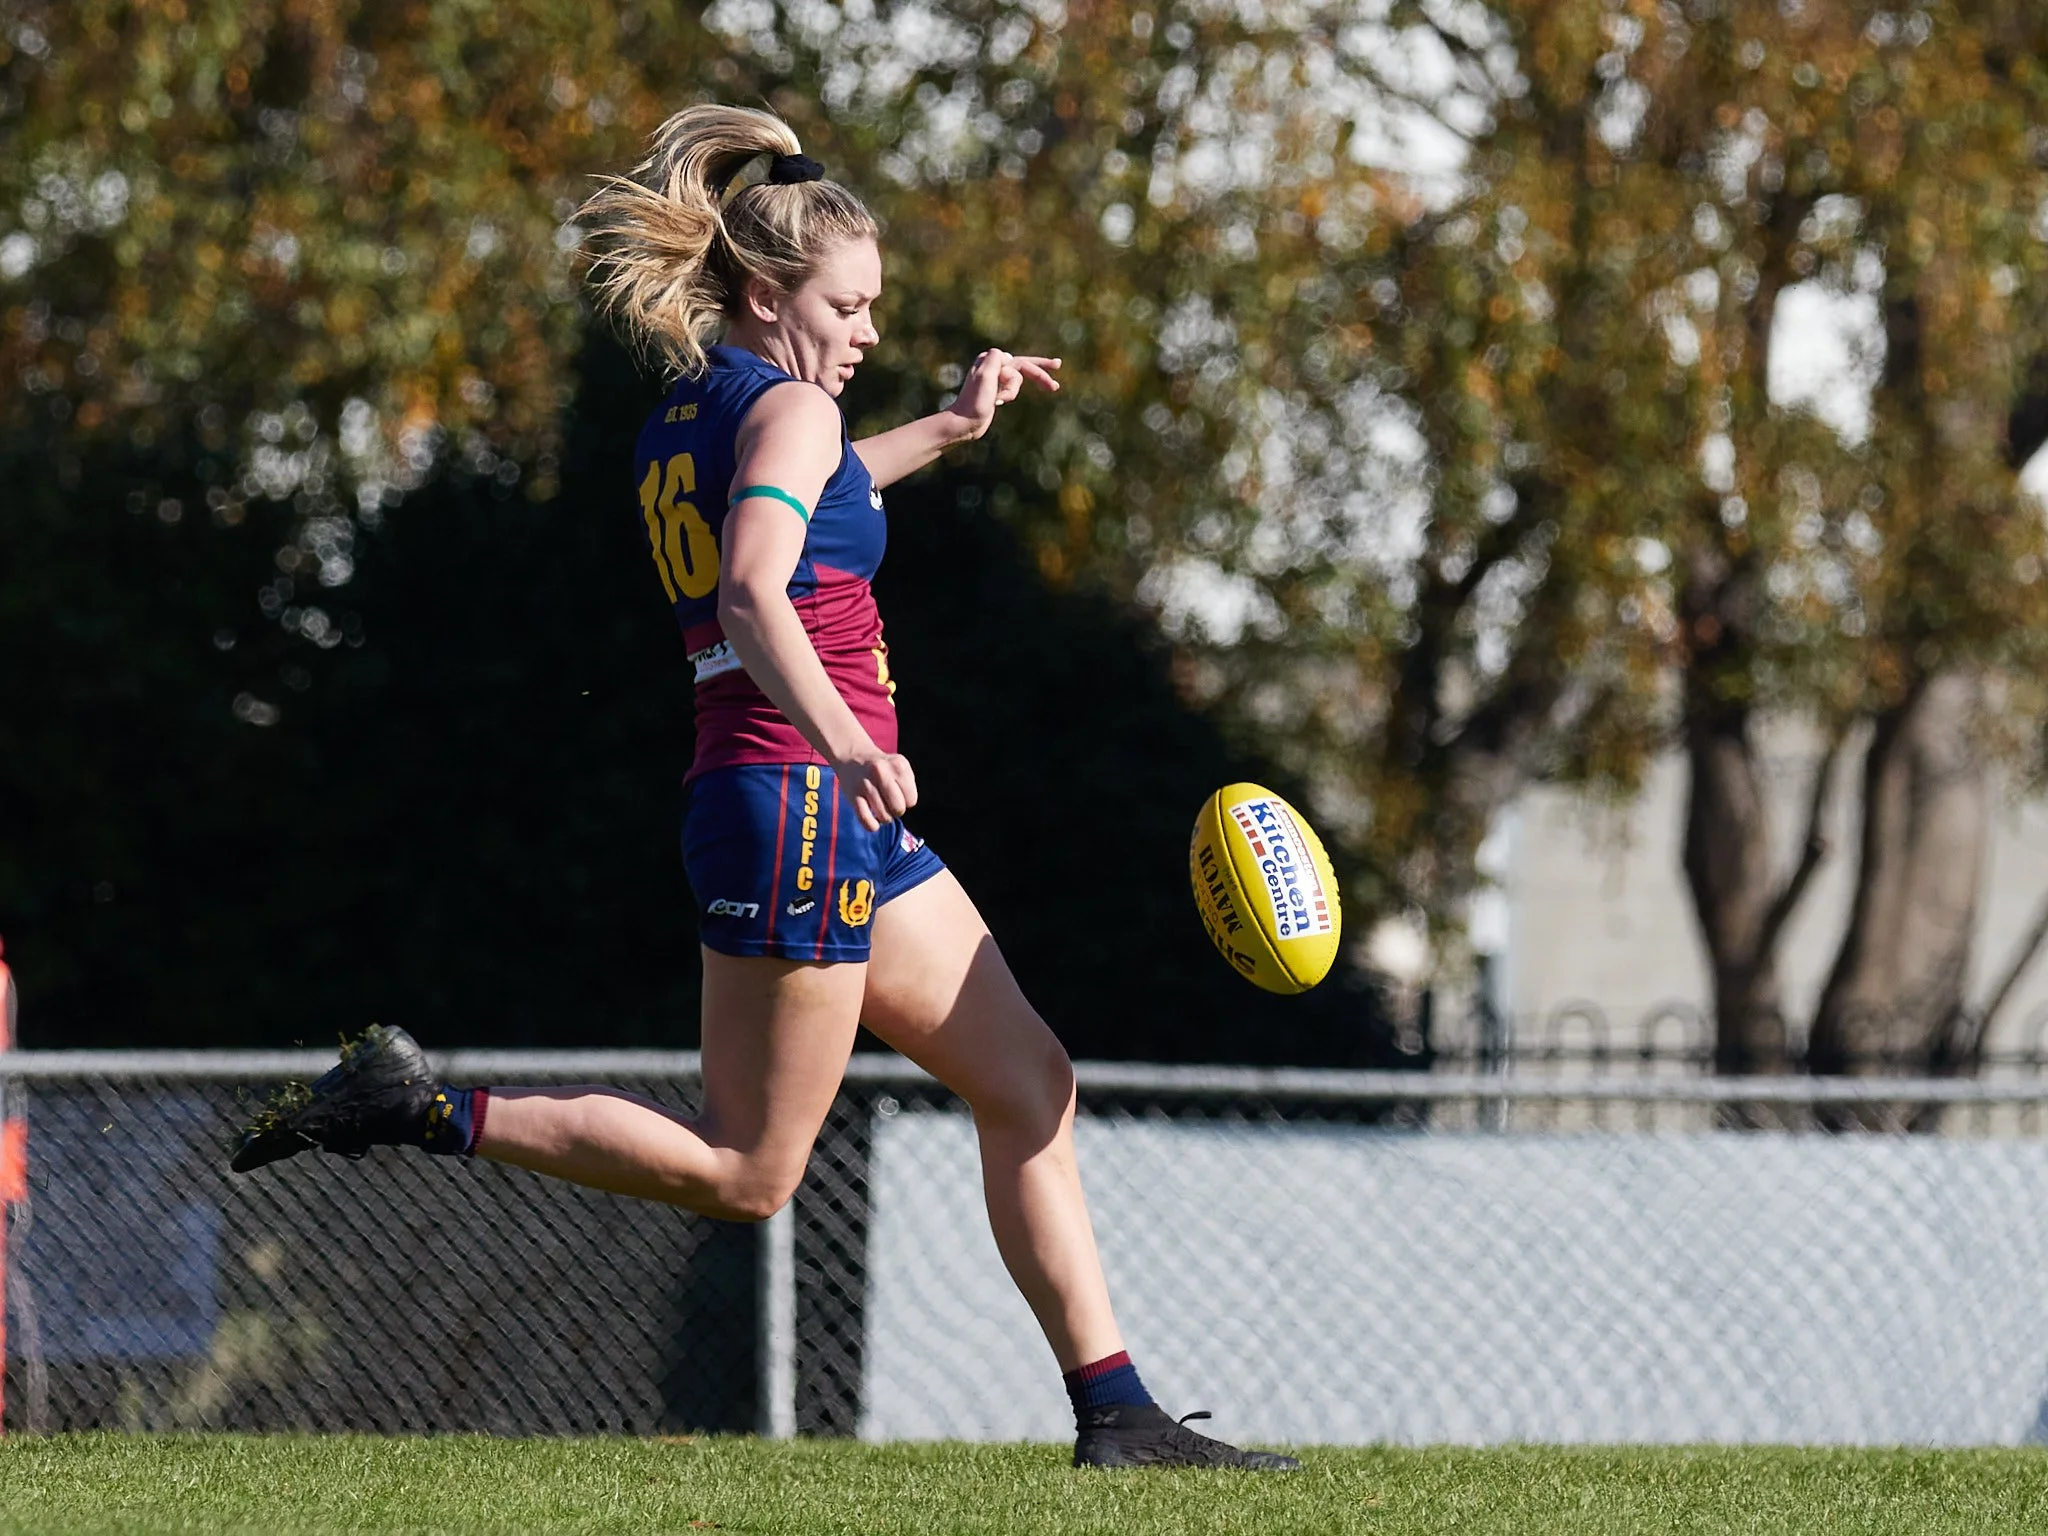
*I have shot the Telstra Board, major social events, even the Prime Minister with no more than $4000 worth of gear, often a lot less, which is about the price of a single FF body or Pro lens and even the AFL or NBL gets no more than $6000. I always have what a professional needs, which is options and backups, so no issue.

My sub $1000au event kit at work.

Enough?


The "White Foamy Thing" And The Value Of Backups

Neil Van Niekerk opened my eyes to the benefit of one of the most useful and accessible flash modifiers you can use.

A sub $1 bit of 2mm black foam, about the size of a paperback, a hair band and you have a flagging panel.

This means you can shoot an on camera flash like a modified studio light.

How?

It works like this.

Flash light (i.e. light) is linear, which means it is stronger closer, proportionately weaker as you get further away (this is the inverse square law). This means if you photograph a row of people, front to back, you will likely get the middle well exposed, nearer ones over exposed and further away ones under exposed. This can range from nuked white to cave black over a relatively short distance.

It also casts shadows if fired straight which can cause problems with deeper subjects.

The black foamy thing (BFT), allows the flash to fire away from the subject, with only the light bouncing back being used (combined with ambient light), the flag panel blocking the unwanted “bleeding” of light on the subject. Bleeding means that the bulk of the light is bounced, but often too much (maybe 20-40%) still goes straight causing the problems outlined above.

The environment becomes one enormous, directional light modifier. Directional and big are both good.

This image shot with straight flash would be a mess of blown out forground subjects, or underexposed background and have a sharp drop-off, meaning the background would be effectively black. So blown-out white, to ok, to deep black. Not attractive or even predictable. The image above has nice feathered drop-off.

The balloon in the foreground could have undone this image if the flash was fired straight. If the camera and flash had metered off them, the boys would have been lost to darkness. If the boys had been properly exposed, the balloons may have blown out un-recoverably to become a blob of distraction.

There is a problem though.

Sometimes the bounce you have to just go with, has to come from above as there is not anything beside or behind you to bounce off or there is something blocking the bounced light. Bouncing from above can cause deep shadows under brows, so you get black eyes with bright noses and hair (it does give nice cheek bone structure though).

This is effectively “butterfly” light, which often needs some fill just for that reason.

A decently exposed image, but a little heavy around the eyes.

For on-the-go photographer who cannot set up modifiers on stands etc, there are two fixes for this.

For this dinner on Saturday, I used a white foamy thing, sometimes as a front flag, which seesm to work the same as the BFT, but often I used it as a normal front bounce.

Obviously a no-go for above bounce.

Open and bright, which is much more pleasant than the heavier look. If you get the ambient light right, there is often free “hair” or “rim” lighting on hand.

Normally I would have used the front flag here, but the white surrounds filled in the whole group, making the image balanced. There is a hint of shadow cast on rear subjects, but the width of the WFT, which is about 6-8” across*, seems to see around corners quite well.

The second fix is to get the flash off the camera, using a hand held unit fired remotely from the camera. This extra flexibility allows you to shoot the flash from further away than the camera, around an obstruction or even off the floor, thus creating a better angle.

Other factors come into play, such as ambient light balance, which is controlled by the shutter speed. Most of these used 1/60-90th which gave me a warm backdrop, slightly darker than the flash lit foreground, but for dance floor shots I used 1/250th to help arrest “ghosting” which is where there is enough ambient light to create a movement blurred exposure around your sharply captured flash image.

A classic flash issue with fringe blurred movement (girl in white). The 1/250th ambient exposure (maximum flash sync), was not fast enough to fully freeze subject motion creating a soft fringe around the much faster flash exposure. I actually like it sometimes, but it does not always work.

Finally a call out to the magnificent little EM10 mk2, which was my backup on the night, so it was called into service when my 2x YN560’s both failed to fire on the EM1.2. This seems to be a thing as the single contact pin units will not fire on the G9’s either, but the dedicated remote unit works fine on all of them?!

I did the entire night with one amateur grade camera, the Leica 15mm or 12-40 both wide open, with a YN560 IV manual flash and a $2 modifier. The flash and sensor combo gives me a couple of workable stops if I miscalculate, so about 1/64 to 1/16 power at ISO 400 is my workable range. The average is 1/32 power at 1/90th, f1.7 or f2 at ISO 400 or ISO 800 at f2.8 as a starting point.

When you get the hang of it, manual is much more reliable than TTL in this type of environment and much lighter on batteries because TTL, especially with high speed sync uses multiple flash pulses to measure and meter, where manual just uses one. consistent blip.

Concerns about cold white light against a warmer ambient background were swept away by the lovely warmth of the EM10 sensor and Leica lens combo. This is just one of those winning pairs, which combined with the 12-40 Oly, 45 and 75mm’s give me an any event kit.

No battery changes, no miss-fires, no over heating issues and at the end of the night, the Eneloop Pro batteries were still showing all bars! One day if I have time, I may test the Eneloops, but at working strength of 1/32 to 1/16 power settings I am guessing I will have to waste 2-3000 flash fires before they fail.

I missed about 50 out of 1200 due to slight focus misses, something I could have avoided if I had activated the focus assist light, but supplied 435 shots, enough to get all 500 students one way or another.

*The BFT and WFT panels are bought in large sheets of soft 2mm foam, sourced from any costume, stationry or fabric shops and cut to size/shape to suit. I usually cut mine into 6x8” rectangles, then trim the short sides with a fairly gentle corner trim, helping me attach the panel to the flash. The foam is flexible with reasonable “shape memory”, so you can flare out or close in the cone as needed. Two together can even make a snoot. For hairbands I use bigger, softer ones, often with a thin one as a safety. Other options are to cut some holes in the panel for more light escape.

Feeling The Benefits Of A New (Lazy) Process

I used to do a lot of landscape imaging.

One of my favourite haunts was “The Gorge”, about 30 mins walk from the middle of Launceston and a surprise to most who visit it.

First you encounter open parkland, then more closed in, semi-wilderness.

My processes involved the mandatory tripod, often as heavy as I could bother with*, some type of timer delay, filters, various lenses etc. I was not Robinson Crusoe here, packing much the same as the rest, only variations in format made any real difference.

Oh how things have changed.

Today I went with;

G9

12-60 Leica

…………

Yep, that was it.

All the images were taken at f5.6 to 7.1 (about f11-16 in full frame), all hand held at 1/5th to 1/200th with ISO’s of 100-400 and the full range of the lens was employed.

The day was not ideal. The best days there are high overcast after rain, employing a polariser to cut glare. I got patchy cloud after a short dry spell. Kinda cool to think this is only 5 minutes drive and 10 minutes walk from the centre of the city.

The stream bed these were taken in was obviously damaged last flood season. A lot of settled, open woods were literally washed away, or smashed up, trees fallen, then pushed into clumps.

A good season for moss has helped.

Higher areas were mostly untouched.

The under growth was healthy.

Some classics were revisited.

Hard to believe how far we have come. I remember once toting six Canon “L” primes up to the same spot one balmy spring day. What a sweat-fest. Straight after I repurchased the 17-40L and 70-200 F4L lenses, just for landscape.

Yes it is lazy and a tripod does have the advantage of slowing me down, but is that actually an advantage? I have found over the last few years, that speed is important. See-shoot can be handy in other environments other than just for street. Often I “work” the frame far better and more easily than when I employ a tripod.

Once, the thought of hand holding at 1/13s and f6.7 for this type of image would have been a bad joke, but with all of the advantages available now, it is more than possible, sometimes to the point of realistically nullifying the need for more.

Detail is retained up the a level I need for fine art printing.

This redimentary kit can even be used for some basic wild life.

Leica 60mm crop.

*I used to rate my tripods by range. Studio only, near the car, a short walk, a long walk, an over-nighter.

Getting A Handle On The Strengths And Limits Of Your Gear (One Lens At A Time)

I often mention the importance of knowing you gear.

Handling a camera confidently, using flash effectively, learning the minimum focussing limit of a lens, how it handles flare etc are all part of that, but the next layer is where the art is.

Take for example, my pair of 45mm f1.8 Olympus lenses.

One of the first M43 lenses I purchased, because it and the Panasonic 20 and 14mm lenses (first editions), were the first wave of “game changers”, so it became a staple. I at one point owned three thanks to early kit buys as well as two 14’s. Apart from having the best AF, especially on Oly cameras, it was also the most stable and probably the most powerful, but it sat in a funny place for me.

Intellectually it was a must have, but habitually, it got neglected.

High enough quality to crop massively without issue. The fact that I often crop it heavily probably means it is not long enough.

This was a longer running habit than just this story. The Canon 85 f1.8 suffered much the same fate as did the amazing 90mm f2 macro Olympus before it and so on. I tended to like the 85mm lens a lot more as a 135 f1.8 on a crop frame and can only imagine the Oly 90 would be as exciting as the much missed Zeiss 85 f2.8 with an M43 adapter.

I have actually forced myself to use the lens, because of two important factors.

The first is it is optically hard to find fault with, exhibiting a nice 3d effect.

Secondly, it is surprisingly useful, even if I tend to gravitate either to the longer 75mm or shorter to semi-wide normal lenses. In tandem with the 40-150 f4 it sits in my bag as the Bokeh/low light option.

Super sharp wide open, with enough Bokeh to use creatively or to fix problems.

My street kit for example is officially the 17 and 45mm f1.8’s, a pairing that seems to make sense and works. The lack of other options gives the 45 some room to be relevant.

I think the problem mostly lies in the focal length’s role in my kit. I have three 40-150, three 12-40/60 and two 14-42 lenses. This means I have no less than ten, 40-45mm options. When I use one of the zooms, it often occurs to me I am at an extreme end and wanting to go longer or wider. Actually choosing that length seems a compromise.

What is good though, is that I can carry an f1.8 lens in this range, that weighs and fills the same space roughly as a spare camera battery or a roll of film.

This is a perfect example of a file that surprised me it was taken with this lens. The depth of field should have given it away, but I still had to check.

Unlike the 17mm, a lens that is an automatic go to and one that I strongly identify with or equally the powerful 75, the 45 tends to get used only because it is always there (plan works), the only one in my work and personal kits.

I still tend to lose connection to the images and they often surprise me when I find that this is the lens I used.

The problem here is, I know the 17mm intimately as I do the 75mm and even the newer Leica 15mm, but the 45 has a void where an equally deep understanding should be. It is after all the oldest of the bunch and surprisingly often used.

What I do know for sure is it is completely trust worthy, no matter which one I use. What I should know though is more about the draw, the character, colour palette and general nature.

Is it organic or snappy? Is it brilliant or contrasty? Is it natural or overtly sharp?

Creamy skin tones, gentle colours and smooth transition.

I think the hint is in the problem.

The lens is seemingly “invisible”.

It has an inoffensive excellence that does not make you overly aware of it. Like the 17mm it has a natural character, but unlike the 17mm it was not a surprise, running with expectations, more of an assumption that has passed muster, so maybe taken for granted.

Bokeh, is easy to find and use, but it is less perfect and powerful than the 75mm, although it also avoids the flatness of field the 75 has. There is a natural perspective that does not call attention to itself, a perfect compliment to the 17mm.

Brilliance is again less pronounced than the 75mm, but it also avoids a signature look, being just fine at what it does, elegantly capable, humble.

Without the deserved arrogance of the 75, the 45 often punches just as hard.

Colour is less punchy and bright than the 75, again leaning towards the 17mm’s more natural and slightly heavier look. I have many images that have an old fashioned look, all taken with one of the 45’s and it handles skin tones wonderfully. These two are the polar opposite to the light and bright Leica lenses.

Channelling Eliot Porter or Sam Abel.

Sharpness. It is sharp, I mean really sharp, capable of being used wide open and then cropped in very tightly, even off-centre. Like so many M43 lenses feeding the smaller, squarer sensor, I just do not question its edge to edge sharpness at any aperture. They picked the sensor for a series of reasons and lens design was one of them.

This file highlights everything good about the lens. Natural colour (this is colour, just off white colour), beautiful tones, invisible transitions, it is sharp edge to edge with fine detail down to pixel level. Most importantly, it is not a show-off, just a competent performer.

Chromatic and other aberrations also seem negligible. The 75mm does have very slight fringing wide open, easily fixed, but the 45 is devoid of any as far as I have ever noticed.

The 25mm is based on the design of the 45, but has a very different look. The 25, 75, 12-40 Pro, 75-300 and the Leica’s all have a similar, modern look. They tend to look lush, brilliant and are fast to drop off into creamy Bokeh.

The 45, 17 and 12-60 and 40-150 kit are close in character, being natural, very organic (that word again, but I struggle to find another) with that “invisible” character. These make the core of my travel kit.

It occurs to me there is a new way to categorise my lenses.

Invisible lenses with natural and organic character and more pronounced specialist lenses with modern Bokeh, more brilliance and obvious perspective effects.

Weaknesses?

It is plastic (all three have lasted for years without issue), not weather sealed (does not fog as often as the 75, probably because it does not get as cold being plastic), does not have a brilliant minimum focus (see below) and requires tiny 37mm filters (I step it up to the more supported 46mm, including a metal hood).

The Panasonic 42.5 f1.7 has better close focus, something than often gives it an edge in comparison tests, but from the above file heavy cropping is possible. If it has this one weakness, something that many other lenses like the 25mm, most M43 zooms and even my longest and widest lenses can address, then I will forgive it.

Easily fixed.

So, I guess I do know the lens has deeper layers. They are just obviously not obvious.

One down……..

More Therapy.

Struggling a bit at the moment. My life seems to be very swingy.

One day I am doing fun images that I love of people I am facinated by, but earning nothing but satisfaction.

Hollybank just out of town is a nice place to unwind.

On another, I am pushing the creative stone up hill, losing most often and coming away feeling a bit wasted, disillusioned even, but getting paid for it.

Balance I think, is found in personal work.

Suuuper lazy landscape shots, all hand held with either the G9 and much neglected 8-18 or an EM1x and 40-150 f2.8. Love the Pana colours, but the Oly contrast is a little hot and hard for this type of environment.

Mixed Day

Sometimes you cannot help but screw some stuff up, recover do some things well and stuff up some more. I ended up roughly in the middle….I guess.

A little creativity in an over used space. Trying to channel a bit of Matt Hernandez, the main issue being have to carry everything in a shoulder bag and work solo-and fast.

Then a little fun with kids and racing cars. What could go wrong ;).

Then a lot of IT frustration, an old computer going slow, Google landscape stuff up (a new landscape for me and I am still wearing the wrong shoes apparently).

Oh well, we soldier on.

Just For Me

I took myself for a walk this morning, something I have been meaning to do for a while.

The kit taken was simple and (sort of) effective;

  • G9

  • 12-40 Oly

  • 75-300 Oly

The G9’s bird AF seemed to work when I set the camera to decent settings. The rippling, which was really obvious with the 75-300, still allowed for a decent hit rate. Very decent actually.

No problem finding a bird in the branches. keep in mind that this is probably my weakest combination, mixing the Panasonic DFD focussing with my oldest, near kit level Olympus lens.

Absolutely no issue with static subjects though. He’s lookin’ at me, lookin’ at him.

The box formed around the foreward subject, ignoring the slightly bird like shape behind.

No quality issues even cropped in close and off centre.

This lens suffers from some predictable veiling flare, but dehaze in C1 takes it right out.

There was more than just birds.

There is something exciting about exploring with a genuinely long lens.

Every shot but the last one was taken on the long zoom.

The Looming Problem Of Too Much, Achieved Maybe Too Easily?

Phil, one of the more experienced togs at the paper has a new Z9 and typical of Phil, he has embraced it with an open mind and realistic, but positive attitude. Coming from older model SLR’s it must feel revelatory. Personally I went through this process over a decade ago, when perseverance and possibly a little too much optimism was required, so two roads, same destination.

Trying out 60fps with the one second delay-post triggering option (Pro-capture on the Oly), he is basically shooting movies at 20mp. I must admit it was cool looking at effectively 6k movie footage, in what felt like frame by frame movie editing.

The EM1’s, especially the “X’s” have the same features, but a few generations ahead with more options in Pro-capture and the G9’s shoot 6k continuous, but do not play as well with my Oly long lenses. I must admit I was never tempted by either feature on either cameras system.

A bit like shooting street using my phone to control a seemingly unattended camera (thus disguising my intent), hammering the sports scene in 1/60th of a second increments, taken in the immediate past seems a bit (as Phil put it), like cheating.

Is it, or am I over-blowing it? Is there coming a time when 6k+ video, with all its ease and benefits will effectively replace stills photography?

Below is a set I took yesterday in single shot mode, relying on the other benefits of high end mirrorless, which are silent and smooth, near instant capture with no visual interruption. Switching cameras for different lenses, I lost a second or two so the first was the quick focus-establishing grab, the next three see the situation roll out over about two seconds, but another 100+ frames wedged in between? No thanks.

Add to that a bucket load of analysis paralysis from an afternoon lost to editing, and the whole thing seems like more work, less pleasure.

Single frame capture can leave you wondering, but it also gets your timing more on point. This one had nothing after (an issue because I did not get any numbers), but possibly a cleaner shot just before. I did not get the shot before and would not have by winding back the clock, because it was already missed (i.e. not yet framed). What I did get was a near instant reflex grab thanks to super snappy AF and shutter fire, but I knew it was a heavy crop anyway, so I decided to let it go.

The reality is, you still have to get the first shot or be ready for it to use post-capture and sorting through even minutes of footage at 3600 files per minute, will take a super app before you even get down to the potential winners. Like a lot of things, more is just sometimes more, not a guarantee of better.

Post-capture action shooting lets you follow a player or a static subject and choose when to fire, post-capturing the moment just gone, but if you are chasing the ball, so constantly reframing, the counter intuitive disconnect of shooting what you just saw happen, while continuing to chase and fire trying to get what is currently happening is a skill in and of itself. Basically you are shooting what has gone, while seeking what is happening.

All of the shots below were single captures, none taken before or after. Could they have been better? Probably, but would I have appreciated the need to micro manage ten times as many frames to get one shot that is maybe a little better timed?

Nope.

More importantly, would I enjoy the process, get a feeling of accomplishment?

Hard no.

This one was another from a single shot, but continuous sequence. The best was the second and I knew it at the time. The first and subsequent few were simply in response to a fluid situation, but were not really needed.

I suppose it comes down to this;

Do I have to get a specific shot (person/instance/situation/action) and do I need these features to achieve that?

Do I need to get the very best split-hair of a second version of the shot or will any well timed frame be enough? Surprisingly each frame is still different even at 60 frames, but only incrementally.

Do I have the time and the computer power to run through hundreds of images for just a few, something that I find the biggest stress of the process? I enjoy the capture, but find the captioning a pain, especially when you have a day when the best shots and the positively identified players do not line up.

Am I willing to blunt my instincts in favour of leaning on the tech?

Time and place may force a sensible compromise of the above, but otherwise mostly no.

The defender on the right was highlighted by the writer as a rising star. All I needed was a shot of her defending successfully, which could have been an ideal time for post-capture and 60fps, but I got lucky with a single grab or two.

Keely Froling is the star and captain of the local basketball team. Always easy to catch in the action and follow, again another ideal target for post-capture I guess, but where is the fun in that.

Phil surprised himself shooting over 2800 images over two matches (or more to the point 40-60 odd sequences) which is probably ten times his usual, I shot 176 for one match which for me was frugal. He was realistic and philosophical about it, just enjoying the exploration with a laugh, but this is the only time I shot less than the more experienced tog to get the job done.

*

While we were discussing this, the topic of the “AFL crop” came up with one of the journalists. The AFL crop (my term), is the tight crop we often see in national paper articles. Phil likes to shoot tight, loving the exploration of a tight group with a fixed long lens (all he uses), Paul and I tend to shoot wider, then crop as needed, although we both shoot tight if the action forces it. Paul shoots with a 200-400 (300-600 on an APS-C) and I use the 300 (600) and 40-150 (80-300) in tandem.

Above are three images at three different crops.

The first is as shot, the second is how I submit, allowing enough room for some creative license, maybe a peripheral player to be picked up and some context or just cropped out, the last is the “AFL crop” which is often the printed version.

I sometimes wonder also if the desire to shoot tight comes from the AF point selections available. A central cluster is pretty generic, but no great loss when shooting a busy central grouping. I use three single small boxes stacked upright, slightly higher than centre (which re-aligns to the same in vertical mode), giving me a more precise “people” shaped target point.

I find this is better for open fields as long as I don’t miss and with practice, I can pick out one person from a group. It also helps me avoid grabbing foreground grass.

I also limit the number of rows this can be switched to down to five, meaning if I want off centre, it is just one nudge of the control nubbin and two nudges is hard left or right edge. It is amazing how often the action is off centre.

So, how far can you get “A” grade crops from a sharp 20mp sensor and lens combination.

This crop,

from this one,

or this,

from this.

Even very tight crops like these below can go full page.

Even this would be acceptable. I just noticed the texture on the ball.

20mp in M43 is more than enough showing no visual difference for print or web use.

Video Evolution

The third podcast was recorded on Wednesday.

The system is still evolving, but not much more can be done.

Building for the future.

Sound is now the Zoom F1 with SSH-6 set to 60 degrees mid-side, placed centre of the table between the four panelists It still needs a little Eq after, but it is otherwise fairly clean and deep. I am going to try shooting across the room, removing the corner echo and cleaning up the messy background. You would assume the diagonal would be longer, but I realised we can hang the background foam-core panel on the wall, saving two feet.

I could have moved to Lav mics for less than $100 (3 more Boya M1’s and a second XLR to 3.5 adapter for the zoom, allowing 4 to be used at once). The little H5 does not get much of a run, but boy has it got flexibility. The problem with this is having to mic up four people, then being stuffed when a fifth guest is added one day or a mic goes down.

The mid-side shotgun allows me to deal with up to six, the maximum for the table.

Picture is fine. The Flat profile on the S5 is quickly becoming a favourite.

Lighting is what it is, which is to say the rule of “the subject should always be brighter than the background” is out the window. If it goes on to bigger things I have tons of muscle in the background, but as we are now, it is “what you see is literally……….”.


In Service, Some Real Satisfaction.

Today I shot a semi serious studio and candid portrait day for the Migrant Resource Centre. It was volunteer work, something that I am finding a bit of a revelation.

It really felt good and good to be useful.

I ran late all day, wearing a watch set to the wrong time by an hour* (I think I may have set it back from daylight savings, twice), but my habit of turning up early meant I was unknowingly just on time.

G9, 12-60 Leica wide open at about 40mm, one YN560 IV through a 42” Godox brolly and a silver reflector at waist level. Vignetting was added and the colour shifted after brushing in the background, using white balance.

The volunteer above gets the gong out of respect for the privacy of others, but you get the idea.

I used butterfly lighting to combat the limits of the small room, but should have used a larger continuous back drop as the 2.4 x 2.1m Manfrotto was not right for small children placed on the floor, or large groups.

Next time I will likely do a continuous cloth, then hang the collapsible in front, removing it if needed to reveal the continuous or simply have a bigger room and do several options.

The butterfly light I used allowed me to push the light and reflector up and down to suit heights from 3-6ft and the reflector the same (about 30 degrees above eye line is ok). If I had more room, a larger mod** would make subject size irrelevant. I might also look at continuous lights for one or more setups.

I used the grey side of the big Manfrotto collapsible. I started with the slightly smaller Pewter, loving the very slightly mottled look, but it was simply too small (as was even the bigger one and the room itself as it goes).

*I only realised at 2:30 when I went out for milk and hit the 3:30 school grid lock.

**7’ Brolly, maybe a 4’ soft box or a soft box into a screen for a more “book light” look.

The New Champion (Of Darkness)

My forced explorations of poorly lit sports venues has a new champion.

The local aquatic centre is impressive, amazing even. A modern, fully appointed pool complex sitting on top of the hill that dominates the city, it has it all. Views, facilities, good patronage and versatility.

The lighting though, can be truly rubbish.

During the day the treated glass panels let in some light, but it tends to be half and half, the artificial light then adding a sickly pall. Good results can be had, but it is on the outside edge of workable.

Even an F4 lens works in mixed daylight.

I assume there is a reason, most likely to do with safety, but the centre of the pool has no overheads. The wings are fine, sets of paired down lights running down both long sides, but the middle is in shadow.

Worse than that, the lights had a tendency to back-light players close to the goals, because the row of lights started about ten feet up the side and miss the ends.

This is the light to my eye. ISO 6400, 1/500th at f2.8.

Lightened to something printable, but suffering poor colour and some nasty, blotchy noise.

About as ugly as I will tolerate and only for news print or small web reproduction. Even as a M43 shooter, I am not used to this. M43 tends to give you sharpness and noise, something de-noising can deal with. From tests I ran last year, the D750 Nikon I was issued was no better, trading off slightly better noise control for lower sharpness.

On the wings, the light level was acceptable even if the colour and contrast is poor, so basically what I expected.

Fine for most uses. Exposing for this half of the space was a numbers game I could win.

Most attacks came down the wings, so all good, but I found myself chasing the action into the middle, where even the players said it was hard to tell the difference between the dark green and maroon team vests.

At 1/350th, this sort of shot is fine.

Options?

Drop the shutter speed to 1/350th, which is pushing it for action, but ok for semi static shots. This means shooting more, then sifting through to find the good ones.

Push the ISO to 12800, which probably would have been a good idea in hindsight because I know the noise in a well exposed 12800 file is better than an under exposed 6400 one. This is the trick to low light work, don’t under expose.

Use a faster lens. Not knowing the pool size used (8 lane 50m potentially, but only 25m was used on the night), I took my 40-150 f2.8 and 300, but as it turned out the 75mm would have been better.

The problem though is walking from a cold evening into a humid environment and I had a job right before so no time to acclimatise my gear. The 75mm is not weather sealed, so can be a fogging nightmare, the only flaw of an otherwise perfect lens.

Use the S5 and crop like hell. I am thinking I need to use this dual ISO camera more when I don’t know what I am going into, which may lead to a longer lens (the 85mm f1.8 could do a lot of indoor sports).

Add light. Flash used to be the only answer and still can be sometimes. Not sure it was cosher in this case though.

Get one of the new breed, like the OM-1, GH6 etc, possibly a G9 mk2 when released. These all seem to offer a stop or more high ISO performance. This was the one area swinging me towards the GH6 at Christmas.

Do what I did and suck up the fact that some files will be iffy for fine art purposes, but fine for the paper.

This is fine I guess, but we have a new champion in a less than desirable space. As you can see, the background is considerably lighter.

M43 does lag behind full frame in this area, which makes sense, but not usually by as much as you would suppose and I say this from using a kit that does not have the absolute top dogs in the class. Usually the lens advantage can bridge the gap. even get a little ahead, but sometimes a perfect storm of circumstances does conspire to fight your best efforts.

Looking at this from a whole other perspective, noise has lately become the un-tolerated enemy. A bit of noise is often invisible in print, even more so on line, but it seems standards are shifting to “no noise, perfect colour, smooth and sharp always” regardless of ISO, which for any photographer with ten years or more of working memory seems like an unrealistic ask.

Personnally I have lived through the ISO 100 slide film, 400 colour and 1600 mono negative film, ISO 1600, then 6400, now 12,800 digital barriers, so this is just another stage in the process.

Lessons We Teach Ourselves (When We Listen)

I am a details person. In photography especially, I go tight, seek patterns, clean and decisive, no clutter.

A small section of an otherwise ordinary bit of coastline.

I remember when I was young, I had a camera, but no car (priorities, right?). What I did have was the Cataract Gorge, a decent photographers training ground just over my back fence. It was not buffet of options, so sometimes a little stream had to stand in as a raging river and water fall (can be done).

Many rolls of Kodachrome or Fuji Velvia were exposed under ferns, through trees downward onto leaf details. I looked for the wonder of the small, the details we all tend to walk past (or on/through/over).

I can close in tightly with a long lens and do regularly, but most often I find myself compelled to move closer.

Long lenses and abstract clarity are familiar to me….

…but small as big is more common.

To clarify though, I have never been a huge macro shooter. My desire to take artistic images as opposed to reference level ones, negates the need to get that close. M43 lenses can usually get to a quarter or half life size with little effort, which is enough.

Shot with the humble 25 f1.8, one of several lenses capable of pseudo macro. As a hard study of these berries, it fails, but that is not my intent.

Revisiting my Japan files, the slightly surprisingly joyous rediscovery of my garden images in particular, I am struck by the change in my own processes. The reality is, detail chasing requires a little exploration, intrusion even. In our wilderness and semi wild park lands, this is accepted. In Japan it is definitely not ok.

My habits changed, seemingly unnoticed from shrinking my world by going to it, to defining medium to larger spaces more succinctly from a forced distance. You always have to shoot from the pathway, no exceptions. I did it, but did not feel the excitement I usually would, so I tended to dismiss the images at the time.

In short, this photographer has discovered the medium-large landscape years after practicing the form by necessity. That necessity breeding semi reluctant adaption with an heavy dose of “might as well, because I may not get back”.

I suppose the processes are identical, just the perspective was changed. The odd thing though is I consistently took the images even though they failed to impress immediately or in the shorter term afterwards. They seemed to need to stew for a while, waiting for a new me and a new processing paradigm to appreciate them.

We did not realise at the time, but this is one of the better known garden features in Japan, highlighted by Monte Don.

I am never going to be the magnificent vista, big sky, foreground to horizon image maker. That has never been me and is done so much better by so many others, but there is a middle ground.

Night Owl

Handling low light with M43 may seem like a trip to that formats “scary” place, but it turns out, the tools are all there.

As the sun drops, the mirrorless advantage first steps up, allowng you to shoot what you see, how you see it.

You can caress the file in exposure giving you more options later.

Fast glass and accurate focussing then come to the rescue. All these images are 8 years old shot on EM5 mk1’s so this has been the case for a while.

From the hip, fast and quiet.

The built in stabilisers, made all the more potent having to only support the smaller sensor.

Down to as low as 1 second.

As the ISO creeps it, things still hold together fine, the lenses becoming the primary empowerment tools. The 17mm Olympus in particular is a champion here.

Finally, processing handles what the system cannot. This is of course the norm these days, processing pulling more than just its weight and will likely do more in the future.

Kyoto Wandering

Some more garden shots from Kyoto.

I am still surprised I am responding so positively to these shots. They slipped under the radar first time around, but I am looking at them differently now. Each is getting a fair go, nothing is lost in the flood of files I tend to rush through after a trip.

These are beautiful places, each the result of sometimes generations of care and careful planning. Lacking the time to revisit them regulalry in person, all I can do is take the shots that feel right at the time, then revisit them this way.

What Do We Really Need Revisited, Or A Plea For Sanity.

A favourite topic of mine is looking at the realistic end point of our work, the tools needed to get there and their application. This was an obsession for a long time, then slowly shifted to a more intellectual exercise as my own processes and gear settled, allowing me to stop chasing rainbows and take a hard look at technical realities.

The photo and video industries are very quick to tell is that more is better. More pixels, higher resolution, faster operation, more options, more endurance, greater potential, but the reality is, we maybe do not need as much as we are led to believe.

This particular re-post was inspired by a visit to a friend about to go on a trip with a decent compact camera and a good eye at a time when some more Japan files have been stumbled acros. I keep seeing good images coming from gear considered so very sub-par by the current thinking.

Photographers and videographers are the worst judges of this.

We are generally pixel count and resolution obsessed, something the industry as a whole is pushing to stay relevant and alive, so always chasing better at the cost of more than good enough. This has always been the case, but like most things at the moment, it seems to have been turbo charged (although slowing thanks in part to COVID, which has allowed us to take stock).

In the film era, much desired improvements happened once a decade at most, bigger formats ruled, enlargement and viewing tools were limited, so the technology itself limited our choices and in turn these limitations forced better technique.

We as a group still turned out good work for over 100 years.

Firstly lets address the viewer.

Most of your viewers should not be practitioners. If they are, you need to get out more. The average viewer will be at first attracted to your subject matter, then their emotional contention to same. This connection may be driven by relevance or simply content, but without it, you have nothing. The average viewer will only be aware of the technical stuff when they are aware they fall short of the norm, showing faults of some type. With video, this is ironically most often related to poor sound.

Beauty is in the eye of the beholder and that beholder is rarely concerned or even aware of the finer technical details.

So, what is the norm?

The current viewing base-line is 1080 to 4k screen viewing, often on small screens at that. The occasional need to “explore” details rarely happens on any but a purely technical level and must be balanced with applying the rule of the proper viewing distance.

Large fine art prints, billboards and huge, high resolution screens are usually viewed at the correct viewing distance and they all fall apart on closest inspection (a 4k screen is only 8mp resolution and printing comes eventually down to ink dots and paper texture).

Contrasting subjects, strong light, deep depth of field and clean lines all contributed to this images perceived “quality”. It could however have been taken by any decent compact camera.

Often the weakest link in the quality chain is outside of your control or irrelevant in real terms.

Ming Thein on his blog experimented with ultra high resolution printing and although successful, found that the ability to mimic on paper what a high resolution (36mp) file on a screen could potentially show (loupe-level detail of the moon on a landscape print), was possible, but ultimately irrelevant and cost prohibitive. Basically he came to the ultimate question of “yes, but who cares?”.

Ctein, a master printer, offered for collectors a cheap (printing cost and freight) 13”x19” print from an older 12mp EPM-1 Olympus M43 sensor image, a sensor known to be softer than later models, just to show that with good technique, pixels and sensor size are ultimately quite low on the quality control check list. The image of a large portion of a bridge showed individual rivets clearly. All his work has a thread of the practical application of sensible gear. His take is good technique beats just tech alone, or alternatively, no amount of tech will save bad technique.

So, what is important?

Separation.

Not always the primary quality concern of an image maker, separation adds to the perception of sharpness or lack of it.

Separation (sharpness) comes from many sources, edge contrast being the main element. Contrast is a combination of light, subject matter (texture and tone), control of noise or grain, depth of field, colour, clarity, lens sharpness and image “stillness”, all contributing to the visual elements of clear separation.

The two images below are identical except the left hand one has added contrast. No sharpness, just contrast in a variety of forms (gentle exposure+vignetting, clarity, dehaze, contrast). The right hand image is sharp, but lacks obvious tells for the viewer.

You can lose sharpness easily enough by compromising any one of these elements, but you do not add any more visual sharpness by throwing more pixels at the problem. This only matters when enlargement size or micro viewing become the main consideration and only after the rest have been addressed. Pixels are only the quantity, not the quality of the image.

The two images below were taken identically. The one on the left looks less sharp, because the right hand image has more contrast and cleaner elements. They are identical down to “chicken wire” level.

More pixels can actually detract from sharpness, if their higher needs are not met. A high resolution full frame sensor needs some pretty tight technique and premium glass to feed it. No amount of post processing will fix resolution lost to blurr, lens aberrations or soft corners, all more likely the bigger the sesnsor and higher the pixel count.

This image is cropped slightly to square from an older generation 16mp, M43 camera file, hand held with a medium grade 45 f1.8 prime lens. It has separation, contrast, shallow depth, colour and clarity. It would not be visually sharper with more pixels, but if enlarged enough, it will fall apart when the maximum enlargement size of the relatively small pixel count is surpassed. If image sharpness is retained with more pixels added then you can print it bigger, but all the other rules are at play here first.

As much as we all get a little thrill when we can see minute details like the small hairs on the leaf edge, who apart from a field scientist, obsessed photog or the occassional overly curious observer, looks this closely at a wider image. Go macro if this really interests you or accept it for what it is.

Pushed in as close as the 16mp sensor will happily go, there is still detail separation to be found, probably lost in a print or a screen. Notice also how the visible sharpness plane has shifted. The rear leaf looks sharp above, but has become a blurred background element at this magnification. Printing, although it can lose fine detail, can also organically smooth out digital artefacts, a useful trade off.

Sometimes, even with the best gear and technique an image by its very nature resists impressing us with its detail retention. A lack of separation at one level can however change context at another. In the image below, a lack of colour contrast and the finest detail being too small to see makes the wider image look high quality and textural but not “snappy”.

The crop reveals micro detail and adds contrast with simpler and cleaner elements.

Quality is dependant on so many things, pixels are just one and often not the biggie.

Bokeh is sometimes maligned by photographers who have not been exposed to its true meaning. Bokeh is not how much blurring a lens can render, which is mostly down to depth of field, but the quality or character of that blurring. This can effect perceived subject separation.

An example of smooth Bokeh and shallow depth of field can play for clean separation. One of the reasons photographers are often drawn to smoothly rendered Bokeh is it adds to the impression of separation by cleanly contrasting the sharp with the unsharp. This was one of the “Leica magic” characteristics so loved in the film era.

Sometimes, even when your sharpness ducks are not in a neat row, you can still get that “snappy” rendering. The Olympus 17mm, unique to me in that it renders background detail very coherently even at wide apertures, but still manages to separate middle distance subjects out.

Cleanliness.

I am not talking about the photographers hygiene or even their subjects, but image cleanliness.

This has layers so bare with.

A lack of actual image cleanliness, such as noise (grain), chromatic aberration or any other obvious technical flaw and poor techniques like missed focus or poorly arresting subject motion will reduce the objective quality of an image. The common offender is often flat, poor light mixed with high ISO Grain and mild subject movement, making poorly lit indoor sport the king of pain.

Contrary to this, sometimes grain or texture can actually add to separation and define edges as it has enough contrast and is clean in its own right. I had a friend, sadly passed away over a decade ago, who was very successful on the international fine art circuit with his ultra grainy black and white images. His methodology was to use super sharply defined film (later digital) grain on an otherwise clean base, rather than try to avoid it.

Sometimes when most of the elements of clean separation are missing, you have to take what you can. The soldier in the background is an ideal example of lost separation due to low sharpness, blended colours and other aberrations, but these in turn add to the feeling of clean separation of the bugler.

When things go your way, it can seem too easy.

Brilliant sun adding contrast, shallow depth of field and no noise or overly busy Bokeh all add to the quality of this image.

This may not be what you want. Blur, movement, texture, grain, other colour weirdness may be the desired elements of an image, in which case a designed-to-be-flawed Holga, relic SLR or home made pin-hole film camera will likely be the tools of choice/ If not, cleanliness will help raise your perceived image quality to the next level.

Ironically, the video industry is mostly trying to avoid overly sharp “digital” looking footage, often employing softening filters to “take the edge off” or in other words, “dirty up” the image. Separation in movies is often desirable, but the hyper-realistic hard-sharp look is not.

*

The other form of image cleanliness is compositional clarity.

Have a clear message and communcate it cleanly. This comes with experience and a decent dose of inherent talent (I rely on experience mostly).

This has two benefits. On the one hand it makes comprehending the image easier for the viewer so they look at it instinctively, not critically. On the other, it reduces visual distractions and increases the feeling of subject separation.

A worker at Hangar 17 distillery. The elements are kept simple, the only “clutter” is relevant and additive.

OK, so from the above, where am I going (again)?

  • Take good, compelling, relevant photos or nothing else matters.

  • Use good technique and learn your gears strengths and limits to unlock its potential (which few ever do fully).

  • Do not get distracted by arguments about sensor size, pixel count of resolution until you undeniably come across a situation you cannot solve any other way.

  • Learn to appreciate your own work on its visual strength, not its technical short comings.

  • Look at the best of what others do, but avoid the obsessive need to find out what gear they used, because ultimately, it does not matter. Looking at photos is good, obsessing over gear is pointless. I did for years and the take away is, it is wasted time.

*

Pixels/Resolution is not all important, only technically relevant at the extremes of reproduction. End viewing needs rarely require more than the current base line (20-26mp). Software empowerment aside, only large printing fine artists or scientists genuinely need more than this. Sharpness and clarity on the other hand, is important.

For video, 1080p is what most clients actually need, even if they think they need 4k or more. Good 1080p trumps poorly realised 4k every time. Often 4k is reduced in size for common use, with no inherent advantage. Again, quality trumps quantity.

Sensor size has some relevance for image cleanliness, especially in low light, especially for video, but often good technique can fix any issues. As a smaller M43 sensor stills user, I use fast glass (also with a depth of field advantage), good processing, exposure tricks and lighting to solve all the issues I come across and if these do not work, only a small handful of bigger sensor cameras would offer any real benefit before they also fall over (we are talking about shooting in near complete darkness with very demanding expectations). Use the kit that best suits your needs, the math evens out.

Embrace your camera, but if the images it makes fall short, look to technique before buying a new one. Maybe a new lens if you only have the kit one, something fast for shallow depth, maybe a prime to help train your eye and guarantee top quality. A (good) tripod can help, then migrate away from jpegs to RAW or do a workshop in a field that interests you, but try to avoid more pixels just for their own sake. It is the path of least reward.

*Studies have shown that the quality difference of video resolutions over 4k at this point in time, even if viewed at an uncomfortably close distance, is effectively invisible to the eye. The same goes for printing. A billboard at the correct distance can look razor sharp, even though at closer distances it is made up of golf ball sized blotches. Quality at the correct viewing distance is paramount, not resolution.

Another study at a major technical university (RMIT I think?) showed two prints the same size side by side in a thoroughfare with passers by asked if they noticed anything. One was printed at 72 dpi, the other at 300 dpi or maybe higher. Very few viewers noticed any difference, even though the faculty were experts in the field.

A further example is a pair of older articles on The Luminous Landscape website. One is the story of a 50mp medium format landscape shoooter who used a 12mp G9 Canon compact camera for record keeping and found he could print to the same standard size as the MF camera before even his experienced friends could not see a difference.

The other showed prints made from 8, 24 and 50mp cameras of the same street scene. At very high enlargements there was more detail in very small image elements like the fine print on a parking sign, but even the higher MP cameras could not resolve details well enough to be seen on a print. At normal sizes and viewing distances the 8mp image was effectively enough.

People Of All Types.

I get the need to make a street image special by adding that extra element, but I also feel strongly that just people, regular people, not doing anything out of the ordinary, just being themselves, are motivation enough.

A dozen stories in a frame.

Each a million moments of experiences had or to come, blended together into one understanding.

Pasts combining to make a future.

Pasts and futures passing without connecting.

Emotions, greater or lesser, caught fleetingly.

Treasures Found, Treasures Lost.

The more I revisit old Japan files, the more I find. Some are known, just not looked at. Some feel like someone else took them. I know I was there, but only the image proves it.

I guess the Capture 1 dynamic is part of it, maybe the slow burn of files and even occassionally, the finding of an idea I chased at the time, that I needed to forget and re-see to understand fully.

I am also monumentally sad that the combination of the old EM5 mk1’s and Capture 1 has been discoverred after the best of my set of old EM5’s is passed. I truly respect their low light handling and clarity, something Lightroom robbed me of at the time. Of course I have them acting in concert now, but many other files have come and gone and practices adjusted to suit.

My ideal camera now would be the EM5 sensor with newer processors, but calibrated towards the same look as the old cameras processors.

To their credit, I cannot now tell the difference between their and the newer Pen F files, something I used to be able to do. Lightroom made the EM5 files look gritty and simple. C1 has elevated them to the Pen F level.

To be honest, I would take a pair of new EM5’s right now, maybe with a thumb nubbin added and maybe a 400k shutter.

Why The S5 Is Taking Over Video.

My personal comfort zone has been the G9 for video and for hybrid shooting, it is hard to beat. The EM1’s would also be great, but they fight hybrid use, lacking useful custom control settings, meaning switching quickly is not a thing.

My current G9 hybrid process is;

Set the basic settings for stills, but set all the Custom functions to video in a variety of formats.

The G9’s are decently heavy hitters in video, especially if you run them out to an off board recorder. As I have them, sans the V-LogL upgrade option, they are better than average hybrids, but I have found the contrast is higher than the GH series, probably to suit stills. I could get a Ninja V or BM off board recorders, but have chosen not to as they cost nearly as much as the cameras.

To clarify this position also, I do not want full frame for stills, M43 is my happy place, but for video, full frame with it’s much higher ISO tolerances is a genuine benefit. It is nice to have a full frame around for stills, but I just have not found a need.

M43 does all I need for stills. and has been fully supported to this point

I now intend to run the G9’s as stills cameras, with occassional mobile rig use (the inherent deeper depth of field and stabiliser advantages at play). The S5 however is just too good as a video option.

The S5 just has too many practical advantages over the G9’s.

The profile options (V-Log, Flat, Cinelike-D2 etc). Flat in particular seems to be like modified Natural, but even flatter. This is ideal for me and a decent equivalent to Cinelike-D available from my other cameras.

Continuous recording. The bugbear that short of an off board recorder, will always hold the G9 back.

Overall better “GH” like contrast. Ironically, this is where the G9 could even the field with a flatter profile. The S5 gets all the options, the G9 not quite. I could upgrade it to VLog-L or an off board, but the S5 with lens added so much for relatively little.

Dual ISO settings. Basically, the S5 is ISO free compared to the G9’s, although the M43 depth advantage does give the G9 two more stops (useable f1.8 = ff 2.8), making up for the natively better FF ISO performance, but the dual option puts it into another league.

Both valid, but the S5 just works better for me. The red record button is a bit lost, but I don’t use it anyway. The only minor issue is the cage is very smallrig biased, so other brands cold shoes and handles do not always fit ideally and the handle is slightly off balance when mounted centrally.

Better video camera settings. This is the big one, from Wave forms, Vectors, shutter angle, many, many more video menu settings, including sound and visual assists. Honestly I could fill a page. The difference between a G9 and the S5 is the same as the G9 to an EM1 mk2, which is to say, there is daylight between them. The EM1’s are stills cameras with capable video hidden inside, but little effort to make them comfortable to use in that space. The G9 is the true hybrid favouring neither at the expense of the other, the S5 is a video camera first, the easier stills options is effortly added by default, but is not a priority.

Little things like no top panel screen, which may seem odd, but for video the real estate is better dedicated to useful buttons and vision relegated to either the rear screen or in my case the 5” Portkeys. In a cage, the G9 screen is partly obscured anyway. The on-off switch is separate to the shoot button, and protected under the cage, the smaller card door, but bigger other flaps.

The only exception is the Smallrig cage, that is a better fit than my GH5/G9 Niceyrig one, but lacks a few screw mount holes on the left side. I have fixed this to a point with a Smallrig plate bolted to the side, but just one set of matching screw threads would have been good.

Of course, there are down sides (accounted for in balance with the price), like new batteries, new lenses etc, but these have mostly become non issues, absorbed into the equivalent options in M43 (the dearer GH6 also needed an expensive card etc, GH5 an off board and gimbal).

My goal was to take the easiest route to easy to take, quality 1080 and occassional 4k footage within a realisticly achieved envelope. The S5 achieves this easily with a minimum of fuss and upgrade paths if required are many. It also meshes well with the OSMO as the full gimbal-odd angle option. The S5.2 AF is not a draw as I manually focus and the slightly higher upgrade options are well beyond my needs.

If I went again, I may have gone the GH5.2, just to keep it sane, but the saving at the time was only about $400au, which did not even cover the S5’s extra lens. I would have All-i recording and live streaming, neither of which seem to matter that much.

If I ever upgrade any of my cameras, a G9.2 would likely be the way, adding hopefully better video options than the G9, phase detect AF and stabilising that all my M43 lenses could take advantage of and GH6 level stills performance (or better).


Video Hard Line

So, I did my little podcast video the other day and it well……ish.

Considerations made so that a workable “anyone can do it” system is achieved;

  • No sound treatment in a bare little room, a melamine table top and covering four panelists with my Lewitt 040 matched pair in X/Y config, overhead on a boom into an H5. Sound was clear but “boxy”.

  • No control of lighting apart from a little fill light from an ancient Bowens flouro unit (found in the work store room). Light was flat, unexciting, but even. More light is not an option becasue I am not hauling it in every Wednesday and the idea is to be able to adapt, not control, so we can go on in the future.

  • The camera was a G9, lens 12-60 at 12 (not a big room), with a 0.5 Black Mist Kenko filter on in Natural mode (-5, -5, -2, -2). Not enough post control and the filter was too soft.

This in mind, we managed a 30min single take, with a 1 min over-run thanks to the G9 limit.

What I would have done differently with this setup.

  • I would have used a single mic, as the X/Y was not required (subjects quite far away, but tightly grouped).

  • I would have at least sound treated the table.

  • Can’t do much with the rest, as it needs to be sit and go.

What I am going to try though, with a desire to up the ante a little, but make the whole thing less difficult to set up is;

  • Switch to the S5 in Flat mode (like V-LogL/Cinelike D, but closer to useable OOC and better skin tones probably set to -2 contrast). The 20-60 will also give me more framing options.

  • Treat the table with a cloth (a big blue rug to match the backdrop).

  • Use the F1 and SSH-6 mid/side shotgun, probably on about -5 M/S, but I will play around with it, placed about 4 foot back, low and in front (hence the table treatment). The SSH-6 is more focussed and tonally resonant than the highly sensitive Lewitts and considerably easier to set up. I can also hide 1 3.5 cable easier than 2x XLR’s.

  • There will also be a backup H1n X/Y mounted. This may even be on the backup G9 incase all this goes pear shaped.

I will also take the X/Y capsule for the F1, in case hiding it behind a football prop mid table is a better idea. It has a shock mount, so the table should be fine.

Last time I went in with a backpack, roller case and shoulder bag. This time, the whole lot will fit in a backpack. The isea is to shoo this every Wednesday, even if I am off, so the whole kit needs to be simple and easy to use.

Easy as………….

So, after the second recording, sound was better, but I will push it in a little closer. I have ordered a foamy to make the F1+SSH6 look more table top-like, the dead cat was a little distracting. The mic was more resonant than the 040’s, but I can reduce noise (self and ambient) and improve depth if I get just a half foot closer. The SSH-6 on 30 degree mid/side covered everyone evenly.

Video quality was fine. The S5 in flat mode was far more flexile than the Natural G9 files. Lighting is still rubbish, but it is what it is. We have a dedicated room, it is shared by the whole team though.

We did another 12 minute single take.

Night From Day

There are plenty out there who can shed more light (!) on this, but here is an example of a useful trick.

If you asked to take a night candle lit vigil image in the middle of the day, there is a relatively simple way of doing it.

Set you camera to manual and (1) choose a shutter speed within your flash sync and ISO/Aperture combination (low ISO/small aperture) to make a dark exposure. Go for 1-2 stops under, or dark to the eye, so basically useless as is. You are exposing for the background here, so ignore the subject. An ND filter can be useful here also, allowing shallower depth of field if desired.

Then use a flash to put light on you subject only. I used TTL, which is painfully twitchy, but Manual would work also. The flash was also in a 26” soft box, slightly feathered, but straight or bounced flash would work.

For this file I then vignetted the edges and used the brush tool to warm up and lighten the front of the subject to exaggerate the effect of the relatively useless candle. This worked well against the cooler surrounds.