This is a technical post, but hopefully it will help someone out there.
Been a bit grumpy lately.
Grumpy may be the wrong term, maybe dismayed, concerned, sad even.
Getting annoyed at people teaching people the wrong things or the right things the wrong way should not be a big issue (or really a thing at all), but it seems so common at the moment, I feel I should put my money where my mouth is.
I am talking about photo and video terminology of course, my bugbear.
More specifically depth of field because it is (1) the most commonly abused, (2) the one that does the most harm when it is miss-used, because (3) it is important to get right technically and creatively and (4) the hardest one to get your head around anyway, so why screw it up early?
This image has depth of field rules at work, but how would you describe them?
Speed is speed which makes shutter speeds easy to learn and ISO to noise ratios also make sense, but apertures and depth of field are the tricky one.
It is far too easy to confuse others by getting this wrong, or right even, after someone else got it wrong before you.
Depth of field (DoF) is a term used to describe the amount of an image that is sharply in focus in front of and behind the point of best focus (where you focussed). By the rules that govern it, more depth is rendered behind the focus point regardless of other elements, because as you get further away from anything the depth of field increases as the relative distance increases.
Unless you are photographing a flat surface like a brick wall, depth of field will always play a part in an image. An image only needs a definable front, middle and back for depth of field to play a part.

The focus point for this image was about at the broken-up bit of the top of the rock. This guaranteed that depth of field in the foreground was covered, the back would take care of itself. Even if your depth of field does not keep everything in focus, it is far more natural to have it taper off to soft blur in the background. This image is “landscape” sharp to about the second rock, then depth of field drops off.
It follows that if you get closer to your focus point DoF decreases to the point where macro photographers (tiny insect and flower chasers etc) have depth of field front and centre of their thinking, all the time.
Apertures, magnification, subject distance, subject to background distance, lens rendering and capture format size all play a role to some extent, so learning only one term or control does not conquer it, it is just a start.
Like a lot of things in photography, things seem to work counter intuitively, but that is just the way it is.
Some terminology.
Apertures are also called “F” stops in photography and “T” stops in cinema. These are similar in use, but cinema T-stops are more accurate to the actual light transmission of the lens rather than a theoretical mathematical value.
Apertures are usually measured in full “stops” of f1.4, 1.8, 2, 2.8, 4, 5.6, 8, 11, 16, 32, 64, each letting in half as much light as the one to their left or twice as much as the one to their right. If you want to see this in action, look down the lens barrel when taking an image at a wide and small aperture. This is easiest with a “fast” prime lens (see below).
There are also half, third and quarter values, but generally the full values are used to describe lens maximums and the valid steps.
A lens has a “speed” value which usually determines it size, weight and cost. This is the maximum aperture or maximum light gathering value at the widest aperture settings. It is called a speed value because it determines the fastest shutter speed and/or ISO the photographer can use.
A fast lens lets in more light > allows a faster shutter to freeze motion, avoid camera shake and/or > allows a lower ISO setting for better image quality.
Cheaper zoom lenses often have slow and variable maximum apertures, especially on their longer end when the barrel extends (like f3.5 to 5.6). Better zooms and fixed focal length lenses (prime lenses) usually have faster and more consistent ones like f2.8 or wider. Apertures wider than f2.8 are usually reserved for prime or non-zoom lenses.
Super fast lenses are always prime lenses with apertures as fast as f1.2 or even f0.95, which means they are actually sometimes wider at those apertures than their lens barrel is long, but these are rare, expensive and sometimes poor quality at that setting.
My fastest lens is a Sirui cinema lens that has a T1.2 (f1.1) maximum aperture. It is a decent performer at that setting.
A wide aperture;
Is a smaller aperture number*. It is a small number because it is a measure of “calibres” or how many times the aperture hole can be divided into the physical lens barrel length. F2.8 means 2.8 times etc.
Focus on the main element of the image like an eye.
This renders shallow depth of field (not “a depth of field”, just depth of field**), which means the sharp plane of best focus drops away quickly to softer, out of focus areas, often called Bokeh, but that is another story.
You open a lens up to it’s wider apertures, or “open it up”.
Using the lens at its widest aperture means it is set “wide open”, regardless of what maximum aperture that is. My slowest lens has a maximum aperture of f6.7 at 300mm, which is still “wide open” for that lens.
Using a lens at its widest aperture may mean it is not at its optical best. The common issue with using wide aperture settings used to be colour fringing, where the different colours of light changed speed as they passed through glass and failed to agree on the focus point at the same time with very shallow depth of field, but this is mostly fixed now with highly corrected glass. This is known as Chromatic Aberration or purple fringing. If in doubt, lenses tend to get near their best one to three apertures in from wide open.
A small aperture;
Is a large number*, because again the small hole divides more times into the lens length. An aperture of F22 for example is a tiny opening dividing 22 times into the lens length.
You close a lens down to smaller apertures, or “stop it down”.
Using a lens at it’s smaller aperture would mean “fully stopping it down”.
Smaller apertures render more depth of field than wider ones. Very small apertures render the deepest depth of field possible.
At very small apertures, usually f16 to 64, but also depending on the camera format used, diffraction* of the light making the image on the aperture edges can reduce quality, but this is subtle and often less of a problem than being out of focus or too little depth of field.
*An easy way to remember this counter intuitive scale is to pretend that aperture vales are measurements of depth. Pretend that f22 means 22 metres as opposed to f2.8 being less than 3m and it makes some sense.
There are other factors at work also.
Lens magnification.
Wider lenses expand perspective and make depth of field look, while longer lenses compress things together so they seem to make depth of field look shallower.
This is another reason why landscape photographers are drawn to wide lenses, because using long lenses often makes it difficult to get everything sharp, while portraitists love longer lenses, because they want to hero their subject and blur out the rest.
Format or sensor size.

The above image was taken with a 35mm lens on a full frame camera. The two below are (left) a true 50mm on the same camera and (right) the above image cropped to match (like it would be on an APS-C format camera).
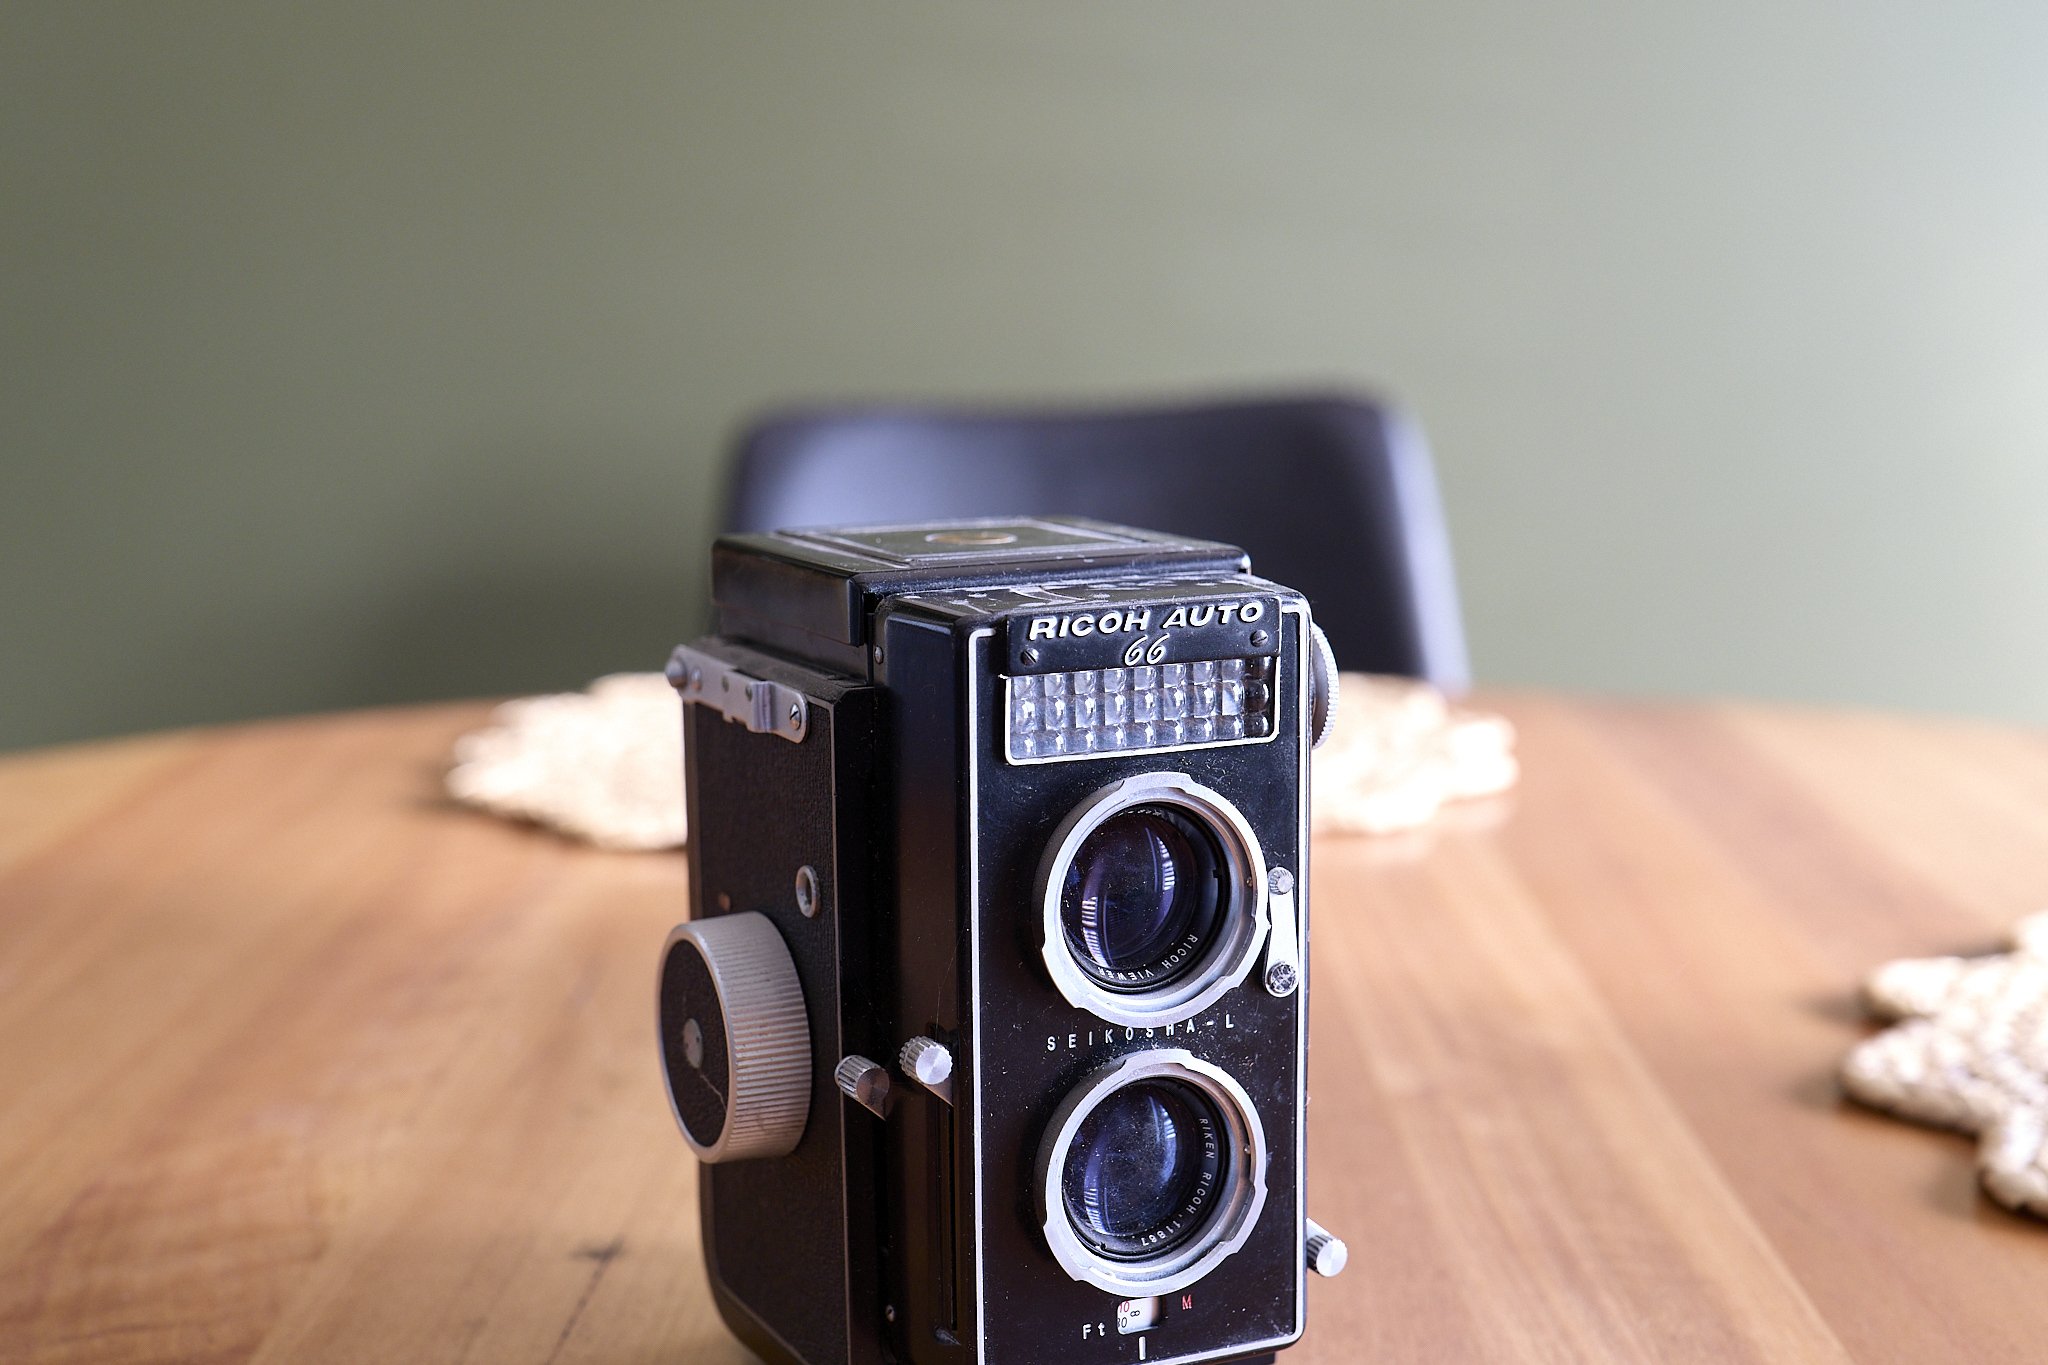
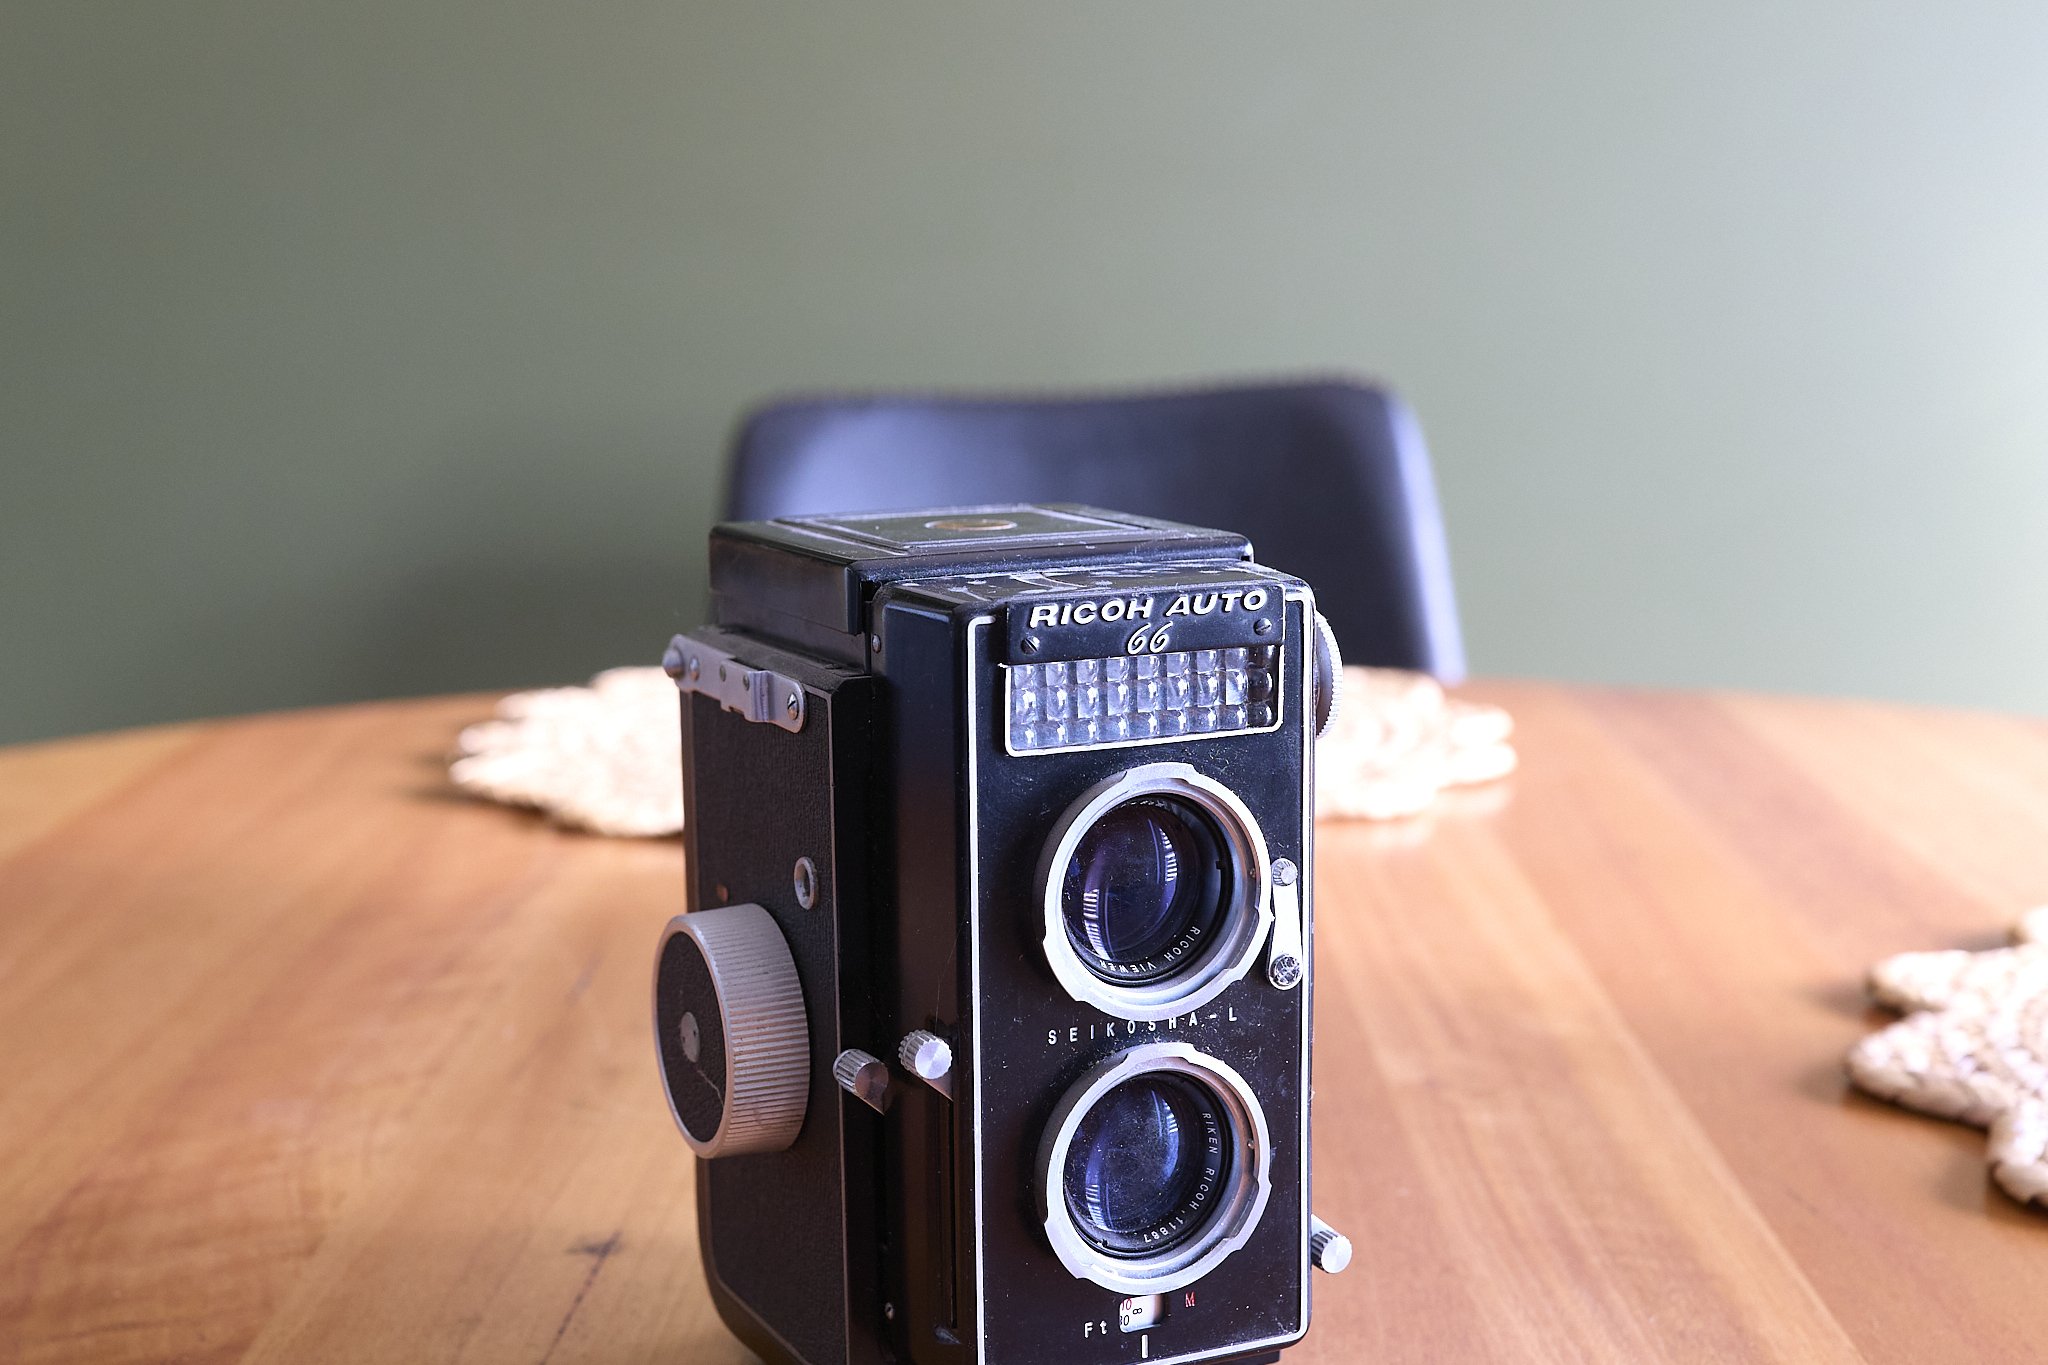
The same aperture was used (f5.6) and focus was made manually for consistency. The left hand image has less depth of field (look at the mat on the right and the chair behind) because a 50mm lens will magnify more than a 35mm, even though the crop of the right hand image seems to be the same otherwise. Both effects have their uses, neither is “better”.
Basically, the smaller the format the greater the effective depth of field all else being the same.
This is why people often accuse smaller format cameras of lacking the ability to render relatively shallow depth of field and why Go-Pro’s, phones and small compacts need special effect modes to achieve blurry background portraits because they have very short focal length lenses on very small sensors. It is also why they are very capable closeup or landscape cameras, showing the benefits of smaller sensors and lenses.
Large format cameras often use lens tilting to add dept of field by shifting the angle of the plane of focus and smaller sensor cameras are more susceptible to diffraction because of the relatively short lenses needed (remember these are a ratio, not a fixed size). In full frame the ideal is about f8 to f11, but in M43 it drops to about f5.6.
This is very important to understand as the actual characteristics of any lens is meaningless without knowing the film format or sensor size of the camera it is mounted on and the rules that govern its use.
A 40mm for example is a super wide lens on a large format camera, a wide angle on a medium format, standard-wide on a full frame or 35mm camera, a short telephoto on an APS-C or Super-35 format, a true portrait lens on M43 format or a long telephoto on a small format compact, so just saying “I use a 40mm” without qualification is no real help.
Except……..
The 40mm above will render the same depth of field at the same aperture on any format at the same lens to subject distance and the same focussing point.
The rules are the same, the lenses just need to be used differently on different formats. Personally I am drawn to the versatility and flexibility of M43 depth of field/magnification rendering, something I am reminded of when I use the less forgiving full frame format.

This image was taken with a 75mm lens at f1.8 on a M43 camera. Depth of field is basically the length of the phone, the subject about ten feet away. The background is the other side of the street, so relatively distant. Any less depth and the image could loose its meaning. This is the same depth of field as a full frame 75mm, but at double the distance.

The tiny little 45mm f1.8 has reach (90mm equivalent on full frame) and speed at f1.8, while still providing shallow enough depth to show a clearly cut out the main subject and retain enough depth for some context. A 90mm full frame lens would more dramatically drop the background out, but to what purpose? From a practical point of view, a clients point of view, there is such a thing as depth of field that is too shallow for their needs.

The advantage of smaller formats, this image was taken on a 9mm lens near wide open (f2.8) and manually focussed at about one foot. The riders were only a few inches away. The bleachers in the background are almost sharp, but so is the foreground, which is harder to achieve! This is the same depth of field as a full frame 9mm, but acting as a less extreme full frame 18mm.
Confused yet?
Ok, it gets worse.
Focus points and Distance to subject and subject to background.
Depth of field also decreases as you get closer to the subject or increases as you get further away. With your own eyes, focus on a mountain in the distance and everything seems equally sharp. Focus on the hand in front of your face and it is very hard to get anything else sharp.
It is always best to focus forward in a scene, like the front row of a group of people rather than to the back, because as distance increases so does depth of field so there is more depth of field behind the focus point than in front.
This gets more exaggerated as distances increase or decrease. Looking into the night sky, all the stars may look similarly sharp, but they may be billions of miles apart. The relevant factor here is the nearest one is a long, long way away, so they are all relatively distant. Conversely, focus on the eye of an insect or tip of a stamen and nothing much else will be in focus, no matter what aperture you use.

Above, a lucky grab of a little bit of a 1cm long fly at T3 (f2.8) on a long full frame macro lens (150mm), shot lengthways. Artistically pleasant, this is a waste of pixels to a scientist.

Another macro image deliberately taken to push shallow depth and focus accuracy to it’s limits.

This image was taken with a relatively long lens (300mm on a M43 camera) at f4. Because the subject was quite close and the shot was taken low, the background is quite blurred, but even the shoulder is a little soft. The aperture of f4 would normally be considered a semi-wide aperture, but the long lens and close subject have exaggerated it’s effect.
The final factor is subject distance to their background. Standing someone up against a wall and hoping to blur out the background is often a waste of effort. A good guide is to place a subject at least as close to you as they are from their background if you want some portrait blur.
This image was taken with the same lens and aperture, but because all the boats are relatively close to each other and far from me, they look similarly in focus at first glance. There is focus plane separation (shallow depth of field), but it is not exaggerated making the front crew blend with the ones behind. The official in the background is probably 50 meters behind the front boat, but still closer to it than I am.
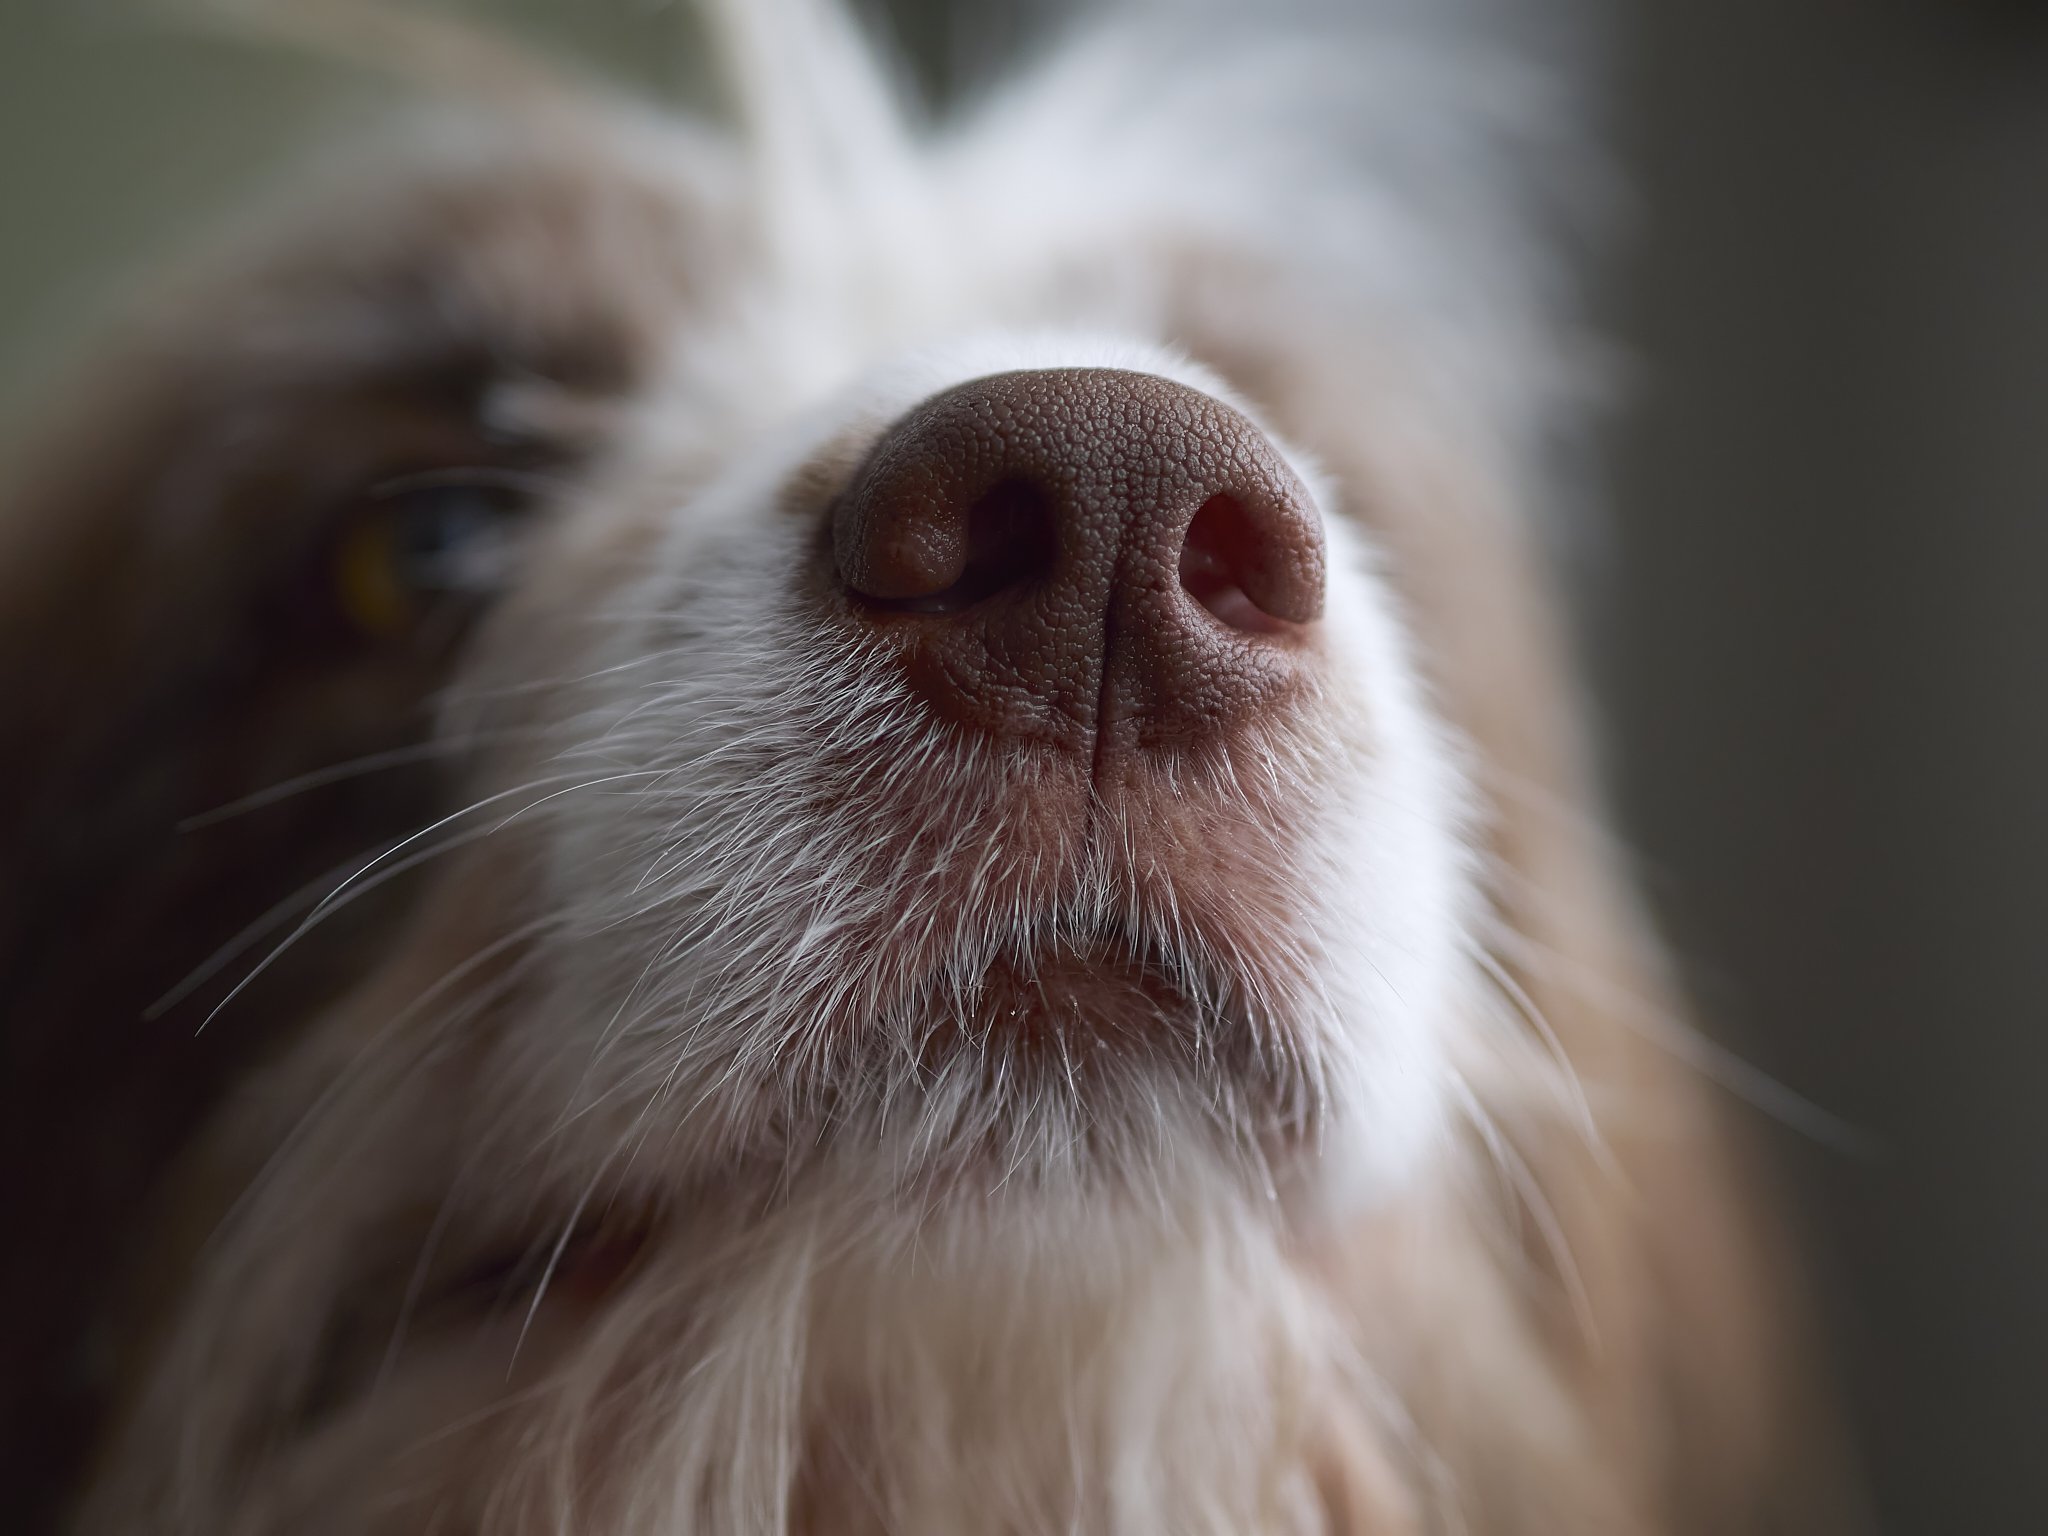
This image was shot wide open at f1.8 with a 25mm on a M43 camera. The lens is relatively wide compared to a full frame 50mm, the sensor increasing its magnification to match, but all the other elements (nearness of the subject’s nose, relative to her eyes) are enough for obvious shallow depth of field. If all else was the same with the full frame 50mm, the very front of the nose would be sharp but not much else.
Ok, lets look at all of these elements together.
If you wanted the very shallowest depth of field possible you would;
Use the widest aperture you have (smallest number = biggest aperture hole).
Use the longest lens you can (probably on the largest sensor available for practicality).
Place the subject closer to you and further away from its background.
Shoot lengthways down the subject, exaggerating the near-far effect.

A long lens, wide aperture, relatively close shooting distance and relatively greater distance to the background have all the elements needed to “cut out” the subject. Notice that even the relatively close foreground flower is soft, but the one further away behind (bottom right) is less so.
If on the other hand you want the most or deepest depth of field you can achieve;
Use a small aperture (big number), but balance that with the limits of the format. Smaller format short lenses suffer from diffraction sooner than larger ones.
Use a wider lens.
Find out the hyper-local distance of the lens and camera you are using (there are apps available). Remember to focus forward of the middle of your desired depth of field, which the hyper-focus calculation will determine.
Compose the image with all the elements at a similar distance and make that distance further away. The main trick is to avoid near-far challenges
If you can, change the focal plane angle by tilting the angle of view (camera), effectively turning front-to-back into top-to-bottom.

I forget the specifics, but I know this was a M43 camera, so a smaller sensor, a 12-60 kit lens, probably at about 14-17mm and f5.6. Focus was likely on the greyish bush or fence post in the middle distance or maybe a little further back. In full frame this would need a 35mm at f11 for a similar result as the longer lens (with same angle of view) would reduce real depth of field.
*Diffraction is always present, but as the aperture becomes smaller, the edges tend to dominate the image area, so its effect increases. Been a bit grumpy lately.
**Calling using a fast lens aperture with shallow depth “a depth of field” is like calling a bright bulb “a brightness”.