Just Use It!

So I did a couple of jobs today, determined to just use the 40-150 as needed and what do you know. In the field the lens proved again how good it is to use.

_B250070.jpg

Taking out the odd flaring (?*), the lens shows the usual qualities of an Olympus lens, high sharpness, good micro contrast and an ability to render a nice image. An image that suits the design ideal of the specific lens.

_B250115.jpg

A few things need to be kept in mind before you go down a dead end path like this.

1. The effect of depth of field, focus errors and atmospheric conditions are easy to underestimate even with M43. A 150mm f2.8 is a shallow depth rendering instrument, especially at closer distances, in any format.

2. The end product will rarely be scrutinised by anyone as closely as you will when “testing” gear.

_B250040.jpg

3. You will tend to find what you are looking for, especially in the short term, so don’t trust those observations when they come too easily. You need your observations come and in their own time before you are sure. In the mean time, you get your images taken.

*The problem, if there is one may lie with a damaged filter, the same one it has had on since day one, which seems to have a light smudging or smokiness on its surface.

The Enigma That Is the 40-150 Pro

I must admit to a love hate relationship with my 40-150 pro.

This stems from the dual problem of buying it untried (which I don’t usually do, often purchasing when working in the industry) and some troublesome early results.

My first professional use of the lens resulted in some oddly “hazy” sunny day files and nervous Bokeh. The Bokeh was my issue, as no one else cared, but the haziness sewed a seed of doubt.

I put it down to a new lens on an older camera, sometimes missing focus combined with iffy Bokeh transition. Not a complete answer. My greatest fear is a lens with a de-centring or focal length specific issue that is hard to predict, so equally hard to control. It seems very sharp across the frame when stopped down a little and can perform well at it’s extremes (where I need it).

Subsequent images went a long way to reducing this doubt and I sold the lens confident there was nothing wrong with it and I even bought it back based on reviewing some of my old files.

The problem;


The two images above are both roughly 300% crops of the same subject at a similar angle, facing the sun at the same time of the day. The same settings (150mm at or near wide open). The distances are different and the shutter speeds are also very different (the focus point is the same). The left image falls into the normal range (1/4000) at about 10m. The right hand is 1/16000 electronic at 50m.

Maybe the electronic shutter is the issue although my first images were taken on an EM5 with normal speeds? If the issue is electronic shutter related, then the answer is easy. Don’t use it.

Two parts of the focal point of the same image, not pointing at the sun. There was a lot of smoke haze also, but nothing obvious in this image. Again a high electronic shutter speed at higher ISO.

At pixel level (medium format thumbnail?). Still sharp at a high ISO wide open and at 150mm and very clean at normal sizes.

At pixel level (medium format thumbnail?). Still sharp at a high ISO wide open and at 150mm and very clean at normal sizes.

I have replaced big hood, because i think it is either the electronic shutter or flare where the issue lies. The only reason I removed the hood was because of it’s fragile nature. I have an early one, prone to breaking.

I replaced it with a screw in metal one for a couple of reasons;

  • The metal one allows the lens to go nose first in a bag without retraction or removal.

  • The screw in one allows a polariser to be used, rotating the filter and hood together.

  • The metal hood is smaller helping the lens fit (on camera) into a couple of bags, that the retractable one is either too fat for or needs a cap also and makes the lens look a little less obvious.

    The solution for now is to leave the metal one on for the robustness it offers and the retractable one also, which fits around the outside. The metal one allows safe storage, it reinforces the plastic Olympus one and gives me the option of removing the bigger one if needed without any fuss.

The third variable is distance. Most of the poor images are of subjects at over 50 meters. This is a real issue if it is the problem , because I bought the lens to do field sports.

Again wide open at 150mm and almost pixel level (400%+). The subject is a chimney two houses down the road. Contrasty and sharp enough to max out 13x19” print’s resolution and a good distance for sports.

Again wide open at 150mm and almost pixel level (400%+). The subject is a chimney two houses down the road. Contrasty and sharp enough to max out 13x19” print’s resolution and a good distance for sports.

Of course, longer distances may have atmospheric considerations.

More testing required.

Ok…..back from some quick tests.

The reference image left, then a processed RAW, then a LSF jpeg just for comparison. The Raw file has more fine detail, but the jpeg looks fine at normal size or up to 100%. The Raw was a little hazy (dull overcast day?), but a little clarity and de-haze brushed on fixed that. I think I have a 85-90% copy, which is fine for what I need.

I think that the reality is, I have a good enough lens, even a spectacular one in some circumstances, but it does have a slightly erratic nature in as yet undefined circumstances. Do I trust it? I have already for a couple of jobs and it has done as needed (with few exceptions).

For pro work, as odd as it sounds, my standards are less strict. For almost all applications the lens takes a very nice looking image suitable for publication, enlargement for the occasional sign or poster.

If used carefully I know it can bring home fine art grade files, but so can most of my lenses.

Another Raw jpeg comparison at 150mm f2.8. In this set the added colour and cruder, but effective sharpening of the jpeg (right) do make a difference. Again, some slight softening in a hazy direction, fixed by the Lightroom sliders.

The simple solution may be to avoid electronic shutter for now, and set up a preset for the lens to apply as needed with a little clarity, de-haze and deeper blacks.

Am I being too picky?

Probably. Bad habit pixel peeping that should be avoided early on with new gear because “he goes looking for trouble usually finds it”. We (I) should let a lens first show it’s best, not look for it’s worst.


Cycles

For many spring is a time of new growth, release from the hardships of winter and anticipation of the warmth to come.

For some it is the all too brief, ending too soon with their failing to grasp life.

A few days later, this little one was host to a myriad of other creatures only born because of it’s death.

A few days later, this little one was host to a myriad of other creatures only born because of it’s death.

There are often reminders of the fragility of life around spring time and through to summer.

Flowers come and all too quickly go, newborn animals that don’t make it, leave sad reminders for us in their wake.

I have always been drawn to this cycle, aware of it or not.

I have always been drawn to this cycle, aware of it or not.

Everything is slave to cycles. Nothing stays the same.

We can embrace that rhythm or fight it, but it goes on regardless.

This also takes the form of growth triumphing, but as part of the cycle of decay for something else

This also takes the form of growth triumphing, but as part of the cycle of decay for something else

I think photography has given me a tool to deal with this cycle of life, when I may have avoided it otherwise.

Things Are Starting To Hum

I really appreciate the work I am currently doing.

Being a part of something, especially something that potentially effects so many people, then being good enough at it to pass muster gives me a greater sense of completeness than I have felt in a long time.

One of the things that excites me so much is the variety of work on offer. I cannot think of any other environment or line of photographic employment other than maybe newspaper work, that gives you the opportunity to do so many different types of photography, all under the one umbrella.

Of course the onus is then on the practitioner to be all of those photographers, but that is the challenge that makes it worth while.

*

Today I did a quick portrait of a work colleague and friend*, needed for her winning entry in a graphic design competition. This shoot and another I did recently for the school leadership group, reminded me of two things;

Firstly, I need to remember that even with all of my newly re-kindled artificial light technique, natural light is always the best starting point for a successful portrait.

I have shot with natural light only for the majority of my time behind cameras. This entire site is the product of a “no artificial preservatives added” ethos, but the reality is, when working in a semi commercial environment, you need to be able to use lights, because you cannot control everything. The trick is knowing when not to.

The second point is that being prepared makes the work seem like fun, which in turn increases everyone’s feeling of success.

Portrait sessions can be huge fun, or they can be a strain for all involved. The main things the photographer can do to help things run smoothly are nailing the technical side (know your processes and keep them simple) and location control, which often go hand in hand.

When things come together, it just goes to prove the point.

Kate deserved the services of my personal camera, the Pen F and the proven 75mm at f1.8, both specialist at portraiture. One camera and lens, one subject, nothing else.

Kate deserved the services of my personal camera, the Pen F and the proven 75mm at f1.8, both specialist at portraiture. One camera and lens, one subject, nothing else.

The shot above was pre-visualised in the days before the shoot. The location was scouted** as the best place to get depth, a clean enough, yet interesting background and reliable light. On the day, we had plenty of light, but near gale force winds to deal with (hair, what hair?).

The first location tried was outside on the sheltered and shady side of the building and worked well enough. We could have walked away, but I felt there was an element missing.

Two minutes later and the gantry of a new student building had that element.

Light.

A large window lighting a dark indoor space, especially on an overcast day, offers gentle and controllable contrast.

This could have been manufactured using artificial light by underexposing the ambient light and using strobes for fake side-sunlight, but if it can be pulled off without, all the better.

I need to remember that the choice to use artificial light must make a shot better, or it should not be used at all. The habit of going to lighting gear first, outside of a studio situation, is a trap. After-all aren’t strobes simply trying to replace natural light?

The other image that made my cut. In studio terms this is “split lighting” , meaning the face is 50/50 light and shadow. The image above is “short” side lighting, meaning the light is on the side of the face facing away from the camera.

The other image that made my cut. In studio terms this is “split lighting” , meaning the face is 50/50 light and shadow. The image above is “short” side lighting, meaning the light is on the side of the face facing away from the camera.

This does not mean a wholesale reversal away from artificial lighting for me. It just means that my process has been better defined, first falling back on reliable old techniques, but keeping a mind to newer ones.

*Thanks Kate for letting me use these images.

**A few weeks ago, I took a walk around the campus and made a photographic record of any possible locations. This then has notes made about best light or as importantly light and times of day to avoid. When Kate asked for this image, I went to my location bank and chose three spots, one for each possible circumstance we might encounter. This has been a godsend for me, as I am personally so much more relaxed when this side of things is taken care of.

The Perfect Camera Bag

Seriously? No such thing.

I have been reminded by necessity, that there is no perfect camera bag, but, their is often the perfect bag for a specific situation.

My bag stocks are embarrassingly large.

Even after years of selling of and gifting, I still lay claim to a dozen or so real camera bags and thanks to M43’s size factor, several non camera specific bags that do the job.

What do I Use?

No single one. Not even a small selection. I use anything at hand, depending on what I am doing (purchasing back my 40-150 Pro has also forced a re-think).

If getting there is more difficult than being there;

LowPro Pro Tactic 350 AW (1st edition). Not my favourite bag to wear (I find it too small and uncomfortable), but great for travelling or simply hauling a decent amount of gear from here to there. I often use this for stage photography, placing the bag in a handy location, because I tend to use several cameras with primes on them, which is impractical with any other bag except maybe the F2. It also goes on a plane with me (remember those?), because it is quite rigid, making it ideal as a foot rest or occasional pillow on lay-overs. (Not reviewed yet)

If being there is as difficult as getting there;

Domke F820 Satchel. This one has just been promoted back to my every day bag. The 40-150 pro, on a smaller camera like an EM10 or 5, fits perfectly in a ready to go configuration (with screw in metal hood fitted). The 12-40 fits on another and with a few other bits (or as many as I like with the extra pockets fitted), and I am ready for most situations. This bag has that magical ability of taking weight and making it feel relatively lighter. Some bags actually feel heavier than they are, this one, with its all around strap, postman’s shoulder pad and semi-rigid top does not. Testing the theory, 2 huge add-on pockets can be attached and the thing can take a ridiculous amount of gear. My only complaint is that it will not comfortably take a bigger camera like the EM1 with grip and a larger lens. (Reviewed).

If being there is more difficult than getting there;

Domke F2 (original). 35+ years old and going strong. This one most often takes odd shaped kits like a camera with flash and modifier fitted, a camera with grip and big lens or lighting gear. It is still a classic, made by a professional, for professionals and it shows. Gear has changed over the years, but this bag, sporting a new insert and strap just works. My wife hates it (it is a little ugly) and I must admit the ancient grubby-chic look has worn thin with me also, but when nothing else works…. . (Reviewed)

If being there is about moving fast and light;

Think Tank Turnstyle 10. When shooting sports, I use this in conjunction with a slung camera. It holds a second camera and lens option, spare bits and my phone in a “get out of the way” configuration. Invisible and low profile until I need it, this thing holds an amazing amount. It also takes a water bottle pouch in the strap without effect. (Reviewed)

If it is important to blend in when you are there;

Filson Camera Field Bag. This a sentimental favourite and my favourite bag when something a little nicer is called for. It has a flaw (fixable if needed), in that it sags in the middle when packed tight. This tends to make it annoying when working fast from the hip. A rigid base would help or careful packing, but that rarely works in the heat of the moment. If I am travelling with a small kit and other things, it is nice and if my kit needs are minimal it works fine, but no Pro lenses or multi body kits. (Reviewed)

Domke F3x Rugger Wear (olive-very rare). Great when it is wet and I need to keep working, the F3x Rugged is ideal. It hugs my hip and the flap sits properly covering the main compartment, meaning it actually does keep water out. It smells a little (oil), looks 80’s style Army disposal-worn out, but like the F2, it does what it is designed to do. Many of my other bags are weather proof, but usually with a catch. The other Domke’s are not as water proof (they make this line), the TT and LP need their water proof sleeves, making them impractical and the Filson, made of a similar cloth, is not as good at wrapping up it’s insides. (Reviewed)

There are many others that fit into to this anti-camera bag niche (Filson Field Bag, Timbuk2 satchel, Tokyo Porter tote, Crumpler satchel etc), but these are the “A” team for work.

Could I work with only one or two?

One only; A Domke (someone else would probably have to choose though).

Two; As above and the Pro Tactic.

Three; As above with the TT.


Old Friend Revisited.

After much soul searching and flip-flopping, I have decided the easiest path to kit completion (for now), is the buy the 40-150 Pro back.

As I have said before, the lens is not demonstrably better optically than my current lenses, in real world terms anyway, but it does offer several fixes to my current options.

Compared to the 75mm F1.8 it is longer and reasonably fast. F2.8 and 150mm is in reality the “dream” lens from my past (a 300mm F2.8 equivalent). There are times, especially when I am looking to get images of all of the children in a class from limited locations, that 75mm is too short and my longer lenses are too slow.

This is a relatively rare situation, but common enough to feel like I am short changing my current employer.

From a personal perspective, I made my peace with the limitations of my kit a while back, but this is different. This is the world of professional expectations. No excuses territory.

The other two lenses I have (40-150 kit and 75-300 kit+) always punch well above their weight. Comparing them recently, only the obvious things are relevant.

A lack of aperture choice, weather proofing and durability are why the big pro lenses are bought over well performing lesser options. AF on the 75-300 surprises, so that one will be used in good light for field sports.

At 75mm I have four lens choices, almost indistinguishable in sharpness. Well done Olympus. Looking there is pointless.

At 75mm I have four lens choices, almost indistinguishable in sharpness. Well done Olympus. Looking there is pointless.

Indoor sports are, I have found, easier to do with the 75mm and the extra reach of a longer lens is better for field sports, but that is when light allows. The 40-150 is the ideal other option in both situations. It also has the classroom, stage and court sports range nailed.

The ability to stand off and separate subjects is core to it’s application. Bokeh is usually pleasant with occasional ni-sen  or “cross-eyed” look, but reliable enough.

The ability to stand off and separate subjects is core to it’s application. Bokeh is usually pleasant with occasional ni-sen or “cross-eyed” look, but reliable enough.

The lens impressed in the past, providing some really sharp files stopped down or wide open. Early on I accused it of being a little patchy sharpness wise, but……

on closer inspection.

on closer inspection.

The QC team found it was often user error and unusual Bokeh transition of near misses rather than actual lens softness to blame. Even with M43 format, F2.8 can be unforgiving.

A JPEG from the almost too sharp Pen F at F8. Recovery of highlights is easier with this lens than some others I own.

A JPEG from the almost too sharp Pen F at F8. Recovery of highlights is easier with this lens than some others I own.

The sleeper though, is contrast. Shooting Football on a dull day highlighted the crisper and generally brighter look of the images. In good light I actually prefer the 75-300’s smoother and gentler rendering, but when it counts, the Pro lens is designed to, and does deliver.

The contrast, or more likely micro contrast of the lens allows for many genuine keepers where other lenses may lose the ability to impart impact.

The contrast, or more likely micro contrast of the lens allows for many genuine keepers where other lenses may lose the ability to impart impact.

At ISO 3200 and 6400 on an EM5 mk1, I found the micro-contrast produced sharper looking files, allowing for noise reduction to be done to taste rather than in desperation. The 75-300 on the other hand is a poor performer in low light as much for it’s smooth and gentle (read; post-plasticky) files, as it’s obvious slow aperture, which forces heavy handed processing more often than not.

On even closer inspection…..

Seriously, I live with goofballs!

Seriously, I live with goofballs!

I have found the lens offers very finely detailed and flexible files. Olympus weaving their magic? Maybe so.

Regardless, the files are ideal for a working pro who appreciates occasional brilliance, but needs dependable goodness.

A lens that will produce this type of pleasant and beautiful image in any circumstance is a blessing. Comparing it to too many other lenses, in far too many and different circumstances, really is a recipe for unsettled dissatisfaction. Take it for w…

A lens that will produce this type of pleasant and beautiful image in any circumstance is a blessing. Comparing it to too many other lenses, in far too many and different circumstances, really is a recipe for unsettled dissatisfaction. Take it for what it offers and move on.

No small thing is the lenses performance on my “lesser” cameras. In the early days of owning it I successfully shot indoor sports and swimming with old EM5 mk 1’s. Remember, these cameras have no tracking capability. The lens and camera combo was quick enough to get near instant first grab keepers at f2.8 (just do not hesitate).

I am looking to add a camera to the mix soon (another EM1 mk2 or EM1x) partly to handle my current and future volume and to deepen my pro camera stocks. This lens will likely jump again in capability and help finalise the Olympus journey for me. The 100-400 is still in my thoughts, but is now really a luxury item.


Getting to Know New Dogs

Both of our girls are over 18 months old now.

Daisy is a bit of a mystery to us. She has many Smithfield traits, such as an independent streak, strong herding instincts and is a very visual communicator. She swings from brave protector of our property, tenacious herder of her sister and others when out running, to timid wall flower, with triggers we do not yet fully understand.

She has taken recently, to sitting in our Agapanthus plants. It is cool (she likes that), hidden (likes that to) and allows her to keep an eye on a likely exit point, the side gate, which is much like her habit of laying in the hall near the front door (another very Smithy trait, old Jack shared).

I often think of dogs as coming in two broad forms; complicated and simple (not dumb, just simple and easy to read).

Daisy is very complicated.

Sometimes knick-named “help yourself”, Lucy is on the other hand as straight forward as they come, just ask her.

Both show bullet proof tendencies, bottomless loyalty to us and each other, and are very affectionate. After playing together full-on for an hour or more, then are then found cuddling up together, but they do see life very differently.

The Further Adventures of "Flash man"; Resources Stocktake

This flash thing has taken off some. From very humble beginnings (a pair of Yong Nuo flashes and two circular mini soft boxes “just in case”, it now boasts enough power to cover large groups or a constant production line of subjects.

It has come to the point where I need to take stock of my capabilities and what to add (if anything) from here.

Flash Units

  • 4x Yong Nuo 560 IV’s These are the work horse units, about the same strength as the second to top units from Canon etc (GN 50+). Having 4 means I always have 2-3, with the ability to double or triple mount them in modifiers as needed. They can also act as controllers if my TX dies. Two of these and 2 brollies managed to handle a school ball where 500+ shots were taken with groups as wide as 15 people.

  • 1x Yong Nuo TX Controller for all the YN units.

  • 1x Yong Nuo 560 III. This unit can be slotted in to the above, but is set up (easily changed) as a slave for hair or splash light. The III’s can overheat, so I use this one more gently.

Modifiers*

I will rate the modifiers from 1 to 5 (5 being best/strongest) for softness (coverage without strong shadows) and control (control over light spill).

  • 72” White umbrella. 5/1 Shoot Through, or Reflected. Big and heavy but the softest light by far. Needs 2-3 units to fill evenly. Great as a single light for medium groups.

  • 2x 40” White umbrellas. 4/1 shoot through or reflected. The work horse group shot units.

  • 43” Umbrella soft box. 4/2 reflected only.

  • 43” Reflector/Diffuser panel. This can be used for a variety of purposes, like adding gold (warm) reflectance.

  • 3x 33” Silver umbrella. 3/3 reflected only. A little more controlled, efficient and brilliant than the white ones.

  • 37” Soft Box. 4/2 . This is the most controllable soft modifier, but is a relative pain to set up quickly.

  • 24” Soft Box. 3/2, 3/4 gridded. More directional and with options (baffle/Grid), this is a creative light.

  • 8x36” Soft Box. 3/3. A mighty pain to assemble, this one allows for angled light, like mimicking an open door or window.

  • 7” Cone with Grids. 1/4-5. Ideal for spot lighting or selectively lighting a background with gelled colour.

  • Flagging foam and bag of hair bands. 1-3/1-3. Used to flag a flash head more or less, these can selectively control or snoot.

  • Gels (2 packs, 6x silicone holders) for colour correction or creative lighting (especially back grounds). With a grey background, I can create any colour or shade from white through to black.

Utilities

  • 4x 8’ Neewer heavy weight light stands (actually heavy, not just “heavy duty” as all stands claim to be). The thinnest stem of these is thicker than the widest on a regular light weight stand and I confidently use then in light wind with a soft box mounted. These can also take a backdrop.

  • Neewer Grey Muslin 6x9 backdrop with home made pole. May get some “Kate” microfibre textured ones also.

  • 3x 6’ Neewer light weight light stands. Good for small side lights, reflectors, travel or just in case. At a pinch they could take a muslin or microfibre backdrop..

  • Double, triple and single cold shoe umbrella mounts.

  • 3x Neewer Bowens S-Mounts. These are faster mounting and much more stable than the ones above, but cannot do multiple units.

  • A medium sized Velbon tripod with tilt head, which can be used for any purpose.

  • Clamps, mini tripod, adapter threads, multi tool, mini flash light, duct tape etc.

  • Optionally Heavy Manfrotto tripod with Pro Master Arca Swiss head.

  • Various bags (1 for flash units, 1 for utilities and a $12 K-Mart duffle to carry it in). I do need a Cricket or Hockey bag for the bigger light stands.

Believe it or not, the whole lot cost less than $1000 au.

*The over zealous collecting of modifiers is simply due to curiosity and a bit of creative depth, after all this is all a bit new to me.

I feel reasonably capable now (in gear, not necessarily skill), so I tend to say yes and work out how later. Could I light 100 people evenly if four rows deep or a full stage? Yes I could. The flash units would be working pretty hard, but they could manage (the Godex as a 6th slave unit is also an option).

There is potential for stronger lights to be added (60w Godex continuous), but to be honest, the 560’s are cheap enough, that I could add a few more for a lot less than one Photopro or Godex studio unit.

A Camera in the Hand...

I tried a 90D in shop on Saturday.

Not a contender I am afraid. The af through the view finder (a simple near-far test) used with a last gen. 70-400 F4L was slower than I am used to. The tracking af is likely better at a fixed distance, using predictive phase-detect, but I was surprised at how laggy it felt after my Oly gear. The live view focus was good, but certainly no better than anything I have now and not it’s natural state.

To check my feelings on the matter I tried a 5D4, which was noticeably better in view finder af and an XT4 with 100-400 which is still in the mix, but the 90D is out. Shame, as it ticked all of the boxes.

It is also good sometimes to remind yourself where you have come from and how you got there. EM5 mk1, 17mm F1.8

It is also good sometimes to remind yourself where you have come from and how you got there. EM5 mk1, 17mm F1.8

Moving Forward, Retro Style

As a confirmed mirrorless user, serious contemplation regarding my next purchase, an SLR may seem odd.

The reality is, I love the mirrorless work style, but I am not blind to the benefits of SLR’s. Even when happily using mirrorless cameras, my mind often switches to the things I miss about SLR cameras.

Battery life.

In their natural form, SLR’s are up to three times more battery efficient. At the moment, a major sports event where I work, is a three battery affair. With an SLR, it would only be one.

Applying a photographic brain.

This one is really odd. An SLR gives you less feed back, making you think more “photographically”. Exposure and jpeg effect previews are all second hand with an SLR. In effect you have to predict rather than see and react. This to me is a major selling point for an SLR. I know my own photographic thinking has been blunted by the “what you see is what you get” feed back loop of a mirrorless.

The feel.

I miss the feel. The bigger form factor, the glass only view finder and specifically the Canon curves are all things I miss for some applications. It occurred to me recently, while teaching a student how to use their SLR, how much I liked and missed the Canon SLR interface.

The best of both worlds.

The reality is, the latest generation of Canon SLR’s are (will) be effectively true hybrids. Ironically this comes at a time when mirrorless cameras have reached SLR like performance, so I guess the hybrid is coming from both directions. Like a very economical petrol powered car or a noiseless magnetic tape, the revolution has maybe come in the form of a too little-too late package, but for a short time, there is a window where the best of both worlds intercede.

The 90D specifically has floated to the top of my soon to be filled wish list as the best all-round camera solution for my current kit.

It offers several needed things;

The better battery life (1500-2000 shots) in SLR mode.

Sports capable af system in two forms, both roughly equalling the EM1 mk2. Canon eye focus tracking in live view mode, which seems to be as good as any current mirrorless (basically the same as the latest RF series) and full phase detect af in SLR mode. The 90D has been positioned as a replacement for the 80D and 7D in a shrinking SLR market.

Lenses that are top tier, especially in affordable telephoto options (a short fall in the Nikon and Sony ranges). The 70-200 f4 or 200 f2.8 are proven winners for under $1000au, the 100-400 is best in class (possibly tied optically with the Fuji, but better made), and the 70-300L is a gem. Not to be forgotten are the older, but still better than Nikon’s offerings for most of their lives, affordable short teles, the 85 f1.8, 100 f2 and 135 f2 primes. the reality is, these excellent and proven lenses are sometimes being bettered by new mirrorless designs, but not by much and at a premium price.

Forward compatibility for an eventual migration to RF.

200,000+ shutter fires or so (Canon’s have generally exceeded their quoted count, some by a great deal. My old 50D for example, went to a sports shooter who retired it at half a million+ frames). This is not as many as the quoted 400k of the EM1 mk3, but the camera is considerably cheaper and has other advantages.

Great price. The 90D undercuts the G9, EM1 mk2, is nearly half the price of an EM1 mk3, is cheaper than anything full frame except the budget Canon mirrorless and is more advanced than many. It also offers weather sealing, which for a Canon is a new low price point. The reality is, the last generation of Canon SLR’s (?) are great value. Much better than most other options.

IQ. Added to the beautiful Canon colour, that I have always used as a standard, is the real benefit of more pixels, and with added cost compared to it’s earlier models. Canon is just measurably a little behind some others in dynamic range and high ISO performance, but they are ahead of M43, where I am now and that is still excellent. The higher pixel count means that the exhibited noise is relatively smaller or aggressive cropping is possible. From a sports perspective, this gives me several advantages. The first is smaller, shorter and faster lenses can do more and secondly, shooting wider, then cropping after is more realistic.

To put it another way, the camera effectively has a 100% cropping factor benefit over an R6, between it’s native format (1.6x) and pixel count advantage (1.5x) and a 50% advantage over my current 20mp maximum and/or can perform at a full ISO setting higher (at least) for the same quality.

Would Full Frame be better in low light? Of course, but again, just as when compared to M43, that would be at substantially higher cost and weight in camera, lens and depth of field.

For example R6 would easily beat it in low light, but the base camera and lens (100-500) come in at about $8500.

The 90D with both a 200 f2.8 and 100-400 would end up at $5500 (just with the 70-300L at $3500), with better battery life, better handling, more depth of field for more keepers (+1 stop), more reach (400=640) or a faster lens (200 f2.8 = +2 stops at 300 equiv.), 50% more pixels and the hybrid advantage.

Other minor considerations are;

My M43 gear is still fully relevant. The Canon does come with the downsides of a big, sometimes noisy and always very obvious SLR. The M43 gear would be used for most other work, especially with children in close, as backup for sports and for indoor work. This may sound counter intuitive, but the reality is, the fast glass and stabilisers from Olympus still have an edge.

Not as easy to achieve with a big, serious looking camera and lens.

Not as easy to achieve with a big, serious looking camera and lens.

I would like a different brand in my kit. No brand does everything well.

Peace of mind for the future. The lenses can go forward to RF and the brand has much less of a shadow hanging over it.

The future (inspired in the past) awaits.

The Keeper of Records

Why do we photograph?

After a couple of years of loss (both parents and two dogs), I understand more than I once did how important documenting the now is, for the future.

An image of my mother when young (she died recently at 80 years). From her perspective, the dog, long gone now, would have been the focus of her memories kept safe in an image, and maybe also the time and place. For me it was the first time I had se…

An image of my mother when young (she died recently at 80 years). From her perspective, the dog, long gone now, would have been the focus of her memories kept safe in an image, and maybe also the time and place. For me it was the first time I had seen the image, produced for the funeral. My grandfather was a chemist and avid photographer from the 1930’s on, which makes my family luckier than most I guess.

After we lost our two older dogs, I did albums of their lives. It helped us cope and move on.

Our two young dogs, it has recently occurred to me, have not had as many images taken of them. Is this because they are young, or maybe in reverence to their predecessors, or possibly I am just not ready.

Maybe the lunacy is just too much to deal with? Lucy (left) has no puppy images, being a rescue, Daisy has some, but not heaps and precious few printed.

Maybe the lunacy is just too much to deal with? Lucy (left) has no puppy images, being a rescue, Daisy has some, but not heaps and precious few printed.

I know that I took more images of the older two towards their later years, so presence of mind to take photos may be in direct proportion to our awareness of mortality. Luckily though, I got lots of images of them young.

Ironically, in an age of torrential photography, with more and more of it focussed on life’s mundanities, we run the risk of losing our memories through a lack of long term thinking. The image at the top of this post is 60+ years old. It was one of many found in an old album, not in the best condition, but stable and (other than creases), in salvageable condition. This “shoe box under the bed” reality is disappearing in the digital world.

Our digital memories and even our cheap prints done on poor quality ink jet paper will probably not outlast our cameras (5 years on average). The Cloud is a help, as long as you (a) remember the image exists (b) can access it (c) allow others to see/access it (d) do not drown what is important in a sea of crap.

Is Facebook going to be our “box under the bed” for the future? If so, who will take the time to preserve.


More Pondering's On My Camera Future

With the imminent change to the Olympus camera brand, then the possible change to Panasonic, depending on their take in the future, Micro Four Thirds is in a bit of a funk with me and I am sure many others.

Taking stock, I have plenty of cameras to support my clutch of excellent portrait/low light lenses, so most of my work will stay unchanged. High speed EM-1’s and Pro glass are not needed or even wanted in many of these circumstances*, but high volumes of work (45gp last month), and the likely need for a longer and maybe faster sports and event lens may be an issue.

With Olympus at a “point of sufficiency”, thoughts turn to areas that could be improved.

Sports performance. The EM1 has been a surprise packet and even has more to offer if I can be bothered with the pesky firmware upgrade, but I would really like too up my game sports wise.

The contenders in descending cost order are Canon (R6 with 100-500), Olympus (EM1 mk3 and the 100-400), which would both add a level of af performance, Panasonic (G9 teamed with their 100-400 or 50-200), which are needed to make their excellent DFD focussing work.

Fuji and the crop frame Canon have fallen away.

An interlude image. This year has been one of upheaval and change. This Dogwood had never flowered before. Just one of the good changes that have come forward this year.

An interlude image. This year has been one of upheaval and change. This Dogwood had never flowered before. Just one of the good changes that have come forward this year.

My Head;

Says get the Canon as a secure pathway to the future. It is dearest, but with sales looming, maybe now is the time. Olympus will still do 90% of my work and personal/travel imaging, but the Canon would be a genuine problem solver in it’s needed role and is future proof brand wise. It will even handle indoor sport with it’s big lens, shooting ISO 6400 cleanly.

My Gut;

Says get the Panasonic. Good value, good results and balance of a “living” system with current kit compatibility. Probably the weakest upgrade overall, it gives me plenty of room to adapt, a second feature set and all without a dramatic outlay (the G9 is a little over half the price of an EM1 mk3 and their 100-400 is also cheaper). I can also justify a wide angle lens (8-25 Oly or 8-18 Pana).

My Heart;

Says stick with Olympus. The EM1 mk3 and long lens would make me effectively done with the system and probably for the duration of any future paid photo work. The comfort and loyalty factor involved with staying the course are also not nothing.

If funds prove to be tight, the 90D and a Canon 200 f2.8 or 70-200 f4L are a good option at $2500, allowing me to still go Canon RF later.


How To Be A Content Micro Four Thirds User Part 2

Following on from the previous post, lets look at another factor

Be realistic about your (and everyone’s) output needs

Be careful what you think you know here. The internet is full of opinions about image quality* but here a few things to ponder;

Almost no one prints to the maximum size their camera can accomodate and if they did, most of their demons would disappear. A well realised print, taken with any camera capable of reaching the medium’s maximum resolution, has worked well enough since the 19th century.

Pixel peeping does not translate into image quality directly. Image quality comes from strong vision, translated with equally strong, but sensitively applied technique, into a realisation of that vision. Technical considerations have always been lurking in the background, but have never stopped us before, so how is it we are so easily convinced that older is no good and newer/bigger is necessary?

EM10 mk2, hand held with a wide open 12-40, cropped from the original (below) and down sized for the web. Good enough for a large wall print, probably exceeding print resolution, which is surely the most it will ever be needed for.

EM10 mk2, hand held with a wide open 12-40, cropped from the original (below) and down sized for the web. Good enough for a large wall print, probably exceeding print resolution, which is surely the most it will ever be needed for.

If your work is only going to make a screen, you will likely down size it, to protect it from pirating, or at best only need to match a 2 or 4k screen (about 8 mega pixels).

I remember a pro once telling me, his editor demanded he shoot with at least 24MP for his magazine (at the time the Nikon and Canon flag ships only boasted about 16). He said he would comply, but continued to shoot with his 20mp 5DII and 10mp 40D, with no after effects. He even admitted to down sizing many files without anyone complaining.

The reality is, only a very few photographers, with specific high-res applications actually need the top end of high resolution cameras, but the majority of these sell to people who feel they need the bragging rights. A more important measure is the quality of the image hitting the sensor. Reduced noise, dynamic range, lens contrast, judicious sharpening, accurate focus combined with depth of field control and enough (shutter) speed to control movement blur are all important to image quality, always. Mega pixels are only important to commercial or fine art printers.

That is why top tier sports and journalism cameras only pack 20mp even now, because for a working pro, getting a good shot “in the can” is vastly more important than maximum possible output..

M43 has advantages that in most cases out weight it’s disadvantages. The small sensor is (all things being equal), going to be noisier, but with a 2x reach and depth of field advantage and generally more efficient stabilisers, you can usually regain the 2 ISO short fall and often with smaller, cheaper gear.

My 75mm f1.8 (150mm f1.8 eq) is one of the best lenses I have ever owned, allowing me to shoot indoor basketball at ISO 4-800. Matched to my EM1 mk2 it handles indoor sports (a tough assignment) very well. Would a D5 Nikon and 70-200 f2.8 be better? Yes it likely would, for three times the price, weight and size. Ironically the resolution would be roughly the same.

If you ask yourself honestly how big and how often you want large file potential, the answer is likely well within your current or even past camera’s potential.

I once shot a full morning of lens comparison images between an Olympus EM5 and Fuji XE-1. Only after I got into the virtual darkroom did I realise the Fuji had been set to small JPEG for some images (vs RAW on the Oly) I used for ebay. I did not notice this at all on a 29” screen until I went to pixel peep and images only jumped up about half again. The files were beautiful, just small. I remember thinking how nice it would be to shoot small JPEG’s for a blog or website, without any consideration needed for big prints.

Mistakenly taken as a 2-3mp image. Every droplet is sharp and clear. The files were still good enough for me to decide about the lenses.

Mistakenly taken as a 2-3mp image. Every droplet is sharp and clear. The files were still good enough for me to decide about the lenses.

*Reviewers like DPreview can show you the micro differences between camera “A” and “B”, but you need to be take into account here that when the best quality print is needed, most images come down to a balance of original file and good post processing, which can easily increase size, sharpness and impact, making the differences between various cameras irrelevant. As an example, look at some good works done using the Nikon D700 or Canon 5D mk1 full frame cameras. Then compare these to the RX100 Sony 1” sensor compact camera. Does the clear resolution difference make any of the work produced on one of Canon or Nikon’s most loved pro cameras less relevant?

Building a Portable Studio Flash Kit

Hopefully this will help any readers looking to add flash into their lives.

As an ardent flash avoider over the years (partly artistic preference, partly just plain chicken), I can recommend adding lighting into your tool kit. Apart from it’s practical benefits, it is a good distraction and creative outlet.

Where to start.

Get two flash units and a cordless controller. You get more power and constant charge from plug-in lights, but no portability. I would recommend Yongnuo 560 IV’s and their controller (or similar such as Godox or Neewer). This should set you back about $200-300 au. The reason these excellent flash units are so cheap, is they are not TTL (smartypants-talk-to-camera) units. They are manual, which is generic (will fit any brand) and can be made in huge quantities. The give away is a single contact pin on the flash’s base. A note here, do not mix brands of multi pin flash units and cameras!!

Why manual? because with a studio set-up, that is what you need (control and consistency), not photo-trickery smarts.

Next add 1 to 3 cheap, light weight Neewer or similar 6.5’ light stands, each with an S-clamp (the big round ones often called “Bowens” style, not the thin little flash/umbrella clamps that are a colossal pain) and white shoot-through umbrella. Rough cost from $80-120au a set, but multi sets are much cheaper (there is currently a set on Amazon with two stands and 6 brollies-but the little clamps-for $80au!).

This set-up can be used either as an efficient shoot through, or less efficient, but slightly softer reflector (as shown). You can use a dedicated controller, a second or third flash as controller or an on-camera flash for fill/catch light and to fi…

This set-up can be used either as an efficient shoot through, or less efficient, but slightly softer reflector (as shown). You can use a dedicated controller, a second or third flash as controller or an on-camera flash for fill/catch light and to fire the unit as a slave, which is fiddly as you need to go to the flash for changes, but if you are organised, no big deal (and you can change aperture or ISO at the camera end in stead).

The S-clamp or Bowens clamp, allows for quick flash removal, a stronger hold, safe battery changes and rotation of the flash body to better “see” the triggering controller. Each unit has stickers marking it’s group, so I can see without going to the…

The S-clamp or Bowens clamp, allows for quick flash removal, a stronger hold, safe battery changes and rotation of the flash body to better “see” the triggering controller. Each unit has stickers marking it’s group, so I can see without going to the flash and the black hair band is for securing the flagging foams. The Bowens clamps also open up a few more modifiers, than an umbrella only clamp.

You can now photograph a small sports team, a car or family portrait.

*

Now to controlling light, which is where the fun starts.

For maximum area coverage, but with little or no control (i.e. light focus), bigger shoot through umbrellas or soft boxes are the way to go. The bigger the surface area relative to your subject, the softer the light. A 72” shoot through umbrella will cost $40-50 au but smaller 43” ones will go 2 for $50.

For more control and added brilliance, silver reflector umbrellas are great. 2 of these at $30 will allow you to focus your light to within 180 degrees and add a little more drama than the shoot-throughs. I recently used a single one, with on-stage down lights to do some drama class portraits, which worked well.

Even more control and softness comes from various soft boxes or umbrella diffusers. The smaller the area, relative to the subject, the harder and more focussed the light. If you get grids for your soft box, you can focus the light even more precisely, without reducing light softness. I have a 24” square gridded, 38” octagonal and 8x36” rectangle, that cost in total $120au. Some of these fit/come with Bowens mounts, which is one reason for getting those (above).

Want fine control? Add a 7” metal diffuser dish (fits the Bowens clamp) with a set of 3 grids, that will give you semi to fine spot light control. $30.

Flagging flash (blocking light to some directions only) is pretty much free, using black soft foam sheets cut to size, held on with rubber bands or hair bands. Two pieces can make a snoot, which is the most focussed light. $2.

Light colour, either for balancing flash to match ambient, or for creating background mood is done using gels, placed over the flash heads. 2 sets with 6 holders, $25.

A good problem solver can be a 43” or bigger 5-in1 diffuser/reflector and clamp for a light stand. $50

I carry the stands and modifiers in a K-Mart duffle ($12) and the flash units, now up to 4, with gels, controller etc in a Neewer tote bag ($29).

My Basics For Using Flash

Turning up to a photo shoot location blind can be daunting, especially if you need to use flash on some level, preferably with a touch of creativity.

In my very short tenure as a working flash photographer (0.000001% of my total photographic life), I have gained enough knowledge to work in a “lets see what we get”, rather than a “Oh sh#t, oh sh#t, oh sh#t” frame of mind.

The basics.

Use Manual.

Manual flash has four active exposure controls and one passive one.

The active controls are; Power (1/1 to 1/128th power), Distance (subject to flash-not camera), Aperture and ISO chosen. The passive control is Shutter Speed, which does have an effect on ambient exposure, but not flash.

The more of these you can control from the get-go the better.

Working for only a month with my rig, I am now comfortable setting up a 1-2 flash outfit and shooting nearly straight away, but I need to control the environment.

I know that if my flash to subject distance is about 3 metres, zoom on the flash at 28mm, my aperture at F2.8* and my ISO set to 400, then 1/32 +.3/.7 to 1/16th power through a shoot through brolly, or 1/16th from a silver reflector brolly are going to be in the ball park. Note that where I stand is basically irrelevant. The flash to subject distance is critical, the photographer to subject distance is not.

Similarly, most ceilings in modern event halls will work with a flagged flash at about 1/8th power at 2.8* and ISO 800 and the flash zoom set to 105mm. This gives me even coverage This is also a good starting point for bouncing flagged flash.

If shooting for fill light outdoors, I will often start at 1/1 power and work for balance. This one is still a work in progress, but a test or two and I am good to go.

These known values (with my flashes), are a starting point I can rely on.

To change these I have a wireless controller on camera that can run three groups separately and is a dream to use (choose the group and increase or reduce the power). If this fails, any one of my 560 IV flash units can step in as a controller.

Shutter speed is chosen based on how much ambient light there is and whether I want to add it in for atmosphere or cut it out to capture movement. At slow camera shutter speeds, you will still capture subject movement sharply as long as you overpower the ambient light , because the flash effectively becomes your shutter. If there is too much ambient light though, you will get subject ghosting as the flash’s fast light and the ambient slow shutter speed light share the exposure giving you one sharp and many blurred versions of your subject. Using a higher shutter speed is not going to capture the movement, but it will cut out ambient light allowing the flash (possibly shooting at up to 1/20,000 of a second), to effectively be your shutter.

As I add more modifiers and make up more complicated flash configurations, I record them in a note book. This allows me to go to an idea with a workable base, then modify as I need.

The reason I do not use TTL is simply because I prefer to control things as shown above. It sits in my head better. TTL uses a totally different set of controls.

The basic strength of TTL is it’s ability to set most of the above for you. It’s weakness is that it bases it’s choices on subject reflectance. Shoot a dark subject without flash and you will usually need to set “-” exposure compensation on your camera. Flash needs the same compensation. It rarely falls outside of a workable-fixable range, but it cannot be relied on to be consistent.

Even though I shoot this way normally (Aperture priority with exposure comp), TTL flash often confuses me and works against my wishes, trying too hard to make flash invisible, then jumping to being too overpowering. It also makes judging battery drain harder. You can control the camera with manual mode, but the flash will still react to it’s environment.

No flash used, just enjoying a great spring.

No flash used, just enjoying a great spring.

*One huge advantage of M43 is f2.8 aperture gives me plenty of flash power (the wider aperture reduces the amount of power needed), but still provides a decent amount of depth of field (equal to f5.6 in full frame). A full frame camera at f5.6 would need either more flash power or a higher ISO setting. Flash on M43 is effectively two stops stronger.

Adventures In Flash Photography (or building a flash kit-quickly)

Flash photography seems to me to be both an ancient art and a new found challenge.

After years of shooting with (for) available light, with rare and occasional contact with studio or flash bound world, I have now come fully around to the necessities of artificial, read; controllable, light.

The journey has been fast and furious to say the least.

The school I work for recently held it’s yr 11-12 ball. We are extremely lucky where I live (a giant island), having no current cases of COVID-19, but as the rest of the world is finding, it takes two weeks to know if you have it and longer to know you are rid of it, so social distancing, cleanliness and testing are still important.

Organising events at the moment, requires careful interpretation of the social distancing rules, so gaining clarity on what would be allowed on the night seemed pretty fluid. Where the ball was held needed to wait until the very night to tell us their expectations.

What would happen in a normal year?

Arrivals (red caret stuff), static portrait, from formal groups to loose friendship groups and some silly stuff, then dancing and mingling shots.

Static “studio style” portrait shots.

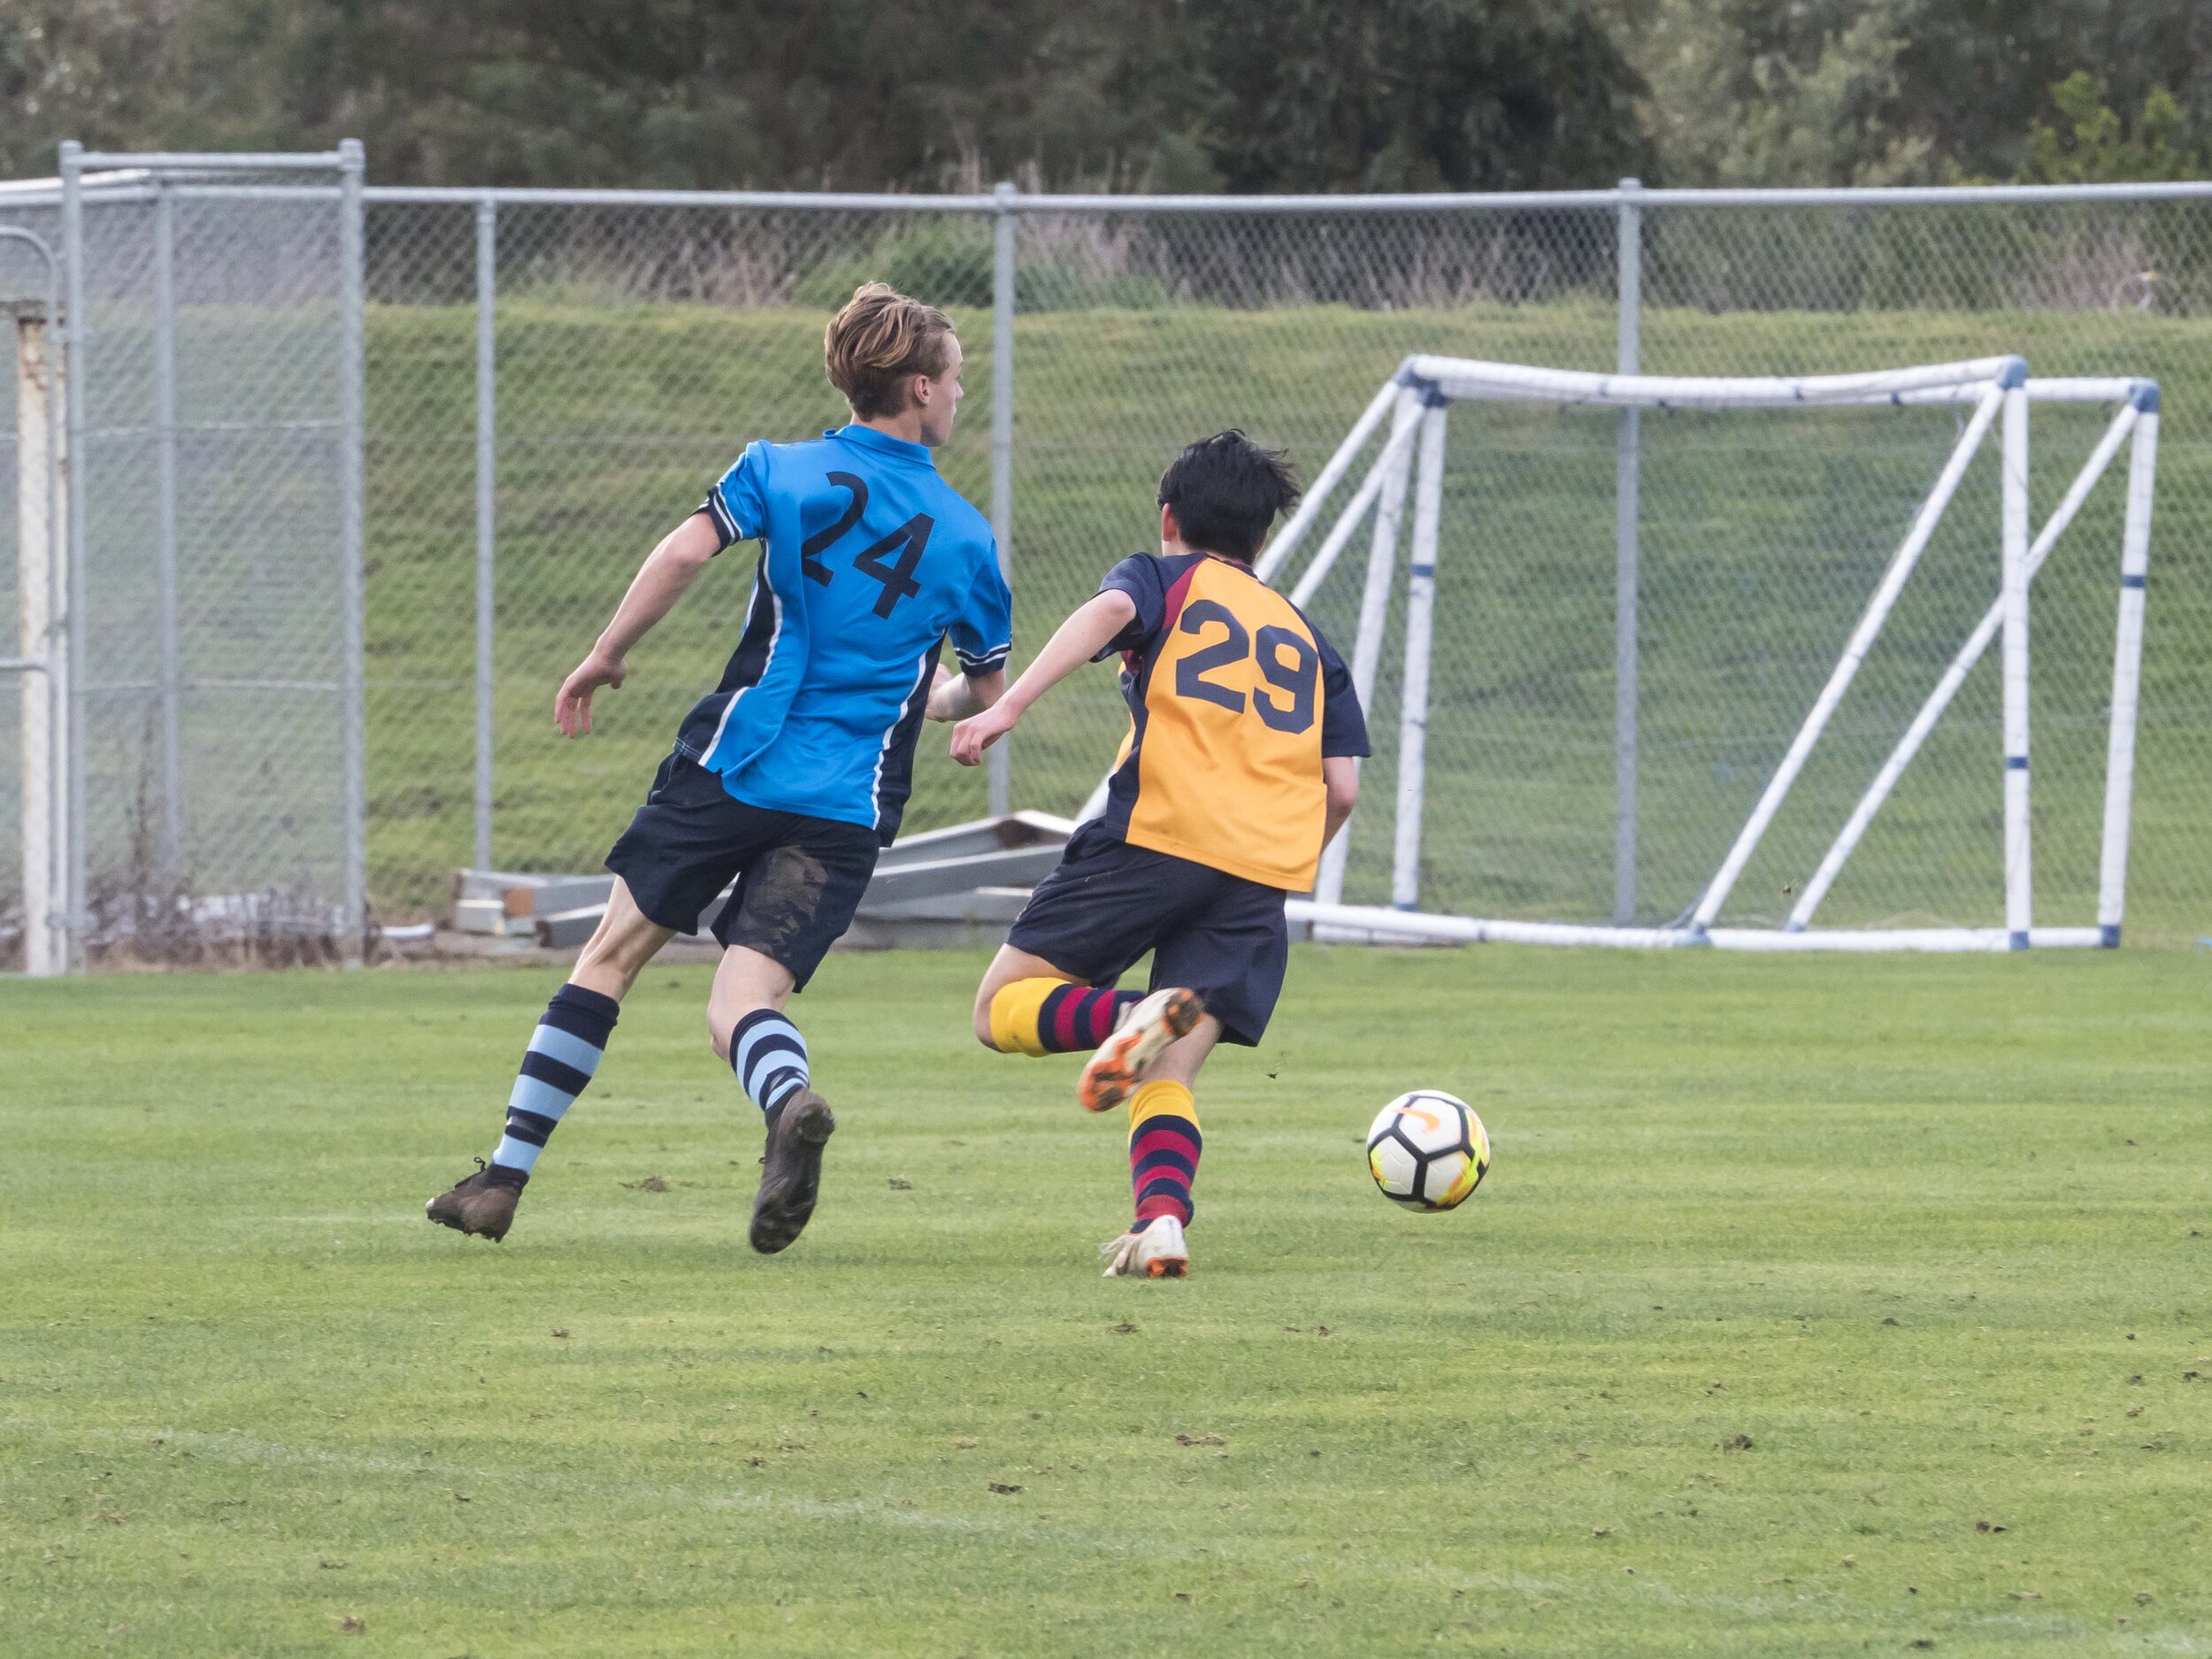
Action shots, mingling, dancing etc.

Prep.

I had a YongNuo 560 III and IV and their cordless commander for a while, but had little desire to use them. My out of date understanding of manual flash made it all too hard in my head (as I understood it). I should have read up more.

I added to this kit a second 560 IV, a Godox TTL 685 to deepen and “smarten” up the base kit and a couple of light weight stands, with circular diffuser soft boxes and flash attachment clamps. I felt like I was on the way for small stuff like single subject portraits, but what about larger groups, especially if social distancing makes a small group as wide as a big group?

After a bit of research a couple of shoot-through umbrellas were added. White shoot-throughs are wide coverage area problem solvers. They lack fine control, but that is for later. Right now I need good, soft and even coverage and the consensus is umbrellas are the way to go.

Testing some ideas the night before left me seriously wondering if I was out of my depth. The reality of it all started to sink in. Thirty years of no flash habits having to make way for thirty days of crash learning with little realistic, up to date field experience?

Neil Van Neikirk and Joe McNally amongst so many others are a treasure trove of ideas in a very sharing community, but the reality is, nothing is certain when using flash (their words). There is no sure fire formula for getting it right every time. You just have to get in the ball park, then play around until you have something workable, play some more for something better and take notes.

The day in question.

After the night before, I turned up resigned to the fact that fate and luck would have a large hand in proceedings. My first job was to try out the studio kit and get it right. I played around for a half hour with some passers by as impromptu models and was far from happy with my results. Theoretically, I was fine, but it just would not come together. My two hour safety net shortened too quickly then was bought short when my contact for the school told me the first students were arriving (45 minutes early). This bought me to my second unfinished task, getting the EM1 and Godex sorted out for the arrivals at the front door!

I high tailed it out front, camera, flash and (hair-brained idea) modifier (a cheap Gary Fong knock off) attached. First shot, out of focus and poorly lit. Crap. I ditched the modifier.

Luckily the couple were the senior prefects who took up station behind me to greet arrivals. I told them I needed another shot later, so disaster avoided. Next couple, better. Next better again. With TTL the the trick is to balance the ambient and flash exposure using the exposure comp controls for both devices. I had painstakingly set this up on the camera using the 1-2 level arrangement, but in my haste I just fell back on exposure comp for ambient light on the camera and TTL +/-0 on the flash.

TTL is good and quick and rarely falls outside of a workable range, but you need to remember, the camera is exposing for ambient light, filling with the flash, so the ratio of ambient and fill is crucial, but you also have to compensate for subject. The smartness of the devices can be your undoing. Dark subjects need minus ex comp with both camera and flash!

End result. All arrivals secured, some post to fix the ratios as the sun set and strong down lighting in the entrance dominated and a grudging respect for the EM1 and Godox combo.

Ok, sorted. Secure in the knowledge that the students would be settling in, ordering dinner and listening to speeches, I wandered back to my makeshift studio (stuck in a corner of the room due to restrictions prohibiting anyone leaving the room), determined to somehow set up a workable arrangement.

Remember the old “KISS or keep it simple stupid”? Well I went with a tricky three light set-up straight out of the box!

The primary light (A) was a 560 IV level with me on my left at full height (6.5 foot), sporting an umbrella. Solid choice. Testing had produced even and strong light at 1/32 power! Awesome. Lots of light from little power. Good for batteries and flash heat.

The secondary light (B), another 560 IV, started out to my right, level with my subject’s, cutting across as fill at about -2 stops power. This lasted a few shots and ended up on my level right, lower than “A”, still as fill but more evenly powered.

The third light (C, a 560 III), designed to be a hair or rim light with the added task of warming up the salmon beige wall I had as a backdrop, started to go to sleep quickly The Mk III’s are apparently prone to that (over heating?) , which is why I went with more IV’s as well as them being smarter. Luckily I had two IV’s or things may have gone a bit pear shaped.

6-700 odd portrait images, some dance floor shots (manual flash flagged and bounced off the ceiling at 1/8 strength) and we were done. In a whirlwind three hours, I barely stopped.

Lessons learned.

1) Start with a basic, workable plan and modify it better.

2) Pack more batteries (24 photo grade ones only just made it).

3) Have backups (another 560 IV since added and some modifier options).

4) Appreciate the little EM10 that did the bulk of the work. The thing ran hot, but did not miss one shot in very dim conditions.

5) Go to these things with a feeling of exploration and anticipation, not dread.

6) Use manual (camera and flash). The reality is, I find manual is actually easier to control and more consistent than TTL. More on this later.

Token pretty photo, no flash used.

Token pretty photo, no flash used.


Tooling Around In The Garden With My New Crush (or get a grip)

The EM10 mk2’s I picked up early in the year on run-out are now my core work cameras.

In this role, they felt a little….puny.

I tried two grips.

The Olympus one, which was a little hard to track down, and the generic (comes under many names-mines unmarked) for about 1/3 the price.

The generic came first.

First thing you notice about this one is it comes in three parts (but the Allen key supplied only fits some of the screws). The handle, base plate and side plates are all separate. I originally took off the side plate, but put it back later as it adds some utility and interest factor to the camera.

In hand, it feels solid and secure. I exclusively used this camera over the last two weeks because it felt better than the base camera.

This week the original grip arrived.

Hmmmm…sexy.

The black camera deserved a rest after “attending the ball”, taking 700+ images with my fledgeling flash kit. The thing was hot to touch after, but did not miss a shot.

The grip supported kit clearly offers better Bokeh!

The grip supported kit clearly offers better Bokeh!


Paths For The Future

Looking at what to do next gear wise, I have narrowed down the contenders to five. Two M43 options and , Fuji and two Canon options.

What I am after is not a great deal;

More depth, especially with sport grade af,

More reach, or at least a better long lens option,

Possibly a wide option.

More pixels? not really unless there is a free bonus nature to them (see below)

Cropped from a 20mp image file, taken with a mid range zoom.

Cropped from a 20mp image file, taken with a mid range zoom.


Each option has it’s benefits and cautions, so lets look at the maths.

Olympus ($5000au).

The EM1 mk3 and 100-400 Olympus combination offers more reach (800mm equiv), more depth (400k shutter and better af) with some more features. It is also fully compatible with my existing kit.

Pro’s; Everything fits, everything is familiar, longevity with Olympus is secured for a while longer.

Con’s; Throwing more money into a possibly dead system path.

Panasonic ($5000au).

This offers me a same-but-different camera in the G9 with some areas of clear superiority over my EM1 mk2 and some areas where it is a little weaker. I feel the G9 is a slightly better camera than the EM1 mk2, but slightly weaker than the EM1 mk3. One of the benefits, their DFD focussing, which nails some situations, does have a couple of caveats. The first is a reliance on Panasonic lenses, the second is a “wobble” effect through the view finder when focusing.

The lenses are the 100-400 Leica which has suffered some mixed reviews, but is on the whole near enough to the Olympus lens and half a stop faster through most of the range. The second lens that just squeezes into the budget is the Leica 8-18.

Pro’s; More M43, but a different feature set, more reach, more width, future proofing.

Con’s; exactly my needs addressed, nothing more, only about a stop of overall benefit in low light.

Canon RF ($7-9000au).

Canon is suddenly kicking some serious goals and clearly starting the shift to mirrorless , not just as a perceived forced transition, but as a real embracing the benefits first route.

The R6 offers no more pixels than my current cameras, but it does offer up to three stops more realistically useable, ISO range. The af looks top notch and the dynamic range is wider than my M43 cameras.

Match this with their 100-500 lens, which looks to be magnificent and you have a combo that is not necessarily capable of better maximum quality, but really has the potential of being a “more often” quality image maker.

The lens logic is interesting. Loosing 300mm equivalent reach, the lens acts like (in M43 terms) an f2-4.5 lens in equivalent depth of field thanks to the sensor size and power.

Add to this either the 24-105 L or even the 24-240 zoom (plenty good enough for small print and facebook) and there is a full kit, but at $10,000 or so.

Pro’s; best in class overall performance from a 20mp sensor, future proofing and depth

Con’s; cost, two systems and possible over kill.

Canon EOS ($4500 +if a standard lens is added)

A 90D and 100-400 L II are a solid, high performance sports rig. Addressing the specifics of above, this combo adds the SLR advantages of much better battery endurance (2000 odd shots), good reach (640mm) and depth (200k shutter fires), with cropping (30+mp) in a fit to purpose camera and lens kit. The lens also transitions into RF well, only being beaten by the 100-500, which is $1000 dearer.

The 90D gets mixed reviews with OVF af performance (DPreview canned it openly), but great reviews for live view performance. I know however, that the camera offers high af customisation, which is almost never taken into account in reviews.

Pro’s; Good value, good future pathway, more pixels (if needed), SLR benefits.

Con’s; An SLR (!), iffy top tier sports af, no more M43 depth.

Fuji ($5000).

The XT4 is like the G9, same, but different. The long lens is strong, the semi free standard is a cut above and if a 14mm were added, would make a full kit.

The plasticky tele is annoying, but optically strong, the camera offers a genuine 1-2 stop ISO benefit, more pixels and the jpeg work flow is tempting. The ability to have my M43 kit intact, complimented by a full Fuji kit is really tempting. All other options either add little in the way of image options, or they are not complete in their own right.

For some reason, running this with M43 feels right, as I have done this before in the early days of mirrorless.

Pro’s; A sensor that acts like a Full frame, but with a cropping benefits, glassy images, jpeg work flow, great glass.

Con’s; Not really any except the plastic lens barrel and the need for a grip to balance the camera/lens.

Ready for the Black Friday through Christmas sales, where I end up may surprise even me.

Sufficiency and the Future

Waiting for a class to arrive for a class portrait, I went exploring in the grounds at the school I work for.

Easily enough taken with an EM10 mk2 and 12-40 lens.

Easily enough taken with an EM10 mk2 and 12-40 lens.

The image above is a crop from below.

Outside of “fear” distance with a 40mm lens.

Outside of “fear” distance with a 40mm lens.

This got me considering, once again, what our realistic level of sufficiency is and why we constantly question it, especially considering my immediate future.

I have pushed the M43 system pretty hard over the last few months. Indoor sports with medium grade lighting, Drama (both performance and portraits), long range field sports, on the fly portraiture, events and images suitable for enlargements, and it has always come up trumps.

I intend to increase the depth of my kit, or rather as quantity is not the issue*, increase it’s depth in pro specs.

The options for about $5000 au. are;

A Panasonic G9, that would compliment my EM1 Mk2 with a same-but-different dynamic. The G9 is in many ways a better camera than the EM1 mkII, or at least offers a solid “plan B” for most situations. This would likely be matched with the 50-200 or 100-400 Leica lenses (the G9 and this lens come in at $500au less than the EM1 mk2 and Oly lens and $1300 cheaper than the MK3 and lens and is 1/2 a stop faster) with possibly the 8-18 as a true wide option. My migration path would still be within M43, but with two feature sets and cross-over into a “living” system.

A Fuji XT4, 100-400 and superior kit 18-55. Again, a similar camera to the EM1, but with better low light performance, a stellar long lens and very neat “kit” lens. If a 14mm was added, this would be a working kit in it’s own right. Obviously there would be no cross compatibility, but I could shift either way in the future.

Another EM1 (mk2 or 3) and the new 100-400 Olympus. This is a commitment to a brand with a possibly limited life-span, but 400k shutter actuations on the EM1 mk3 is double most other options and the Oly 100-400 is best in class. This would likely see me out with Olympus, offering full kit compatibility, or at least get me through until I can justify a full shift to a more affordable FF brand (everything at the moment seems to be getting dearer).

Cheap option, get my 40-150 back, with an EM1 2-3, saving $1-2k, but lacking a long option.

A seemingly odd shift to a Canon 90D SLR and long lens (200 f2.8, 70-200 F4 non IS cheap options or 100-400 IS II), giving me a best value option for sports, better battery life and a logical upgrade path to Canon FF mirrorless when the prices become reasonable (or maybe even not). This is where I lament selling my 400 f5.6, 200, 70-200 and 135 L’s, but oh well. A 90D and 70-200 F4L or 200 f2.8 comes in at $2500, surely making it the best value with a 300mm F2.8/4 lens equivalent.

Sony. Too dear, messy and video centric.

Nikon. Great cameras but expensive or iffy low grade tele lenses, when compared to Canon’s mass of excellent budget “L” options. A D500 would be nice, but what affordable lens options would keep it’s Af tracking edge intact?

*I have lots of depth with 2 EM10 mkII’s doing low stress daily work stuff, 3 EM5 mk1’s in my flash kit, an EM1 mkII reserved as my sports camera, The Pen F, one EM5 and Pen mini for personal use. The shortage is in tracking af capable cameras.

Sport And Where To Go Next

Being a school photographer has to be just about the best place to exercise all of your (my) photographic muscles. The subjects are diverse, interesting the situations even more diverse.

Indoor production? No problem. In situ portrait, or classroom interactions , again no issue. My kit sports a set of useful primes and a great standard zoom, so no technical issues.

My favourite subject, mainly because it is a license to have fun with little pressure, is sport.

Ironically, that is where I am weakest gear wise. A logical at the time selling off of my 40-150 f2.8 and later my 12-100 f4 has reduced me to shooting sports outdoors with the 75-300 and 40-150 “kit” level lenses.

Now I love these lenses. Tied for best bang for the buck in the system, especially for cost/size/weight, they have both proven themselves over and over as more than capable for casual shooting, but when you have to get the shot, they look a little thin on paper (and I dread the day I am standing next to “that” photographer with a huge white lens monster!).

Last Wednesday, I had my first serious outing with field and indoor sports.

Indoor Netball was fine, although I swear it is the toughest sport to shoot with its fast pace, stop-start dynamic and usually poor indoor light. I spent too long there (had 1 1/2 hours to cover four sports) as I did not feel I had hit my rhythm, but after 25 minutes, I surprised myself and came out with 20 odd “local newspaper” grade shots using the 75mm f1.8 and 12-40 f2.8. This combo is hard to better. Early fears that the older 75mm may not have the newest focussing “legs” I had the pleasure to experience with the 40-150 pro, have been pretty much put to bed and the 12-40 is sure footed and useful, if a little short sometimes.

Hurrying down the hill to the multi field Football and Soccer grounds I was gifted with strong winter sunlight…… for about five minutes.

A crop 50% from the 75-300 at F8 and 190mm, ISO 800 with the EM1 mk2 (original firmware). This was a sequence of about 5 images ending in a solid collision.

A crop 50% from the 75-300 at F8 and 190mm, ISO 800 with the EM1 mk2 (original firmware). This was a sequence of about 5 images ending in a solid collision.

I cannot share many images as I do not wish to show the faces of the kids from the school I work for (in the yellow), but just lets say, I was (again) surprised by the accuracy, speed and sharpness of the EM1 and 75-300 combo in reasonable light. The grounds are down low, so they loose the sun early, but while it lasted, it was good.

In a nutshell, if I used my skills and anticipated the action, followed the subject and fired at the right time, the camera made sure I got the shot 75 percent of the time or better and usually managed 100% in sequences.

Another tight drop. This was a sequence of 10 images, all sharp (same stats as above), but the best three, where contact was made images had the student’s faces in. Shame about the messy background, but I found if a I stood in one spot, I could cove…

Another tight drop. This was a sequence of 10 images, all sharp (same stats as above), but the best three, where contact was made images had the student’s faces in. Shame about the messy background, but I found if a I stood in one spot, I could cover three grounds at once, taking what I could get. The benefit of a 400-600mm lens equivalent.

Then came the acid test.

Massive black storm clouds descended over the grounds, stealing what little light there was (about three stops). The maths got nasty. ISO 1600 (my realistic quality limit), lens wide open (about f5.6 in the 200mm zoom position, equal to 400mm on a full frame-it is a hair sharper at f8) and 1/250 to 1/500 maximum shutter speed. Many of the images came out a little dark with the camera set to manual, as the light was occasionally dropping even more. I was not too hopeful.

All I can say is, if that is your kit and situation, don’t worry too much. A little noise reduction to taste, some contrast boosting, lightening where needed, maybe a little localised clarity and you will be fine. Again, local newspaper, back page sports images, even with a little (or a lot of) cropping.

Would I like to upgrade lens?

Yes I would, if nothing else than for weather sealing (which eventually cut my day short).

The (budget limited) options are:

Buy back my 40-150 from the friend I sold it to for about $1000au. Benefit, +2 stops at 300mm FF eq., sharper (better micro contrast), better AF and weather sealing.

Buy the new 100-400 Oly ($2300). Benefit, sharper, better AF, longer range, but no aperture speed/ISO benefit.

The Panasonic 100-400 ($2000au). Benefit, as above, possible not as much in AF, but it is slightly faster at shorter focal lengths.

The Panasonic 50-200 ($2000au). Benefit, longer than the Oly 40-150, but a little slower at the long end. A stop faster and all-round better than the 75-300 at 200mm (400mm equiv) except any real AF performance boost is uncertain with Pana lenses on Oly bodies.

Buy a Canon 80D on clearance with the excellent 200 f2.8L ($2000-2500au). Benefit, +1 ISO and +2 aperture stop boost at 300mm FF equiv. and a sports dedicated 100K + shutter fires. This would also provide a good option for an “R” series switch later or another cheap SLR. Splitting the kits does not bother me as their roles would be quite specific. Olympus for most stuff including some sport, Canon just for sports. The non zoom is a little limiting, but I know from experience that the 300mm f2.8 “hole”* is the problem, not covering a wider range. It also works well with a good teleconverter.

Buy a 6d Mk2 and 75-300 or the 200mm above ($3000au). Benefit, +3 ISO stops, with the same 300mm lens dynamic at 5.6 or +5 (!) stops with f2.8 200mm and FF camera, but lots of cropping. The AF system in the 6D is the same as the 80D, except more centralised as the AF coverage is crop frame.

Nikon would be in the race except they do not offer a range of good value semi-premium tele lenses.

Option B is to just keep going as is and see what the Christmas sales cough up.

*This hole is the mid-wing field sport, or far end of the court, indoor range that is so often the ideal distance to shoot these sports at and my weak area.